
Pruning
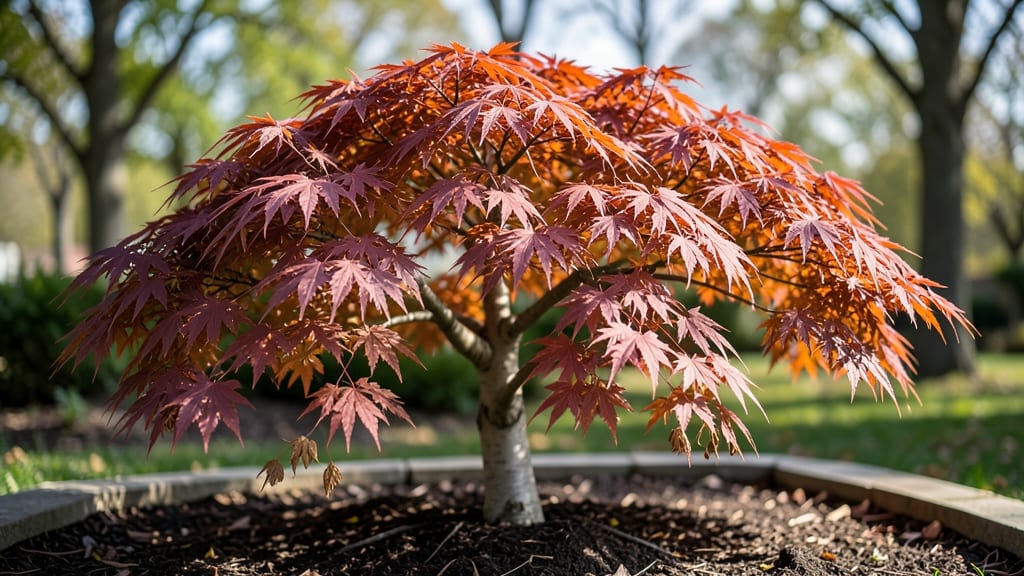
Japanese maple trees in autumn transform your yard into a fiery masterpiece—those crimson, orange, and gold leaves are worth every minute of care. 🍁 I’ve watched my own Acer palmatum burst into color after a single season of targeted pruning, and the difference between a lackluster display and a showstopper comes down to timing and technique.
The secret lies in pruning after the leaves change but before hard frost—typically late October to early November in most climates. You’re not just shaping the tree; you’re encouraging dense growth that holds its vibrant hues longer.
A sharp pair of bypass pruners, a clean towel for sticky sap, and a clear day for better visibility are all you need to get started.
What you’ll end up with is a tree that looks like it belongs in a botanical garden, not just your backyard. The foliage stays richer in color, branches fill in more evenly, and the tree’s natural shape becomes even more striking against the autumn sky.
Plus, you’ll avoid the common mistake of over-pruning, which can stress the tree before winter.
This approach works for both container-grown and in-ground Japanese maples, and the same principles apply whether you’ve got a dwarf variety or a sprawling specimen. The key is patience—autumn’s the perfect time to set your tree up for next year’s even more spectacular display.
📚 In This Guide
- What you need
- Instructions
- Tips and common mistakes
- Wrapping up and next steps
What you need
- ● Pruning shears – Bypass-style (sharp, clean cuts; avoid anvil shears for delicate branches). Recommended: Felco #2 or similar (for branches up to ½ inch thick).
- ● Loppers – Bypass-type for branches ½ to 1½ inches thick (e.g., Corona or Fiskars).
- ● Pruning saw – Curved-tooth for thicker branches (2+ inches; e.g., Bahco or Fiskars).
- ● Hand pruners (for fine work) – Anvil-style (if you must use one, sanitize thoroughly to avoid disease).
- ● Disposable gloves – Nitrile-coated (for grip and protection; 2–3 pairs).
- ● Rubbing alcohol (70%+) – Small bottle (for sterilizing tools between cuts).
- ○ Pruning sealant – Optional but helpful (e.g., Tanglefoot Tree Wound Pruning Seal; for cuts larger than ½ inch).
- ● Ladder or step stool – Sturdy, non-slip (extendable for taller trees; 6–10 ft height).
- ● Heavy-duty trash bags – 2–3 large bags (for debris disposal).
- ● Weather check – Prune on a dry, overcast day (avoid wind or rain).
- ● Tree assessment – Safety first! Inspect for dead/diseased branches (remove these before seasonal pruning).
- ● Sharpener or file – Small pocket-sized (to maintain tool sharpness mid-pruning).
- ○ Water spray bottle – Optional (to clean sap off tools quickly).
Step-by-Step instructions for autumn Japanese maple pruning
Transform your tree into a fiery autumn masterpiece with these precise pruning techniques.
🌿 Step 1: Assess the Tree for Pruning Needs
Start by examining your Japanese maple from all angles, looking for branches that no longer contribute to the tree's shape or health. Focus on those that are dead, crossing, or growing inward—they'll only compete with your vibrant autumn foliage. I like to do this in early autumn, about 4-6 weeks before the first frost, when the tree is still actively growing but hasn't yet entered dormancy.
Use your hands to gently shake each branch. Dead branches will rattle inside while live ones will feel firm. Mark these branches with a small piece of twine or a paint marker—this keeps you organized and prevents accidental cuts later. Here's the thing—Japanese maples have delicate bark, so avoid heavy-handed pruning that could damage the tree's structure.
✂️ Step 2: Prune for Shape and Airflow
Begin by removing any dead or diseased branches first—these are your top priority. Cut just outside the branch collar (the swollen area where the branch meets the trunk) at a 45-degree angle. This ensures the wound heals properly and reduces the risk of disease. For larger branches, use clean, sharp pruning shears or a small handsaw to avoid tearing the bark.
Next, thin out the canopy by removing about 10-20% of the foliage to improve airflow and sunlight penetration. This step is crucial for autumn color—better light exposure means more vibrant leaves. Focus on branches that are rubbing against each other or growing in awkward directions. You'll see the tree's natural shape emerge as you work, and that's your guide for where to cut.
🌱 Step 3: Encourage New Growth for Next Season
After shaping the tree, turn your attention to the smaller branches and twigs. These are the future stars of your autumn display, so handle them with care. Prune back any overly long or leggy growth by about one-third to encourage bushier, more compact growth next year. This is where your tree will develop its most vibrant autumn colors.
Don't forget to prune out any suckers or water sprouts—these fast-growing shoots steal energy from the tree and can detract from its overall beauty. Use your fingers or small pruners to pinch them off at the base. Real talk: Japanese maples respond beautifully to pruning, but less is often more. Over-pruning can stress the tree and reduce its autumn color intensity.
💧 Step 4: Clean Up and Prepare for Autumn
Once all the pruning is done, gather your clippings and dispose of them properly. Burning or bagging them prevents disease from spreading back to your tree. Now's also the time to sterilize your pruning tools with rubbing alcohol or a 10% bleach solution to kill any lingering pathogens. I always do this after pruning—it's a small step that pays off big time in tree health.
After pruning, give your tree a deep watering to help it recover. Japanese maples have shallow roots, so water slowly and deeply to encourage root growth. Mulch around the base with 2-3 inches of organic mulch, keeping it a few inches away from the trunk to prevent rot. This helps retain moisture and protects the roots from temperature fluctuations as autumn progresses.
Tips & tricks for perfect autumn Japanese maple pruning
Here's what nobody tells you about making your Japanese maple shine this fall.
Timing is Everything: Those 4-6 weeks before the first frost are your sweet spot for pruning. This timing lets the tree heal before winter while still allowing new growth to develop vibrant autumn colors. I learned this the hard way after pruning too late—my tree struggled to recover before the cold set in. If you're unsure about frost dates, check your local weather forecast or consult a local nursery.
The Cutting Angle Matters: When removing branches in Step 2, that 45-degree angle isn't just for show—it's about proper wound healing. Cut just outside the branch collar (that swollen area where the branch meets the trunk) to prevent water from pooling and causing rot. For larger branches, use a small handsaw to avoid tearing the delicate bark. I always make a small nick on the underside first to guide my cut—this prevents the bark from splitting.
Prune Strategically for Color: Remember that 10-20% foliage thinning in Step 2? This isn't arbitrary—it's about maximizing sunlight exposure for those stunning autumn colors. Focus on removing branches that are rubbing against each other or growing inward. These branches compete for sunlight and nutrients, which can dull your tree's fall display. Think of it as giving your tree a spa day—more light means more vibrant foliage.
Tool Care Prevents Infection: That 10% bleach solution for sterilizing tools in Step 4 isn't just a suggestion—it's essential. Japanese maples are particularly susceptible to disease, especially after pruning. I keep a small spray bottle of rubbing alcohol handy for quick clean-ups between cuts. Sterilizing tools after each tree (not just after pruning) gives you an extra layer of protection against spreading pathogens.
Pro Tips for Japanese Maple Tree In Autumn
- Here's what nobody tells you about making your Japanese maple shine this fall.
- Timing is Everything: Those 4-6 weeks before the first frost are your sweet spot for pruning.
- The Cutting Angle Matters: When removing branches in Step 2, that 45-degree angle isn't just for show—it's about proper wound healing.
Frequently asked questions
Got questions about keeping your Japanese maple stunning in autumn? Here are some of the most common ones—plus expert tips to help you prune like a pro!
When is the best time to prune a Japanese maple for autumn color?
Prune your Japanese maple late winter to early spring (before buds swell) for the best autumn display. Avoid pruning in summer or fall—this can stress the tree and dull its vibrant colors. Light shaping in late autumn (after leaves fall) is fine, but keep cuts minimal to preserve next year’s foliage.
How much can I trim without damaging the tree?
Japanese maples are delicate—never remove more than 25% of the canopy in one season. Focus on dead, diseased, or crossing branches first. For shaping, trim only outer growth to maintain the tree’s natural form. Over-pruning weakens the tree and can reduce autumn color intensity.
Will pruning affect the autumn leaf color?
Yes! Pruning too late (after leaves emerge in spring) or too aggressively can reduce sugar production in leaves, leading to duller autumn hues. Prioritize early-season pruning and avoid heavy cuts near leaf-bearing branches. The goal is to balance growth—not sacrifice color.
Are there alternatives if my Japanese maple isn’t thriving?
If your tree struggles with color or health, consider these fixes:
- Fertilize lightly in spring with acidic, slow-release fertilizer (like 10-10-10).
- Ensure well-draining soil—Japanese maples hate soggy roots.
- Try a dwarf variety (e.g., 'Bloodgood' or 'Emperor 1') if space is limited.
- Mulch with wood chips to protect roots and retain moisture.
What should I do if my pruned branches aren’t healing properly?
If cuts bleed, ooze, or show signs of rot (mushrooms, discoloration), act fast:
- Apply pruning sealant (like Tanglefoot Tree Wound Pruning Seal) to large cuts (>½ inch).
- Sterilize tools with rubbing alcohol between cuts to prevent disease spread.
- Thin out dense areas to improve airflow—this reduces humidity and fungal risks.
Wrapping up and next steps
Autumn’s fiery display from a Japanese maple tree isn’t just luck—it’s the result of thoughtful pruning, timing, and care. By following the right techniques, you’ll unlock stunning crimson, orange, and gold hues that make your garden the envy of the neighborhood. 🍁
Ready to transform your tree into a seasonal masterpiece? Grab your pruners, review your notes, and schedule that first trim before winter sets in. Your future autumn show is waiting—go make it spectacular!