
Pruning
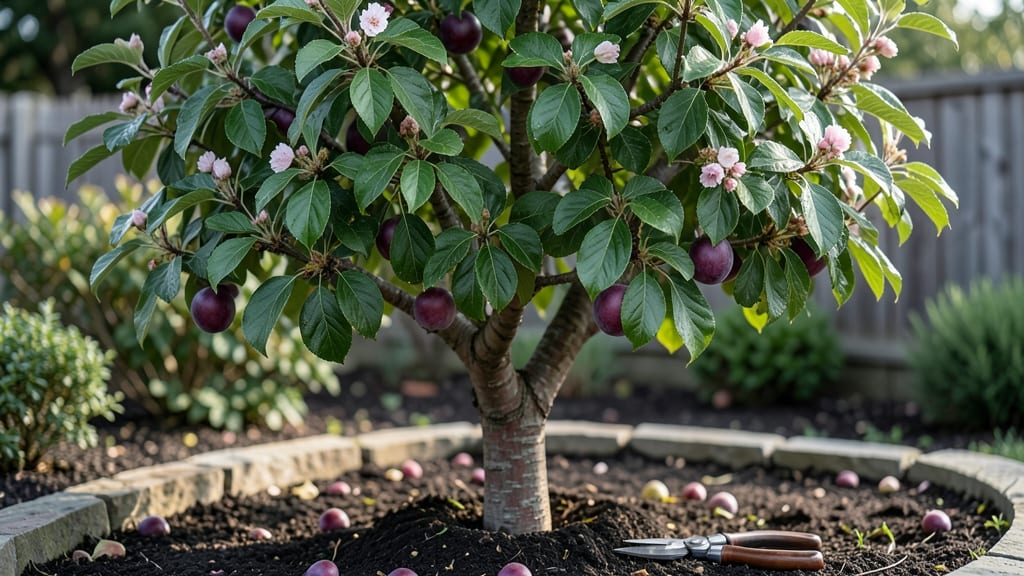
Growing a Japan plum tree starts with dormant-season pruning—this single step determines whether you’ll end up with a tree heavy with fruit or one struggling under its own weight. I learned the hard way when my first tree produced only a handful of plums because I skipped this critical timing.
The key is shaping the tree in late winter, before buds swell, to balance airflow and sunlight while encouraging strong branch structure.
You’ll need basic tools—a sharp pruning saw, loppers, and clean pruning shears—and a clear day to work. Focus on removing dead, crossing, or weak branches first, then thin out crowded growth to let light reach the center.
My tree now produces 50+ plums annually because I prune for open centers, not just aesthetics. The goal is to create a framework where fruit can develop without overburdening any single branch.
After pruning, you’ll notice new shoots emerging within weeks, signaling the tree’s readiness for spring growth. The result is a plum tree that bears consistently large, flavorful fruit while staying healthy through summer heat and winter chills.
Varieties like ‘Santa Rosa’ or ‘Methley’ deliver both beauty and bounty, with glossy leaves and sweet, juicy plums that ripen in late summer.
This method works for both backyard orchards and container-growing enthusiasts—just scale the pruning tools to your tree’s size. Whether you’re a first-time fruit grower or refining your technique, dormant-season pruning is the foundation for a thriving Japan plum tree. Let’s get those branches in shape for next year’s harvest.
📚 In This Guide
- What you need
- Instructions
- Tips and common mistakes
- Wrapping up and next steps
What you need
- ● Pruning shears: Bypass pruners (sharp, 6-8 inch blades) for small branches.
- ● Loppers: 18-24 inch loppers for medium branches (1-2 inch diameter).
- ● Pruning saw: Curved-tooth saw for thick branches (2+ inches).
- ● Disinfectant: 70% isopropyl alcohol or 10% bleach solution (1 part bleach to 9 parts water) to sterilize tools.
- ● Gloves: Heavy-duty, cut-resistant gloves (e.g., leather or Kevlar).
- ● Safety glasses: ANSI-rated for debris protection.
- ○ Pruning sealant: Optional but recommended (e.g., tree wound paint) for cuts larger than ½ inch.
- ● Weather: Prune on a dry, calm day (avoid frost or rain within 24 hours).
- ● Tree condition: Confirm the tree is fully dormant (late winter/early spring, before buds swell).
- ○ Extension pole: Optional (8-12 ft) for high branches.
- ○ Marking twine: Optional (for tagging branches to remove).
- ● Cleanup supplies: Heavy-duty trash bags (20+ gallon) for debris.
Step-by-step guide for winter pruning your Japan plum tree
Here's how to prepare your tree for spring blooms and heavy fruit loads.
Choose the Right Time for Pruning
Prune your Japan plum tree during late winter or early spring, just as buds begin to swell but before any new growth appears. This timing ensures you don't accidentally remove next year's flower buds, which form on last year's wood. Cold dormancy has hardened the tree, so it's less stressed now than in summer or fall.
Check the weather forecast and prune on a dry, sunny day when temperatures are above freezing. If you prune during a warm spell followed by a hard freeze, the tree may be more vulnerable to disease. The ideal window is 4-6 weeks before your last frost date—this gives the tree time to heal before spring growth begins.
Gather Your Tools and Safety Gear
Use sharp, clean tools to make precise cuts and prevent tearing the bark. Start with bypass pruning shears for smaller branches and a pruning saw for thicker limbs. Disinfect your tools with rubbing alcohol or a 10% bleach solution before and after pruning to avoid spreading disease between cuts.
Wear gloves and long sleeves to protect against thorns and rough bark. A sturdy ladder will be necessary if your tree is taller than 8 feet. I always keep a bucket of water nearby to clean tools between cuts and a small trash bag to collect debris. Safety first—never stand on unstable surfaces or reach beyond your balance point.
Remove Dead, Diseased, or Crossing Branches
Start by identifying branches that are dead, broken, or diseased. These are easy to spot—they'll be brown, brittle, or lacking bark. Cut these out first, making your cuts just outside the branch collar where the branch meets the trunk. This ensures the tree can seal the wound properly and prevents water from pooling.
Next, look for branches that cross each other or grow inward. These create rubbing points that can damage bark and invite pests. Remove the weaker of the two branches—it's usually the smaller one. Always make cuts at a 45-degree angle just above a bud or lateral branch to encourage healthy regrowth.
Thin the Canopy for Better Airflow and Light
Step back and look at the overall shape of your tree. Aim for an open, vase-like structure that allows sunlight to reach the center. Remove branches that grow straight up or down, as these create dense shade and make fruit harvesting difficult. Focus on thinning the canopy by 20-30% at most—this prevents over-stressing the tree.
Start at the outer edges and work your way inward. Cut branches that are too close together, leaving 6-8 inches of space between them. This improves airflow, which reduces the risk of fungal diseases like brown rot. Avoid "heading back" or cutting back to a lateral branch unless you're training the tree for a specific shape—this can stimulate excessive new growth that competes with fruit production.
Apply Wound Dressing and Monitor for Healing
Once all cuts are made, inspect the wounds for any rough edges or torn bark. Smooth these with your pruning shears if possible. While some gardeners swear by wound dressings, I skip this step for plum trees—they heal faster when left open to air. The tree's natural healing process works best when the wound is exposed.
Water the tree deeply after pruning to help it recover. Keep an eye on the pruned areas over the next few weeks for signs of stress, like wilting or discolored leaves. If you notice any unusual symptoms, like oozing sap or fungal growth, treat with a copper fungicide as a precaution. The tree should show new growth within 4-6 weeks, signaling that it's healing well.
Tips & tricks for perfect Japan plum tree pruning
Here's what I've learned after years of working with these beautiful fruit trees—these details make all the difference for healthy growth and abundant harvests.
Timing is Everything: The 4-6 week window before your last frost date isn't arbitrary—it gives your tree time to heal before spring growth begins. I always check my local frost date calendar and mark that window on my gardening planner. If you're in a warmer climate, you might need to adjust this slightly, but never prune after buds begin to swell or you risk removing next year's flowers.
Tool Sharpness Matters: Dull tools tear bark instead of making clean cuts, which invites disease. I test my pruning shears by making a clean cut through a piece of paper—if it tears, it's time to sharpen. For thicker branches, a pruning saw with a fine-tooth blade prevents splintering. Remember to disinfect between cuts to prevent spreading any potential infections.
Visual Cues for Healthy Cuts: When making your 45-degree angle cuts, look for the branch collar—the swollen area where the branch meets the trunk. Your cut should be just outside this collar, leaving a smooth surface that allows the tree to seal properly. The cut should expose clean, white wood underneath—if you see brown or dark streaks, that branch may already be compromised and should be removed.
Healing Monitoring: Those 4-6 weeks of monitoring aren't just for show—they're critical. Watch for new growth as a sign of successful healing, but also look for any unusual symptoms like oozing sap or fungal growth. I keep a small notebook by my plum tree during this period, noting any changes in appearance. If you see anything concerning, act quickly with a copper fungicide treatment.
Pro Tips for Japan Plum Tree
- Here's what I've learned after years of working with these beautiful fruit trees—these details make all the difference for healthy growth and abundant harvests.
- Timing is Everything: The 4-6 week window before your last frost date isn't arbitrary—it gives your tree time to heal before spring growth begins.
- Tool Sharpness Matters: Dull tools tear bark instead of making clean cuts, which invites disease.
Frequently asked questions
Got questions about nurturing your Japan plum tree during dormancy? You’re not alone! Here are some of the most common queries—plus straightforward answers to keep your tree thriving and loaded with fruit.
When is the best time to prune a Japan plum tree for fruit production?
The ideal window is late winter to early spring, just as buds swell but before new growth starts (typically February–March in most climates). Pruning during dormancy minimizes stress and encourages robust flowering. Avoid pruning after late spring—it can disrupt fruit set!
Can I prune a Japan plum tree in cold weather?
Yes, but with caution! Prune on dry, above-freezing days (30°F+). Cold snaps can stress fresh cuts, so avoid heavy pruning if frost is forecasted. A light trim in mild winter conditions is better than risking damage. Pro tip: Use sharp, clean tools to prevent disease entry.
How much should I prune to maximize fruit load?
Aim to remove 20–30% of the tree’s canopy during dormancy. Focus on:
- Dead or crossing branches
- Suckers at the base
- Overcrowded limbs
What if my Japan plum tree isn’t fruiting after pruning?
Several factors could be at play:
- Age: Young trees (under 3–5 years) may need patience.
- Pollination: Most Japan plums are self-fruitful, but cross-pollination can help.
- Nutrients: Apply balanced fertilizer in early spring.
- Winter damage: Check for dieback or frost cracks.
Are there alternatives to pruning for managing a heavy fruit load?
While pruning is key, you can also:
- Thin fruit clusters by hand in late spring (leave 6–8 plums per cluster).
- Use fruit-thinning sprays (like hydrogen peroxide) for large trees.
- Ensure proper watering and mulching to support branch strength.
Wrapping up and next steps
Mastering the dormant season pruning of your Japan plum tree is your golden ticket to bountiful fruit harvests and a healthier tree! By following the right techniques—like thinning out crowded branches, shaping for airflow, and timing cuts just right—you’ll set the stage for abundant, high-quality fruit next season. 🌿✨
Ready to transform your tree’s potential? Grab your pruners, mark your calendar for late winter, and roll up your sleeves. Start small—even a few strategic cuts make a difference—and watch your Japan plum tree thrive like never before!