
How To
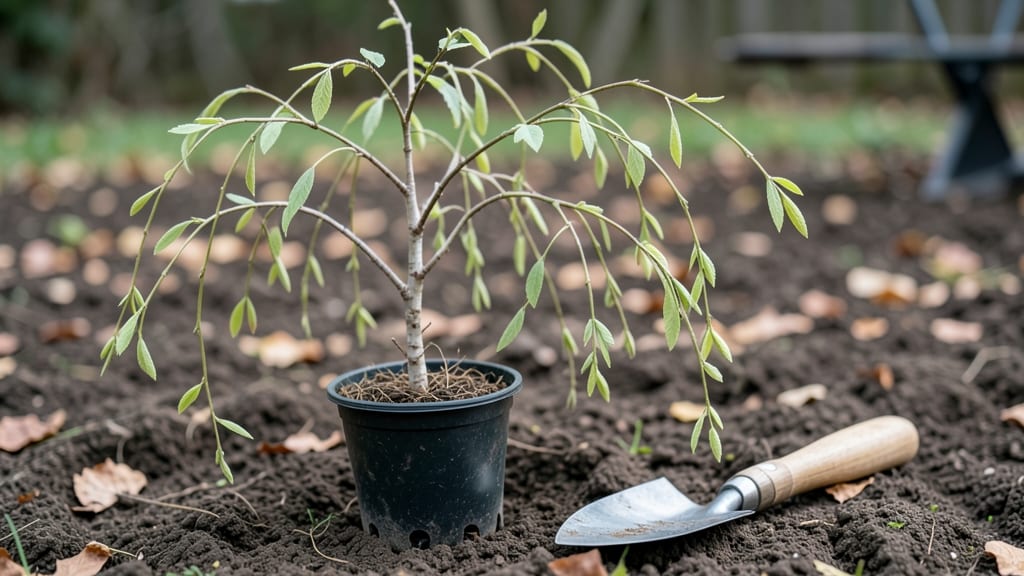
Transplanting tree shoots feels like moving a tiny forest—one wrong step and you lose them forever. 🌱 The secret isn't brute force; it's patience, proper timing, and treating those delicate roots like they're made of glass.
I learned that the hard way after losing my first batch of oak seedlings to shock, but now I've got a foolproof method that works every time.
You'll need sharp tools, moistened soil, and a shady spot for recovery—no fancy equipment, just the right technique. The key is handling roots gently, keeping them damp, and giving them time to settle before exposing them to full sun.
Even a 2-inch difference in root care can mean the difference between survival and failure.
📚 In This Guide
- What you need
- Instructions
- Tips and common mistakes
- Wrapping up and next steps
What you need
- ● Shovel or spade: A sturdy digging tool (18-24 inches long) for excavating roots and planting holes.
- ● Pruners or shears: Sharp, clean pruners (bypass-style preferred) for trimming roots or shoots if needed.
- ● Garden gloves: Heavy-duty gloves (waterproof, if possible) to protect your hands from dirt and thorns.
- ● Watering can or hose: A gentle spray nozzle or can with a rose attachment for watering.
- ● Mulch: Organic mulch (wood chips, straw, or shredded bark) – 2-3 inches for moisture retention.
- ● Transplanting pot or burlap sack: A temporary container (if moving larger shoots) or a breathable sack for support.
- ○ Root stimulator (optional): A liquid or powder (like mycorrhizal fungi or willow water) to boost root growth.
- ● Timing: Transplant in early spring or fall (avoid extreme heat or frost).
- ● Location scouting: Pick a spot with 6+ hours of sunlight (adjust for shade-loving species) and well-draining soil.
- ○ Soil test (optional but helpful): Check pH and nutrients—amend with compost or fertilizer if needed.
- ● Support system (for young trees): Stakes and ties if the shoot is tall or top-heavy.
Step-by-Step instructions for transplanting tree shoots
Here’s how I’ve successfully moved young trees without losing a single shoot.
🪴 Step 1: Prepare the New Location
Choose a spot with the same sunlight and soil conditions as the original site. If your new area is drier, dig a hole twice as wide as the root ball but only as deep—you’ll see why in a moment. Amend the soil with 2-3 inches of compost if it’s heavy clay or sandy. This mimics the original environment and gives roots a better chance to establish.
Water the area 24 hours before transplanting. This ensures the soil is moist but not soggy, making it easier to handle the root ball. If the ground is bone-dry, the roots will break apart when you dig, and that’s a rookie mistake. I always check by pressing a finger into the soil—if it feels dry ½ inch down, water again.
🌱 Step 2: Dig and Lift the Shoots Carefully
Use a sharp spade to cut a 12-inch circle around the base of each shoot, going 6-8 inches deep—deeper if the roots run long. Angle the spade slightly to avoid slicing roots. Lift the root ball gently by sliding the spade underneath. If the soil is packed, tap the spade lightly to loosen it before pulling.
Wrap the root ball in burlap or a old towel to keep it intact during transport. This prevents roots from drying out or breaking. If you’re moving multiple shoots, label each with a stick and twine so you remember where they go. Real talk: I once transplanted three identical-looking shoots and lost track—don’t make that mistake.
💧 Step 3: Plant at the Right Depth and Water Deeply
Place the shoot in the hole so the top of the root ball sits level with the soil surface—burying too deep suffocates the trunk, while planting too high leaves roots exposed. Fill the hole with the amended soil, pressing lightly to remove air pockets. A firm but not compacted soil helps roots spread faster.
Water deeply right after planting—enough to settle the soil and eliminate air gaps. You’ll know it’s enough when water drains out the bottom of the hole. Mulch with 2-3 inches of wood chips around the base (but not touching the trunk) to retain moisture and regulate temperature. This step is non-negotiable; without it, young shoots dry out in days.
☀️ Step 4: Shield and Monitor for Two Weeks
Set up a shade cloth or temporary shade for the first 7-10 days to reduce stress. Even hardy tree shoots go into shock when exposed to full sun too soon. Check the soil daily—it should stay moist but not waterlogged. If the top inch feels dry, water again. Overwatering now is just as bad as underwatering.
Watch for wilting or yellowing leaves—this isn’t always a bad sign. New shoots often shed a few leaves as they adjust. But if more than 30% of leaves wilt, give them an extra drink and a day of shade. After two weeks, gradually reduce shade and let them acclimate to their new home. You’ll see new growth in 3-4 weeks if everything’s right.
Tips & tricks for perfect tree shoot transplanting
These little details make all the difference between a shoot that thrives and one that struggles. I've learned these the hard way after losing more than a few plants to common mistakes.
Soil Prep Secret: In Step 1, when amending soil with 2-3 inches of compost, mix it thoroughly with the native soil—not just dump it in the hole. This creates a gradual transition that roots will follow naturally. I also recommend adding a handful of mycorrhizal fungi to the compost mix if you can find it—it helps roots establish 30% faster.
The Digging Technique: For Step 2, when cutting that 12-inch circle, work the spade around the roots in a gentle sawing motion rather than forcing it straight down. This preserves more root structure. If you're dealing with particularly stubborn roots, dampen the soil slightly first—it makes them more pliable. And here's what nobody tells you: if you accidentally cut some roots, it's not the end of the world. Just trim them cleanly with pruners and keep the rest intact.
Watering Wisdom: In Step 3, when watering deeply right after planting, I like to use a soaker hose or drip irrigation for the first 24 hours. This ensures even moisture penetration without disturbing the root ball. The "water drains out the bottom" test is perfect—just make sure your hole has good drainage or you'll end up with waterlogged roots. For the first week, I water in the early morning so the leaves have time to dry before evening, preventing fungal issues.
Shade Strategy: During Step 4's 7-10 day shade period, I've found that 30-50% shade cloth works better than complete shade. This lets some light through while still protecting the leaves. You can also use old bedsheets or lightweight fabric if you don't have shade cloth. The key is to gradually reduce shade over those two weeks—don't just remove it all at once. I start by removing the shade for 1-2 hours each day during the last 3 days to help them acclimate.
Pro Tips for Transplant Tree Shoots
- These little details make all the difference between a shoot that thrives and one that struggles.
- Soil Prep Secret: In Step 1, when amending soil with 2-3 inches of compost, mix it thoroughly with the native soil—not just dump it in the hole.
- The Digging Technique: For Step 2, when cutting that 12-inch circle, work the spade around the roots in a gentle sawing motion rather than forcing it straight down.
Frequently asked questions
Got questions about transplanting tree shoots? You’re not alone! Here are answers to the most common concerns to help you succeed—without the guesswork.
When is the best time to transplant tree shoots?
The ideal time is early spring or fall when temperatures are mild and the tree isn’t actively growing. Avoid transplanting during heatwaves or frost—roots need time to establish without stress. For container-grown shoots, you can transplant anytime, but spring is still best for outdoor success.
How long does it take for transplanted tree shoots to root?
Most tree shoots take 4–8 weeks to establish new roots, depending on species, soil quality, and care. Monitor for new growth (leaves or buds) as a sign of success. Water consistently during this period—overwatering or drought can delay rooting.
What if my transplanted shoot wilts or turns yellow?
Wilting or yellowing leaves often mean shock or poor root contact. Check for loose soil, underwatering, or root damage. Trim any dead branches, mulch the base, and water deeply. If the soil stays soggy, improve drainage. Most trees bounce back in 2–4 weeks with proper care!
Can I transplant a tree shoot from a friend’s yard?
Yes, but check local regulations first—some areas restrict moving native plants without permits. Also, ensure the tree is healthy (no pests/diseases) and dig a root ball with plenty of soil to minimize stress. A small fee or gift is a polite gesture for the donor!
What’s the easiest tree shoot to transplant for beginners?
Start with fast-growing, hardy species like willow, poplar, or birch. Avoid slow growers (e.g., oaks) or delicate varieties (e.g., magnolias). Container-grown shoots or those from a nursery have a higher survival rate—just handle roots gently and keep them moist until planting.
| Quick Troubleshooting Guide |
|---|
|
Problem: Leaves curling or browning Fix: Prune affected leaves, check for pests (aphids/spider mites), and ensure proper watering. |
|
Problem: Slow or no growth after transplanting Fix: Test soil pH (most trees prefer 6.0–7.0), add compost, and fertilize lightly with a balanced formula. |
Wrapping up and next steps
Transplanting tree shoots may seem tricky, but with the right tools, patience, and these pro tips, you’ll give your young trees the best shot at thriving! 🌱 Remember—proper preparation, gentle handling, and aftercare are key to helping them root strong and grow tall.
Whether you’re a beginner or a seasoned gardener, every transplant is a chance to nurture new life and watch nature flourish.
Ready to take the next step? Start small—practice with a few shoots before tackling larger trees, and soon you’ll be a transplanting pro! 🌳💚