
How To
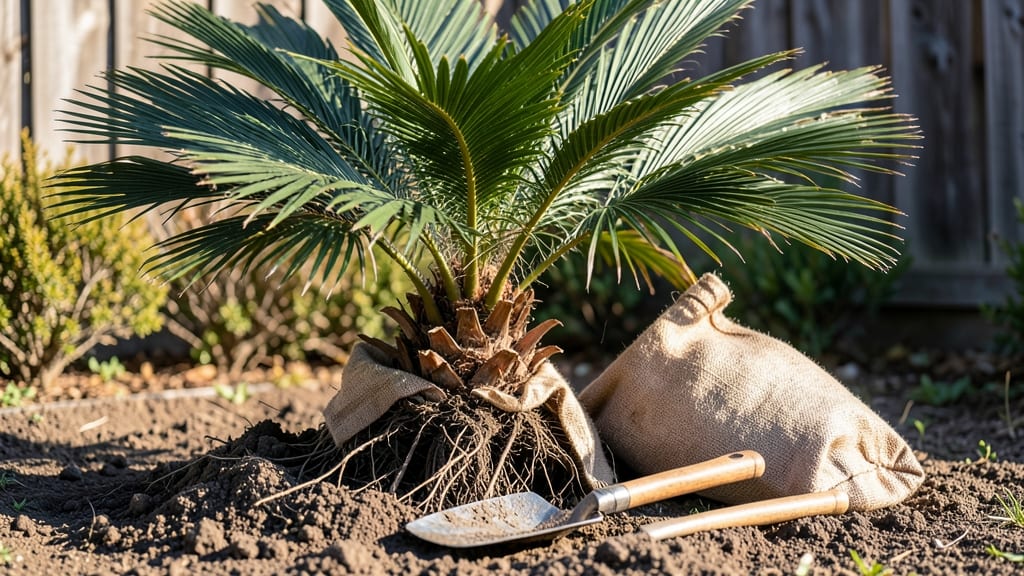
Transplanting palm trees without killing them starts with timing—spring or fall, when temperatures hover between 55°F and 85°F, gives roots the best chance to establish before extreme heat or cold sets in.
I’ve moved everything from dwarf pygmy palms to tall Canary Island palms, and the difference between a thriving transplant and a sad, yellowing one comes down to these few critical steps.
The key isn’t brute force; it’s patience and prep work that keeps the roots happy long after you’ve backfilled the hole.
Your biggest ally is well-draining soil mixed with compost—palms hate soggy roots, and even tropical species need airflow around their fibrous systems. Dig the hole twice as wide as the root ball but only as deep, then loosen the native soil at the edges to encourage new growth outward.
Water deeply three days before transplanting to reduce shock, and if you’re moving a large palm, consider hiring help—those trunks are heavier than they look. The goal isn’t just to replant; it’s to give the roots a fighting chance to spread before summer’s heat hits.
📚 In This Guide
- What you need
- Instructions
- Tips and common mistakes
- Wrapping up and next steps
What you need
- ● Shovel or spade: A heavy-duty digging shovel (18–24" blade) for mature palms or a garden spade (12–16") for smaller ones. Pro tip: Rent a palm tree transplanting fork (💡) for massive roots!
- ○ Wheelbarrow or tarp: A heavy-duty tarp (6’x8’) or wheelbarrow to transport soil and roots. Optional: A dolly for extra-large palms!
- ● Pruning shears or handsaw: For trimming dead fronds or overgrown roots (sterilize blades with rubbing alcohol!).
- ● Root stimulator: 1–2 gallons of mycorrhizal fungi or rooting hormone gel (like Dip ‘N Grow).
- ● Burlap or landscape fabric: 10–20 sq. ft. to wrap roots (avoid plastic—it restricts growth!).
- ● Stakes & twine: 4–6 wooden stakes (2–3 ft. long) and twine to secure the palm during recovery.
- ● Watering can or hose: With a gentle spray nozzle for post-transplant hydration.
- ● Timing: Transplant in early spring or fall (avoid extreme heat or frost!).
- ● Location scouting: Pick a spot with full sun (6+ hours/day) and well-draining soil (amend with sand or gravel if needed).
- ● Neighbor approval: Check local HOA rules or tree ordinances—some areas restrict palm removal!
- ● Weather check: Aim for a cloudy day or early morning to reduce transplant shock.
- ● Soil amendments: Peat moss or coconut coir (5–10 gallons) to improve drainage.
- ● Mulch: 3–4 inches of wood chips to retain moisture and regulate soil temp.
- ● Tree strap: For extra-large palms (prevents trunk damage during transport).
- ● Post-transplant fertilizer: Slow-release palm fertilizer (like Osmocote) to kickstart growth.
Step-by-Step instructions for transplanting palm trees safely
Palm trees handle transplanting better with careful timing and technique—here's how to do it right.
⏰ Step 1: Choose the Right Time for Transplanting
Transplant during the coolest months of your region, ideally in early spring or late fall when temperatures stay between 60-75°F. Avoid transplanting during extreme heat or cold snaps—palms struggle to establish roots when stressed by temperature swings. I've seen palms wilt dramatically when moved in summer heat, so timing matters more than size.
Check your local climate zone to align with the dormant or slow-growth period of your specific palm species. For example, Canary Island date palms thrive when transplanted in October through March, while Mexican fan palms adapt better to April or May moves. Watch for new frond growth—if you see fresh leaves emerging, wait until they mature slightly before transplanting.
🪴 Step 2: Prepare the New Planting Site
Dig a hole twice as wide as the palm's root ball but only as deep as the container or original planting depth. Loosen the soil at the bottom with a shovel or garden fork to prevent compaction—palm roots need air and space to spread. I always add 3-4 inches of coarse sand to the bottom of the hole for drainage, especially in clay-heavy soils.
Mix the removed soil with compost (about 1 part compost to 3 parts native soil) to improve fertility and structure. Avoid heavy amendments like manure, which can burn tender palm roots. Test the soil pH—palms prefer slightly acidic to neutral (6.1-7.5). If your soil is too alkaline, add sulfur according to package instructions before planting.
🌱 Step 3: Dig Up and Transport the Palm Carefully
Water the palm 2-3 days before transplanting to reduce root shock—well-hydrated roots handle disturbance better. Dig a wide trench around the root ball, stepping back 12-18 inches from the trunk to avoid damaging the crown shaft (the swollen base where roots emerge). Use a sharp spade to slice cleanly through roots if needed, but try to keep as much of the root system intact as possible.
Lift the palm by supporting the root ball and trunk simultaneously—never grab just the fronds. Wrap the root ball in burlap or a tarp if transporting more than 50 feet to prevent root exposure. Keep the palm shaded and moist during transport. I've seen entire root systems dry out in just 2 hours on hot days, so plan your move carefully.
☀️ Step 4: Plant and Stabilize the Palm
Position the palm in the hole so the top of the root ball sits level with or slightly above ground. Fill the hole with the amended soil mixture, tamping gently to eliminate air pockets. Avoid burying the crown shaft—this suffocates the plant and invites rot. Water deeply to settle the soil, then add 2-3 inches of mulch around the base, keeping it 6 inches away from the trunk to prevent moisture buildup.
Stake the palm only if necessary—most mature palms don't need support. If staking, use 3-4 flexible stakes tied loosely to the trunk with wide, soft straps (never wire). This prevents trunk damage as the palm sways in wind. Water deeply every 3-5 days for the first month, then taper to once a week once new fronds appear.
💧 Step 5: Monitor and Care for Recovery
Watch for new frond growth within 4-8 weeks—this is your sign the palm is recovering. Yellowing fronds are normal for the first 2-3 months but should gradually turn green as roots establish. If fronds brown suddenly, check for overwatering or fungal issues—palms hate soggy roots. I've seen palms recover from transplant shock in 3 months, but some sensitive varieties take up to 6 months to fully adjust.
Fertilize lightly 3 months after transplanting with a balanced palm fertilizer (8-2-12 ratio). Avoid heavy nitrogen feeds—these encourage frond growth at the expense of root development. Keep the area around the palm weed-free to reduce competition for water and nutrients. With proper care, your transplanted palm will look like it was always there within a year.
Tips & tricks for perfect palm transplanting
Here's what I learned after moving palms without losing a single one—these details make all the difference.
Timing is Everything: The 2-hour window for keeping roots moist during transport is non-negotiable on hot days. I've seen palms arrive at new locations with completely dry root balls after just 90 minutes in summer heat. If you're moving during peak sun, cover the palm with a damp towel and keep it in the shade until planting. Even a 10-minute delay can mean the difference between survival and transplant shock.
Root Ball Protection: When you're digging that wide trench around the root ball in Step 3, pay special attention to the crown shaft—the swollen base where roots emerge. This is where new roots will grow, so avoid damaging it. I've seen gardeners accidentally slice through this area with a spade, which can set back recovery by weeks. If you must cut roots, do it cleanly with a sharp tool and at a slight angle to minimize damage.
Soil Preparation Secret: That 3-4 inches of coarse sand at the bottom of the planting hole isn't just for drainage—it creates a buffer zone that prevents root rot in heavy soils. For clay-heavy areas, I recommend adding an extra inch of sand and mixing in perlite for even better aeration. The goal is to mimic the well-draining conditions palms prefer in their native tropical environments.
Recovery Monitoring: The 4-8 week window for new frond growth is your best indicator of success. I've learned to track three things during this period: the number of new fronds, the color of existing leaves, and the overall rigidity of the trunk. A healthy recovering palm will show firmness returning to the trunk first, followed by new growth. If you don't see any new fronds after 8 weeks, it's time to investigate potential issues like soil compaction or root damage.
Pro Tips for Transplant Palm Trees
- Here's what I learned after moving palms without losing a single one—these details make all the difference.
- Timing is Everything: The 2-hour window for keeping roots moist during transport is non-negotiable on hot days.
- Root Ball Protection: When you're digging that wide trench around the root ball in Step 3, pay special attention to the crown shaft—the swollen base where roots emerge.
Frequently asked questions
Got questions about transplanting palm trees?
You’re not alone! Here are answers to the most common concerns—from timing to troubleshooting—to help your palms thrive after the move.
When is the best time to transplant palm trees?
The ideal window is late fall to early spring (avoid extreme heat or frost). Palms are dormant or semi-dormant, reducing stress. If transplanting in summer, do it early morning or on cloudy days to minimize sunburn. Young palms (under 5 years) adapt faster than mature ones—plan accordingly!
Can I transplant a palm tree myself, or should I hire a pro?
Small palms (under 10 feet) are DIY-friendly with the right tools and technique. For larger species (like Roystonea or Washingtonia), hire pros—especially if roots are tangled or the tree weighs hundreds of pounds. Pros use cranes, root pruners, and soil additives to ensure survival. Rule of thumb: If it’s heavier than you are, call an expert!
How often should I water a newly transplanted palm?
Water deeply every 2–3 days for the first 2 weeks, then taper to weekly (adjust for climate). Overwatering suffocates roots, while underwatering causes shock. Pro tip: Use a moisture meter or dig 2 inches down—soil should feel damp, not soggy. Mulch helps retain moisture!
What if my palm’s fronds turn yellow or brown after transplanting?
Yellowing fronds are normal for 2–4 weeks as the tree adjusts. Brown tips? Likely sunburn or transplant shock. Trim dead fronds (but never more than ⅓ of the crown) and shade the palm for a few days. Red flags: Wilting, blackened fronds, or oozing sap = root damage or disease—contact an arborist.
Are there palm tree alternatives that are easier to transplant?
Yes! Dwarf palms (like Pyramidals or Pindo) and bamboo palms (not true palms but low-maintenance) handle transplanting better than giants like Coconut palms. For minimal stress, choose container-grown palms—they’ve already adapted to root confinement!
| Quick Troubleshooting Guide |
|---|
| Problem: Slow growth after transplanting |
| Fix: Test soil pH (palms prefer 6.1–7.5). Amend with compost or palm-specific fertilizer (low nitrogen). |
| Problem: Soil pulling away from roots |
| Fix: Replenish soil and water gently to settle roots. Add mycorrhizal fungi to boost root health. |
Wrapping up and next steps
Transplanting palm trees might seem daunting, but with the right prep, patience, and care, your tropical beauty can thrive in its new home! 🌴✨ Remember to choose the perfect timing, dig carefully, and support recovery with proper watering and shade.
Your efforts will pay off in lush, healthy growth—so don’t hesitate to roll up your sleeves and get started.
Ready to give your palm tree a fresh start? Mark your calendar for the ideal transplanting window and gather your tools. You’ve got this! 💪