
How To
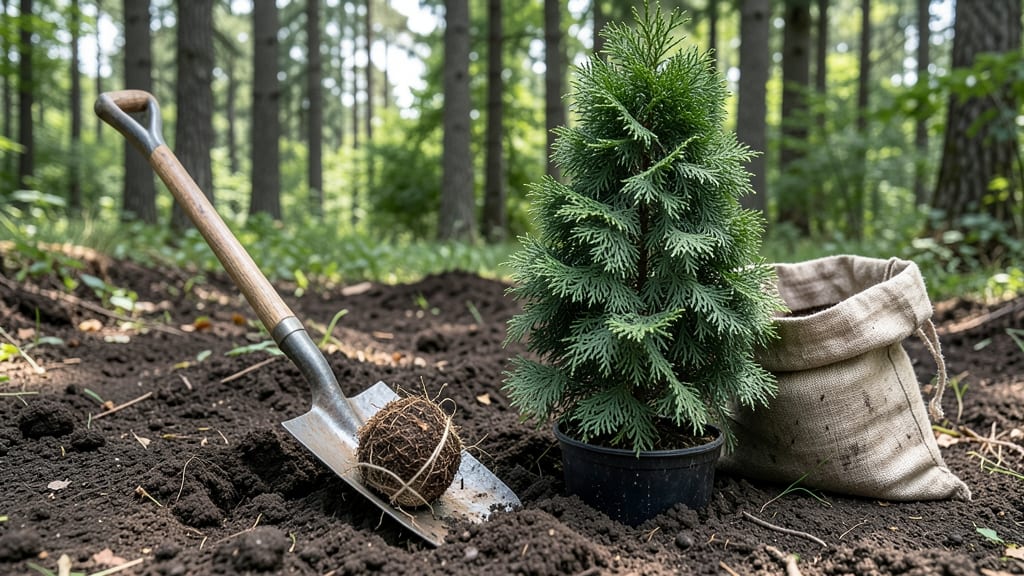
Transplanting cedar trees successfully starts with timing—dormant season is your best friend. 🌲 I’ve moved more cedars than I can count, and the difference between a thriving transplant and a sad, wilting stump comes down to when and how you dig.
The key is late fall or early spring, when roots aren’t actively growing but the tree still has energy to recover.
You’ll need sharp tools, a wheelbarrow, and a plan to protect those delicate roots. Dig a wide trench around the tree first—cedars hate root damage—then lift carefully, keeping as much soil intact as possible.
Water deeply before and after moving, and shade the tree for the first few weeks to reduce stress. Most people rush this step and end up with shock; don’t be one of them.
📚 In This Guide
- What you need
- Instructions
- Tips and common mistakes
- Wrapping up and next steps
What you need
- ● Shovel or spade: A sharp, heavy-duty digging tool (18–24" wide) for mature trees; a hand trowel for saplings.
- ● Pruning shears or loppers: For trimming roots and branches (10–12" blades for medium-sized cedars).
- ● Root stimulator: A powder or gel (e.g., Rootone) to reduce transplant shock (1–2 oz per tree).
- ● Burlap or landscape fabric: 3–4 ft wide, to wrap roots and protect them during transport.
- ● Twine or zip ties: For securing the burlap (10–15 ft roll).
- ○ Wheelbarrow or dolly: To move the tree (optional but highly recommended for larger specimens).
- ● Watering can or hose: With a gentle spray nozzle for post-transplant hydration.
- ○ Mulch (optional): Pine straw or wood chips (2–3 inches deep) to retain moisture and suppress weeds.
- ● Timing: Transplant in early spring or fall (avoid extreme heat or frost).
- ● Location scout: Pre-select the new spot with 6+ feet of clearance (cedars need space to grow!).
- ● Weather check: Ensure 3–5 days of cloudy or mild weather post-transplant.
- ● Permits (if applicable): Check local regulations for large tree removals/movements.
Step-by-step instructions for transplanting cedar trees
Here's my foolproof method for moving cedars without stressing the roots.
🪴 Step 1: Prepare the New Location and Dig the Hole
Choose a spot that mimics the cedar's original conditions—partial shade to full sun depending on your climate. The hole should be twice as wide as the root ball but only as deep. You want the top of the root ball to sit 1-2 inches above ground level after planting.
Use a shovel to loosen the sides of the hole gently—cedar roots are shallow but sensitive. Mix the excavated soil with 2 inches of compost (if your original soil was poor) and set it aside. Avoid amending with fresh manure or heavy fertilizers, which can burn the roots.
✂️ Step 2: Prune and Lift the Cedar Carefully
Water the cedar deeply 2-3 days before moving to reduce transplant shock. On moving day, prune any dead or damaged branches first—this focuses the tree's energy on root recovery. Use clean, sharp pruners to make cuts just outside the branch collar.
Dig a wide trench around the base of the tree, 12-18 inches away from the trunk, and work your way down to expose the root ball. Use a handsaw if necessary to cut through thick roots cleanly. Lift the tree with a tarp or burlap, keeping the root ball intact. If roots break, trim them with pruners—never tear them—and dust the cuts with rooting hormone.
💧 Step 3: Position and Backfill the Tree
Place the cedar in the prepared hole, ensuring the root flare (where the roots meet the trunk) sits level with the ground. Spread the roots gently outward—don't force them—and fill the hole with the reserved soil mix, tamping lightly every 3 inches to remove air pockets. Water slowly as you go to settle the soil.
Create a 2-inch-high berm of soil around the outer edge of the hole to encourage water to soak into the root zone. Mulch with 2-3 inches of wood chips, keeping it 6 inches away from the trunk to prevent rot. Water deeply until moisture reaches 6-8 inches down, then let the soil settle for 24 hours before watering again.
☀️ Step 4: Support and Monitor for Recovery
Stake the cedar only if necessary—use 2-3 stakes placed 6-12 inches from the trunk and tie loosely with soft fabric strips to avoid girdling. Avoid heavy pruning for at least 6 months to reduce stress. Cedars are drought-tolerant, but keep the soil moist (not soggy) for the first 30-45 days after transplanting.
Watch for wilting, yellowing needles, or excessive leaf drop—these are signs of shock. If you see them, water more frequently but avoid overwatering. After 6-12 months, the tree should establish fully, and normal growth will resume. Here's the thing—patience is key. Cedars recover slowly but steadily.
Tips & tricks for transplanting cedar trees
Here's what nobody tells you—cedar transplanting is an art, not a science. These little details make all the difference between a thriving tree and one that struggles for years.
Timing is Everything: The 2-3 days of deep watering before moving is non-negotiable. I learned this the hard way after losing two cedars to shock—hydrated roots handle stress far better. Water in the morning so the soil has time to absorb fully before you dig. The goal is to keep the root ball moist but not waterlogged during the entire process.
Root Ball Preservation: When digging that 12-18 inch trench, work slowly and carefully—cedar roots are more delicate than they look. If you must cut through roots, use a handsaw for clean breaks rather than forcing them. After trimming, that rooting hormone isn't just optional—it can double your success rate. Think of it as a bandage for your tree's wounds.
Soil Science Matters: That 2-inch compost mix isn't just filler—it helps restore microbial activity in the disturbed soil. For poor soil conditions, consider adding a handful of worm castings to the mix. The key is to mimic the tree's original environment as closely as possible. And remember: never use fresh manure, which can burn tender new roots.
Post-Transplant Care: The 24-hour settling period before your first watering is crucial. It gives the soil time to compact naturally around the roots. After that, your watering goal should be consistent moisture at 6-8 inches deep—think of it like giving your tree a long drink rather than frequent sips. A soil moisture meter is worth the investment if you're serious about success.
Pro Tips for Transplant Cedar Trees
- Here's what nobody tells you—cedar transplanting is an art, not a science.
- Timing is Everything: The 2-3 days of deep watering before moving is non-negotiable.
- Root Ball Preservation: When digging that 12-18 inch trench, work slowly and carefully—cedar roots are more delicate than they look.
Frequently asked questions
Got questions about transplanting cedar trees? You’re not alone! Here are answers to the most common concerns—so you can tackle your project with confidence.
When is the best time to transplant cedar trees?
The ideal window is late fall to early spring (October through March), when trees are dormant. Avoid transplanting in summer heat or winter freezes. Evergreens like cedars lose less moisture this way, giving roots time to establish without stress. Pro tip: Water deeply 1–2 weeks before transplanting to reduce shock.
How do I know if my cedar tree is healthy enough to transplant?
Look for vibrant green needles, minimal browning, and firm (not mushy) bark. Avoid transplanting if you see yellowing needles, wilting, or pest damage—these signs mean the tree’s struggling. Healthy cedars bounce back better! If unsure, consult a local arborist for a quick health check.
Can I transplant a large cedar tree, or should I stick to smaller ones?
Cedars can be transplanted at any size, but success drops with maturity. Trees under 10–15 feet tall transplant easiest. For larger cedars, hire a pro with heavy machinery—root balls need careful handling to avoid breakage. Warning: Big trees may take 2+ years to fully recover.
How often should I water my cedar after transplanting?
Water deeply 2–3 times per week for the first month, then taper to weekly. Use a soaker hose to keep roots moist (not soggy). Mulch around the base to retain moisture. Key: Avoid overhead watering—it encourages fungal diseases like root rot.
What should I do if my cedar’s needles turn brown after transplanting?
Brown needles often signal transplant shock or drought stress. Check soil moisture first—water if dry. If browning spreads, it could be pests (cedar bark beetles) or disease. Prune dead branches, improve drainage, and apply a balanced fertilizer (like 10-10-10) in spring. Most cedars recover within a season!
| Issue | Quick Fix |
|---|---|
| Wilting leaves | Water roots immediately + shade tree for 2 weeks. |
| Slow growth | Test soil pH (cedars prefer 6.0–7.0); amend if needed. |
| Fungal spots | Remove mulch 6 inches from trunk; treat with copper fungicide. |
Wrapping up and next steps
Transplanting cedar trees doesn’t have to be intimidating—with the right prep, timing, and care, your trees can thrive in their new home! 🌳✨ Remember to prioritize root health, watering consistency, and proper spacing to minimize shock.
Whether you’re relocating a young sapling or an established tree, patience and attention to detail will pay off in lush, resilient growth.
Ready to take the next step? Start by assessing your cedar’s health and marking the perfect spot in your yard. Then, gather your tools and dive in—your future shade (and curb appeal!) will thank you. Happy planting! 🌱💚