
Propagation
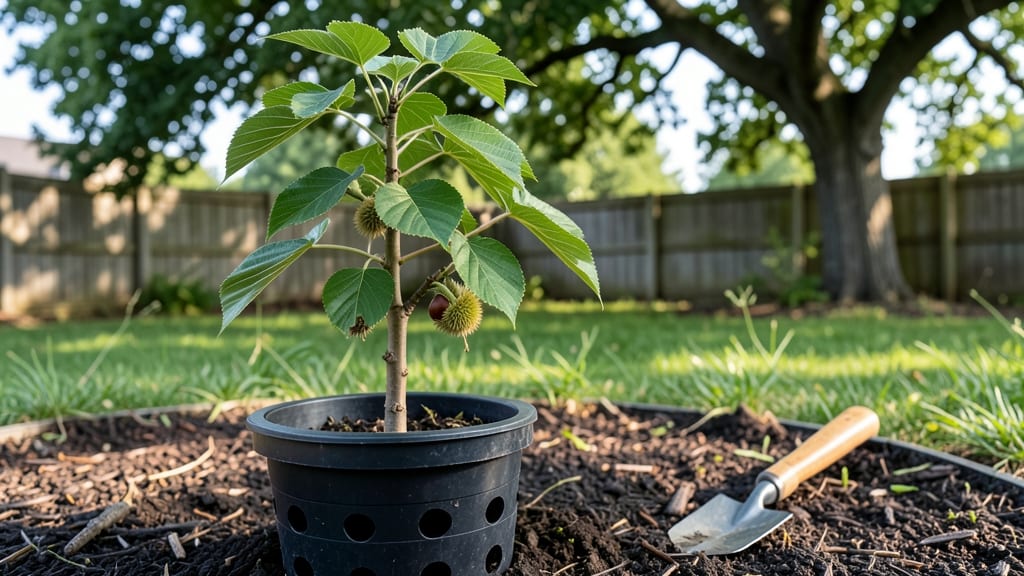
Starting a chestnut tree from seed isn’t just propagation—it’s a long-term promise of towering shade and crunchy autumn treats. 🌱 The key is breaking dormancy through cold stratification, a process that mimics winter’s natural timing.
I’ve grown chestnuts this way for years, and the first green shoot always feels like magic after months of patience.
You’ll need fresh chestnuts (not store-bought), a damp paper towel, a sealed bag, and a fridge for 6-8 weeks. Sweet chestnuts (the edible kind) and horse chestnuts (ornamental) both work, but their germination speeds differ—sweet chestnuts often sprout faster.
The trick is consistency: keep those seeds moist but not soggy during stratification.
By spring, you’ll have plump sprouts ready for planting. They’ll grow 6-12 inches their first year, then slow down as roots establish. The real reward? A tree that could live for centuries—if you give it the right start. Here’s how to avoid the pitfalls most beginners face.
This method works whether you’re growing in pots or straight in the ground, though container-grown trees adapt better to transplanting. Horse chestnuts are hardier for northern climates, while sweet chestnuts thrive in warmer zones. Either way, the wait is worth it for that first harvest of glossy nuts.
📚 In This Guide
- What you need
- Instructions
- Tips and common mistakes
- Wrapping up and next steps
What you need
- ● Fresh chestnut seeds: 3–5 viable seeds (harvested from mature, healthy trees in fall). Pro tip: 💡 Choose plump, unblemished nuts!
- ● Cold stratification setup: 1–2 paper towels or peat moss (moistened)
- ● 1 ziplock bag (resealable, quart-sized)
- ● 1 refrigerator (set to 35–40°F / 2–4°C)
- ● Planting containers: 1–2 small pots (4–6 inches in diameter) with drainage holes
- ● 1 seed-starting mix (sterile, well-draining potting soil)
- ● Tools: 1 spoon or small trowel (for planting)
- ● 1 spray bottle (for gentle watering)
- ○ 1 humidity dome or plastic wrap (optional, for warmth)
- ● 1 grow light (if natural light is limited)
- ● 1 thermometer/hygrometer (to monitor soil temp/moisture)
- ● 1 label maker (to track seed varieties)
- ● 1 mulch (for transplanting outdoors later)
Step-by-Step instructions for growing chestnut trees from seed
Here's how to break the dormancy cycle and coax those stubborn chestnut seeds into life.
🌱 Step 1: Harvest and Prepare Fresh Chestnut Seeds
Collect mature chestnuts from the tree in late fall when they've fallen naturally. Avoid any with holes or mold—they won't sprout. I like to store them in a cool, dry place until November, when I'm ready to begin stratification. The key is freshness: seeds older than 6 months lose viability quickly.
Remove the spiny husk by rolling the chestnut between your palms or gently tapping it against a hard surface. The seed inside should feel firm and heavy. If it's shriveled or hollow-sounding, it's past its prime. I always test a few by cutting one open—if the kernel inside is brown and mealy rather than creamy white, skip it.
❄️ Step 2: Cold-Stratify Seeds for 90 Days
Place the cleaned seeds in a ziplock bag with a damp paper towel—just enough moisture to feel slightly damp when squeezed, not dripping. Seal the bag and store it in your refrigerator's crispier drawer (around 35-40°F). This mimics winter conditions and breaks dormancy. I label each bag with the date to track the 90-day period precisely.
Check the seeds every 2 weeks—they should remain moist but not soggy. If mold appears, discard the batch immediately. After 90 days, the seeds will have swollen slightly and feel heavier. This is your signal that stratification worked. Don't rush this step; impatient germination leads to weak, leggy seedlings that won't survive outdoors.
🌱 Step 3: Plant Stratified Seeds in Containers
Fill 4-inch pots with a sterile seed-starting mix (never garden soil—it's too dense). Plant 1-2 seeds per pot at a depth of 1 inch, pressing lightly but not compacting. I use biodegradable pots to avoid root disturbance later. Water gently until moisture seeps from the drainage holes.
Place the pots in a warm, bright spot (around 65-75°F) but not direct sunlight yet—you're aiming for indirect light to prevent overheating. A seedling heat mat helps maintain consistent warmth. Germination typically takes 4-8 weeks, so patience is key. Watch for the first tiny green shoot breaking through the soil—this is when you'll know it's working.
☀️ Step 4: Transition Seedlings to Outdoor Conditions
Once seedlings reach 4-6 inches tall and show 3-4 true leaves, they're ready for hardening off. Move them outside to a shaded, sheltered spot for 2-3 hours the first day, gradually increasing exposure over 2 weeks. Chestnut seedlings are tough but need this slow adjustment to avoid shock.
After 2 weeks of hardening, transplant them into larger containers or directly into the ground in a sunny location with well-draining soil. Space them 10 feet apart—chestnut trees grow large. Mulch with 3 inches of organic material to retain moisture and suppress weeds. The first year focuses on root development, so avoid heavy pruning.
Tips & tricks for starting chestnut trees from seed
Cold stratification isn't just a process—it's the secret to unlocking those stubborn chestnut seeds' potential. Here's how to turn good intentions into thriving seedlings.
Seed Selection Matters: In Step 1, when harvesting chestnuts, focus on those that fell naturally in late fall—these are the most viable. I've found that seeds collected before their natural drop (even if they look perfect) often fail to germinate. The natural fall indicates full maturity and readiness for dormancy breaking. Test a few by cutting them open: the cream-colored kernel should be firm, not brown or mealy—this is your quality control check before investing 90 days of care.
Stratification Precision: The 90-day cold stratification in Step 2 is non-negotiable for chestnut seeds, but the details matter. Store your ziplock bags in the refrigerator's crispier drawer (around 35-40°F) where humidity is consistent. I've learned the hard way that warmer fridge areas or freezer temperatures can disrupt the process—stick to that precise temperature range. The damp paper towel should feel like a wrung-out sponge; too much moisture causes mold, while too little prevents germination. Weigh your bag before and after to ensure consistent moisture levels.
Germination Timing: In Step 3, when planting your stratified seeds, remember that the 4-8 week germination window is just an estimate. Some seeds may sprout in 3 weeks, others take 10—patience is key. I've had batches where only half germinated, but those that did were robust. If no sprouts appear after 8 weeks, gently check for rot by carefully removing one seed. If it's mushy, your moisture levels were off; if it's still firm, try planting fresh seeds from a new batch. A seedling heat mat at 65-75°F helps maintain optimal conditions without direct sunlight that could overheat delicate sprouts.
Hardening Off Strategy: The 2-week hardening process in Step 4 is where many seedlings fail. Start with just 2-3 hours of shade on day one, then gradually increase exposure. I've seen seedlings wilt dramatically when moved too quickly—this is their last critical test before outdoor life. Use a small shade cloth if your outdoor spot gets intense afternoon sun. After 2 weeks, your seedlings will be ready for their permanent home, whether that's larger containers or direct planting in well-draining soil with that essential 3-inch mulch layer.
Pro Tips for Start A Chestnut Tree From Seed
- Cold stratification isn't just a process—it's the secret to unlocking those stubborn chestnut seeds' potential.
- Seed Selection Matters: In Step 1, when harvesting chestnuts, focus on those that fell naturally in late fall—these are the most viable.
- Stratification Precision: The 90-day cold stratification in Step 2 is non-negotiable for chestnut seeds, but the details matter.
Frequently asked questions
Got questions about growing chestnut trees from seed? You’re not alone—this process has a few quirks! Here are answers to the most common queries to help you succeed.
How long does it take for chestnut seeds to sprout?
With proper cold stratification (60–90 days in the fridge), most chestnut seeds sprout in 2–4 weeks after planting. Some may take longer—patience is key! Warmth and moisture speed things up, but don’t rush it. If no sprouts appear after 6 weeks, check for rot or adjust moisture levels.
Can I skip cold stratification?
Technically yes, but your success rate will plummet. Chestnut seeds need stratification to break dormancy—skipping it often results in slow or no germination. If you’re impatient, try soaking seeds in warm water for 24 hours before stratification to jumpstart the process.
How do I know if my seed is viable?
Viable chestnut seeds are plump, firm, and free of mold. Tap two seeds together—if they sound hollow, they’re empty. For extra assurance, cut one open: a white, moist interior means it’s good to go. Discard shriveled or cracked seeds—they won’t sprout.
What’s the best time to plant stratified seeds?
Plant after stratification ends, ideally in early spring (March–April) when soil temps hit 50°F+ (10°C+). Avoid planting too early—frost can kill tender sprouts. If you’re in a warm climate, late winter works too, but monitor moisture closely.
Why did my chestnut seedling die?
Common culprits: overwatering (roots rot easily), drought stress, or pests (like slugs). Keep soil moist but not soggy, use a mesh pot to deter pests, and ensure good drainage. If leaves yellow or wilt, adjust care immediately—most seedlings recover if acted on fast!
Wrapping up and next steps
Growing a chestnut tree from seed is a rewarding journey that combines patience, care, and a touch of nature’s magic! 🌱 By following these steps—from cold stratification to transplanting—you’re not just nurturing a seed; you’re cultivating a future source of sweet, nutritious chestnuts and a stunning addition to your landscape.
Once your sapling is thriving, the next logical step is to monitor its growth and prepare for its eventual move outdoors—where it can flourish for decades.
So roll up your sleeves, stay consistent, and enjoy the process. Your future chestnut tree is waiting for you! 🌳