
Pruning
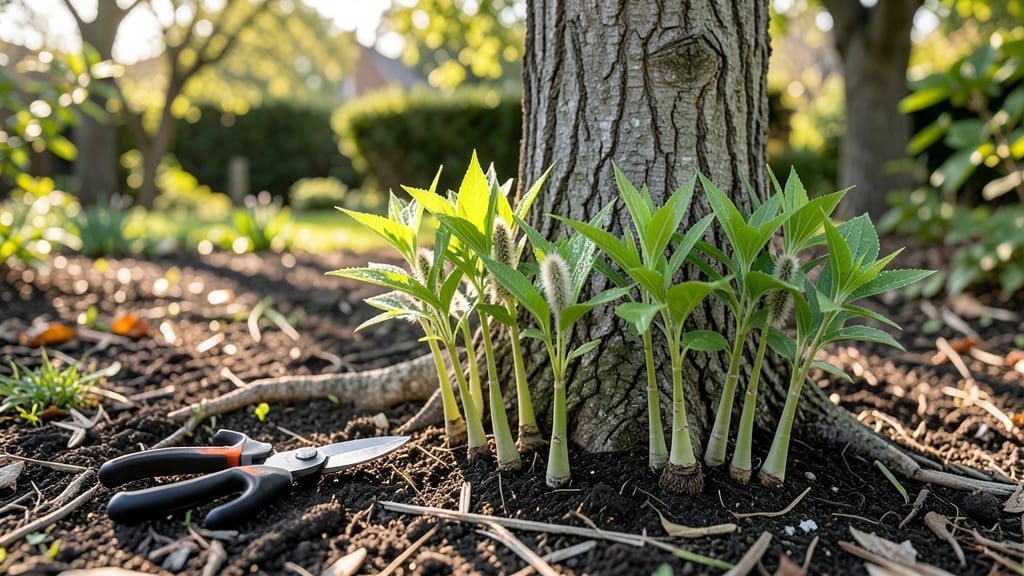
Removing tree suckers keeps your landscape looking sharp and your trees thriving. ✂️ I’ve wrestled with these aggressive shoots for years—until I learned the right cuts make all the difference. These fast-growing sprouts steal energy from your tree’s main structure, so tackling them early prevents long-term damage.
You’ll need a sharp pruning saw or loppers for thicker suckers, and rubbing alcohol to sterilize cuts. The best time to act is late winter or early spring, when the tree’s dormant but about to burst with new growth.
Cut just outside the sucker’s collar—that swollen area where it meets the trunk—to prevent regrowth.
When done right, your tree directs energy to its branches and trunk instead of these unwanted shoots. You’ll notice stronger, more vibrant growth within a season, and fewer pests or diseases that love weak, overcrowded areas. The key is clean cuts and consistency—no half-measures here.
For stubborn suckers, repeat the process a few times over spring. And here’s the secret: sealing cuts with pruning paint isn’t necessary for most trees—just keep them clean and dry. Ready to reclaim your tree’s energy and curb that wild, unruly look?
📚 In This Guide
- What you need
- Instructions
- Tips and common mistakes
- Wrapping up and next steps
What you need
- ● Pruning shears (bypass or anvil) – For small suckers (diameter bypass pruners for cleaner cuts.
- ● Loppers (10–14 inch) – For suckers ½–2 inches thick. Choose bypass loppers for precision.
- ● Pruning saw (7–10 inch) – For thick suckers (2+ inches). A curved-tooth saw prevents tear-out.
- ● Gloves (heavy-duty, cut-resistant) – Protects hands from thorns, sap, and sharp tools.
- ● Ladder or step stool – For high-reaching suckers (ensure stability!)
- ● Disinfectant (70% isopropyl alcohol or bleach solution) – Wipe tools between cuts to prevent disease spread.
- ○ Tree wound dressing (optional) – Only use if the cut is large (>2 inches). Skip for small cuts—modern research shows it’s often unnecessary.
- ● Rubbing alcohol wipes – Quick tool cleaning on the go.
- ● Work boots or closed-toe shoes – For uneven terrain.
- ● Safety glasses – Protects eyes from debris.
- ● Know your tree species – Some trees (like maples) bleed heavily; prune in dormant season (late fall/winter).
- ● Check local regulations – Some areas restrict tree removal without permits.
- ● Weather check – Avoid pruning in extreme heat, rain, or wind.
Step-by-step instructions for eliminating tree suckers
Here's how to tackle those unwanted shoots and keep your tree thriving.
✂️ Step 1: Identify Suckers and Choose the Right Time
Suckers are those vigorous shoots growing from the base of your tree or along its trunk. They steal energy from your main tree, so removing them early—when they're still less than 6 inches tall—makes the job easier. The best time to tackle them is late winter or early spring, just as new growth begins but before sap flows heavily. You'll know it's the right moment when you see fresh green buds starting to swell.
Wear gloves and long sleeves—sucker removal can be messy, especially with sap-heavy trees like maples or birches. Grab your pruners or loppers (clean and sharp ones make all the difference) and get ready to work. If suckers are thick at the base, you might need a hand saw for the tougher ones, but most will yield with a clean cut.
✂️ Step 2: Cut Suckers at the Base with Precision
Never pull suckers—you'll damage the root system and leave a wound that invites disease. Instead, make a clean, diagonal cut at the base, just above the soil line. The angle helps rainwater run off the cut, preventing rot. For suckers thicker than your thumb, use loppers or a hand saw to avoid tearing the bark. You'll feel resistance as you cut through the woody stem—push firmly but steadily.
If a sucker is growing from the main trunk or large branches, cut it off just above a bud or branch collar (the swollen area where branches meet the trunk). This ensures the tree can seal the wound properly. Avoid leaving stubs—never leave more than ¼ inch of sucker attached, or it'll regrow. You'll know you've done it right when the cut surface looks smooth and the tree's natural healing tissue (callus) starts forming within weeks.
🌿 Step 3: Treat the Base and Monitor for Regrowth
After removing suckers, inspect the base of the tree for any remaining buds or small shoots you might have missed. These can sprout again if left behind. If you're dealing with a persistent sucker-prone tree (like willows or poplars), apply a tree wound dressing or pruning sealant to the cut areas to protect them from pests and disease. For most trees, though, letting the cuts heal naturally is best—just keep an eye on them.
Watch the base of the tree for new shoots over the next 4-6 weeks. If you see any, remove them immediately before they grow beyond 2 inches tall. Consistency is key—one thorough removal session is better than multiple small ones. You'll know your efforts are working when your tree puts its energy into strong, healthy branches instead of wasting it on suckers.
☀️ Step 4: Fertilize and Water for Recovery
After a big pruning session, your tree will need extra care to bounce back. Water the base deeply (about 1-2 gallons per inch of trunk diameter) to help it recover. For example, a 6-inch diameter tree should get 6-12 gallons of water spread evenly over the root zone. Avoid overwatering, though—soggy soil invites rot, and you want the tree to focus on healing, not struggling.
Apply a balanced, slow-release fertilizer (like a 10-10-10 formula) around the drip line of the tree to give it a nutrient boost. Spread it evenly in a 2-foot wide band around the trunk, then water it in. You'll see the difference in 4-6 weeks—your tree's foliage will look richer, and new growth will be stronger. This step ensures your tree stays healthy and doesn’t produce more suckers as a stress response.
Tips & tricks for healthy tree pruning
Here's what I've learned after years of dealing with stubborn tree suckers—and how to keep your tree thriving.
Timing is Everything: The late winter to early spring window is critical because that's when trees are just waking up from dormancy. If you remove suckers too early (like in winter), the tree won't heal properly. If you wait too late (into summer), you risk stressing the tree when it's actively growing. Look for those fresh green buds starting to swell—that's your perfect cue. I always mark my calendar for this time each year because missing it means dealing with thicker, more stubborn suckers later.
Tool Prep Makes All the Difference: Before you start cutting, take 5 minutes to sharpen your pruners and loppers. A dull blade crushes the stem instead of making a clean cut, which can damage the tree's healing process. For suckers thicker than your thumb, I recommend using a hand saw—just make sure it's clean to avoid introducing disease. I keep a small bottle of rubbing alcohol handy to wipe down tools between cuts, especially when working with sap-heavy trees like maples.
Monitoring is Non-Negotiable: That 4-6 week monitoring period after removal is where most people fail. I've seen beautiful clean cuts turn into sucker hotspots because someone didn't check back. Set a reminder on your phone or mark it on your calendar. The first 2 weeks are most critical—this is when any missed buds will start showing signs of new growth. I like to do a quick inspection every Sunday morning with my coffee; it takes about 5 minutes and prevents months of frustration later.
Watering Wisdom: When you're calculating that 1-2 gallons per inch of trunk diameter, remember that's deep watering—not just a quick sprinkle. I use a garden hose with a slow setting to let the water penetrate deeply. For larger trees, I'll actually dig a small trench around the base to help direct water to the roots. The key is getting that water where the roots are actively growing, not just wetting the surface soil. You'll know you've done it right when the soil stays moist about 6 inches down.
Pro Tips for Remove Tree Suckers
- Here's what I've learned after years of dealing with stubborn tree suckers—and how to keep your tree thriving.
- Timing is Everything: The late winter to early spring window is critical because that's when trees are just waking up from dormancy.
- Tool Prep Makes All the Difference: Before you start cutting, take 5 minutes to sharpen your pruners and loppers.
Frequently asked questions
What’s the best time of year to remove tree suckers?
The ideal time is late winter or early spring (before new growth starts). This minimizes stress on the tree and prevents pests/diseases from entering fresh cuts. Avoid pruning during fall—it can trigger new suckers or attract invasive insects.
Should I paint tree wounds after cutting suckers?
Only for large cuts (over 2 inches in diameter). Use a pruning sealant to protect against decay. For small suckers, skip sealing—the tree’s natural healing is usually sufficient. Overuse of sealant can trap moisture and cause rot.
Will removing suckers harm my tree?
Not if done correctly! Suckers drain energy from the main tree, so removing them actually promotes healthier growth. Use clean, sharp tools and follow the 1/4-inch rule (cut at a 45° angle just outside the branch collar). Over-pruning is the real risk—never remove more than 25% of the canopy at once.
Can I use bleach or vinegar to kill suckers instead of cutting?
While bleach or vinegar can weaken suckers, they’re not a reliable long-term solution. Bleach may burn surrounding soil, and vinegar’s fumes can harm nearby plants. For stubborn suckers, cut and treat with a systemic herbicide (like glyphosate) only if organic methods fail.
How do I stop suckers from growing back after removal?
Prevent regrowth with these tips:
- Apply a vinegar-water mix (1:1 ratio) to fresh cuts to deter regrowth.
- Mulch 3–4 inches deep around the tree base to block sunlight (suckers need light to grow).
- Monitor for root suckers—dig carefully to avoid damaging roots.
- For persistent suckers, repeat removal every 2–3 months until they stop.
Wrapping up and next steps
Removing tree suckers doesn’t have to be a daunting task—with the right tools, timing, and technique, you can keep your trees thriving while maintaining a clean and healthy landscape. 🌳✨ Remember, consistency is key, so check for new suckers regularly and act quickly to prevent them from draining your tree’s energy.
Now that you’re equipped with the know-how, grab your pruners and get started! Your trees will thank you with stronger growth and a more polished look. Happy pruning!