
Trees
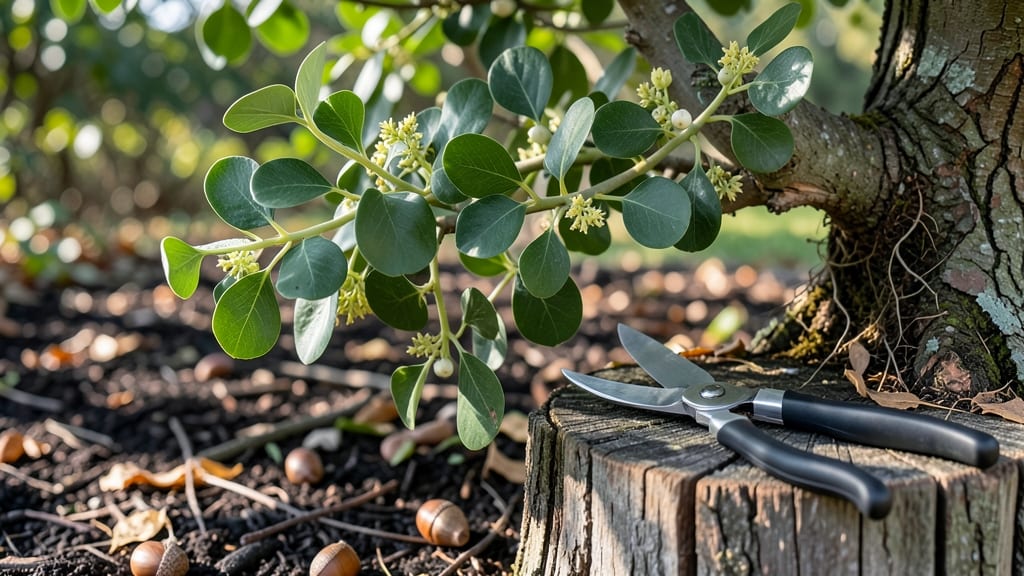
Learn how to remove mistletoe from trees without harming your host—it’s all about precision and patience. ✂️ I’ve learned the hard way that yanking it out can damage the host tree, but the right technique keeps both healthy.
The key is timing, tools, and knowing where to cut without leaving scars.
You’ll need sharp pruning shears, gloves (mistletoe sap is sticky!), and a ladder if the infestation is high up. Spring or early summer is ideal—avoid winter when trees are dormant. Start by cutting the mistletoe’s connection to the host branch, then remove the entire clump before it can regrow.
The result? A cleaner tree and fewer future battles. You’ll spot fresh growth on the host branches within weeks, and the tree’s energy won’t be drained by the parasite. Just avoid chemical treatments—they can harm both the mistletoe and the tree.
For stubborn cases or large trees, call an arborist. But most backyard infestations? This method works like a charm. Ready to tackle it step by step?
📚 In This Guide
- What you need
- Instructions
- Tips and common mistakes
- Wrapping up and next steps
What you need
- ● Pruning shears or loppers – Choose bypass pruners (sharp, clean cuts) or loppers (for thicker branches). Size: 6-8” shears for small branches, 12-16” loppers for thicker stems.
- ● Safety gloves – Heavy-duty, cut-resistant gloves (e.g., mechanized gardening gloves) to protect hands from thorns and sharp edges.
- ○ Extension pole saw (optional but helpful) – For mistletoe high up in trees (e.g., 20-30 ft reach).
- ● Disposable pruning bags or bucket – To collect and dispose of mistletoe debris (prevents spreading seeds).
- ● Rope or harness (if climbing) – Only if you’re working at significant heights (10+ ft). Never risk climbing without proper safety gear!
- ● Hand sanitizer or rubbing alcohol – For cleaning tools between cuts (prevents disease spread).
- ● Pole pruners – For precision cuts without climbing (e.g., Fiskars X7 or Felco F-2 models).
- ○ Tree wound dressing (optional) – Only use if the host tree has deep cuts (e.g., Tanglefoot Tree Wound Pruning Seal). Note: Most experts recommend not sealing small wounds—let them heal naturally!
- ● Ladder (if needed) – A stable, extendable ladder (e.g., 24-32 ft) with non-slip feet.
- ● Disposable coveralls – Protects clothing from sap and debris.
Step-by-step guide for safe mistletoe removal
Here's how to tackle mistletoe without stressing your trees or risking regrowth.
🌿 Step 1: Identify the Mistletoe and Assess the Host Tree
First, confirm you're dealing with mistletoe by checking for its distinctive waxy, leathery leaves and white berries (if present). Look for the dense, green clumps growing where branches fork—this is where mistletoe attaches itself to the host tree's vascular system. I always start by examining the tree's overall health because stressed trees handle mistletoe removal poorly.
Run your fingers along the branch where the mistletoe connects. You'll feel a slightly swollen area—this is the haustorium, the parasite's root system that taps into the host's nutrients. Healthy host trees will bounce back better, so avoid removal during drought or extreme heat when the tree is already struggling.
✂️ Step 2: Gather Tools and Prepare for Clean Cuts
You'll need sharp pruning shears (for small infestations) or a pruning saw (for larger clumps), plus a clean rag and rubbing alcohol to sterilize your tools between cuts. I keep a bucket of soapy water nearby too—mistletoe berries can spread seeds if they fall on other trees. Wear gloves to protect your hands from the sticky sap.
Make your first cut about 4-6 inches below where the mistletoe attaches to the host branch. This ensures you remove the entire haustorium, which can regrow if even a small piece remains. For larger clumps, cut in sections but always leave a clean, slanted cut to prevent water from pooling and causing rot.
💧 Step 3: Remove the Haustorium and Treat the Wound
Once the mistletoe is severed, you'll see the haustorium—a white, cottony mass where it connected to the branch. Scrape this away completely with a knife or your fingernail, being careful not to gouge the host tree's bark. The goal is to sever all connections to the tree's vascular system.
After removal, seal the wound with a thin layer of pruning sealant. I use a product with mycorrhizal fungi—it helps the tree heal faster and prevents disease. For smaller cuts, even a dab of tree wound paste works well. Avoid thick applications, as they can trap moisture and cause rot.
☀️ Step 4: Monitor the Tree and Prevent Regrowth
Watch the host tree closely for 2-4 weeks after removal. You'll want to see new growth at the pruning site, which means the tree is healing properly. If you notice oozing sap or darkening around the cut, the tree may be stressed—apply another layer of sealant and reduce watering temporarily.
To prevent mistletoe from returning, keep the area under the tree clear of fallen berries. Birds spread mistletoe seeds, so if you see them feeding on the berries, consider placing a temporary bird netting around the tree until the threat passes. Healthy trees are less susceptible, so focus on proper watering and mulching to keep the host strong.
Tips & tricks for safe mistletoe removal
Real talk: Mistletoe removal isn't just about cutting—it's about protecting your tree while you do it. Here's what nobody tells you about making this process smoother and safer for both you and the tree.
Timing is Everything: Never remove mistletoe during late summer or early fall when the host tree is already stressed from preparing for dormancy. I learned this the hard way after removing a large clump from my oak in September—it took the tree two full growing seasons to recover. Early spring, just as buds begin to swell, is the ideal time when the tree has energy reserves to heal.
Tool Selection Matters: Using the right tool makes all the difference. For small infestations, bypass pruners with sharp blades work best—they create clean cuts that heal faster. For larger clumps, a pruning saw with a fine-tooth blade prevents tearing the bark. Confession: I skipped sterilizing my tools once and ended up with a fungal infection on my tree that took months to clear up. Always clean your tools with rubbing alcohol between cuts.
Visual Cues for Complete Removal: When you scrape away the haustorium in Step 3, look for a clean, white surface where it connected to the branch. Any remaining cottony fibers mean the mistletoe can regrow. I use a magnifying glass to check for tiny root strands—those need to be completely removed too. The goal is to leave no trace of the connection.
Pro Tips for Remove Mistletoe From Trees
- Real talk: Mistletoe removal isn't just about cutting—it's about protecting your tree while you do it.
- Timing is Everything: Never remove mistletoe during late summer or early fall when the host tree is already stressed from preparing for dormancy.
- Tool Selection Matters: Using the right tool makes all the difference.
Frequently asked questions
Got questions about safely removing mistletoe?
You’re not alone—this parasitic plant can be tricky to handle! Below, we’ve answered the most common questions to help you tackle the job with confidence and care.
When is the best time of year to remove mistletoe?
The ideal window is late winter or early spring (just before new growth begins). This minimizes stress on the host tree and makes the parasite easier to spot. Avoid pruning during active growth (spring/summer) or dormancy (deep winter), as these times can harm the tree’s health.
Will removing mistletoe kill my tree?
Not if done correctly! Mistletoe is a parasite, but removing it properly (cutting at the right angle and sealing wounds) won’t harm a healthy tree. However, if the tree is already weak or heavily infested, consult an arborist to assess its condition first. Think of it like detoxing—the tree will thank you!
Do I need special tools to remove mistletoe?
Basic tools work for most jobs: clean, sharp pruners (for small clumps) or a pruning saw (for thicker stems). For high branches, a pole saw or harness system keeps you safe. Avoid dull tools—they tear tissue, inviting infections. Pro tip: sterilize blades with rubbing alcohol between cuts to prevent spreading disease!
Can I just pull mistletoe off instead of cutting?
Nope—never pull or twist! This damages the host tree’s bark and can leave ragged wounds. Always cut at the base of the mistletoe’s attachment point (the "sinkers") and seal the wound with pruning sealant. Think of it like extracting a splinter: patience and precision win.
What if the mistletoe keeps coming back?
Persistent mistletoe often means the roots or sinkers weren’t fully removed. Re-inspect the area after 6–12 months—if new growth appears, dig deeper or cut closer to the tree’s trunk. For stubborn cases, repeat treatments in late winter for 2–3 years. If all else fails, consider professional help—some trees just need a little extra TLC!
Bonus Tip: How do I prevent mistletoe from spreading?
Mistletoe spreads via birds dropping seeds—so limit bird perches near infested trees. Also, sterilize tools between trees and dispose of clippings (don’t compost them!). Healthy trees with strong canopies resist infestations better, so prune for airflow and sunlight. Prevention is always easier than a cure!
Wrapping up and next steps
Removing mistletoe from trees doesn’t have to be a struggle—with the right tools, patience, and care, you can protect your host tree while keeping your space mistletoe-free.
Whether you opt for manual pruning, herbicide, or professional help, always prioritize the health of the tree by avoiding unnecessary damage. Your efforts will not only restore balance but also ensure your tree thrives for years to come!
Now that you’re equipped with the know-how, take action—schedule a pruning session on a calm day, and enjoy a healthier, happier tree! 🌿 For larger infestations or tricky trees, don’t hesitate to consult a local arborist for expert guidance.