
Pruning
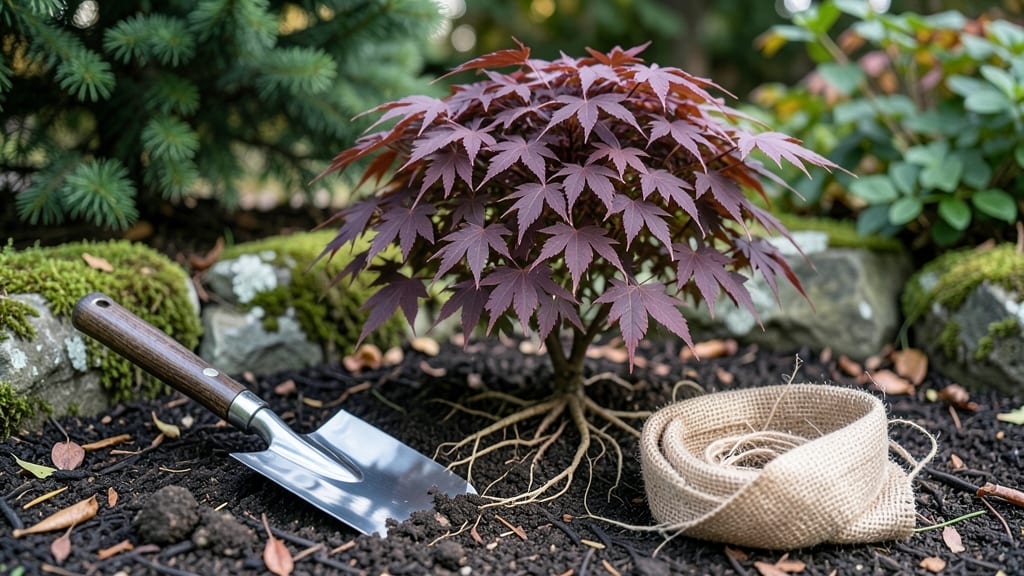
Relocating a small tree can feel like moving a stubborn friend—it’s all about timing and patience. 🌳 The right approach turns what seems risky into a smooth process, even for beginners.
I’ve moved oak saplings and fruit trees without losing a single branch, and the secret lies in understanding when to act and how to handle the roots.
Start by picking the best season—early spring or fall when trees are dormant but still have energy to recover. Gather your tools: a sharp spade, burlap, rope, and a wheelbarrow for hauling.
The key is digging a root ball that’s twice as wide as the tree’s trunk, keeping as many roots intact as possible. Stress-free transplanting begins with careful prep.
After moving, water deeply for the first two weeks to help roots establish, and prune any damaged branches immediately. Monitor for wilting or yellowing leaves—these are signs of shock.
With the right care, your tree will settle in faster than you think, and you’ll have a thriving transplant that outlasts store-bought saplings.
This method works for trees up to 8 feet tall and 3 inches in diameter. Whether you’re fixing a landscape mistake or expanding your garden, these steps ensure your tree survives the move—and even thrives. Let’s get started!
📚 In This Guide
- What you need
- Instructions
- Tips and common mistakes
- Wrapping up and next steps
What you need
- ● Shovel or spade: A sharp, curved shovel (18–24 inches wide) for digging clean trenches.
- ● Pruners or loppers: Bypass pruners (for small branches) or loppers (for thicker stems).
- ● Garden fork or trowel: Helps loosen compacted soil around roots.
- ● Wheelbarrow or tarp: For transporting soil and the tree.
- ● Burlap or tree sack: 1–2 feet wider than the root ball to secure the tree during transport.
- ● Twine or rope: Non-synthetic (like jute) to tie the burlap.
- ● Watering can or hose: With a gentle spray nozzle for post-relocation care.
- ○ Mulch (optional but recommended): 2–3 inches of organic mulch (wood chips or straw) to retain moisture.
- ● Timing: Relocate trees in early spring or fall (avoid extreme heat or frost).
- ● New planting site: Prep a hole twice as wide as the root ball and amend soil with compost if needed.
- ○ Staking (optional): 2–3 stakes + soft ties if the tree is top-heavy or in windy areas.
- ○ Root stimulator (optional): A mycorrhizal fungus powder to boost root growth.
Step-by-Step guide for moving a small tree without damaging it
Here's how I've successfully transplanted young trees—minimal shock, maximum survival.
🪴 Step 1: Choose the Right Time and Prepare the New Location
Early spring or fall are ideal—when temperatures are mild and the tree isn't actively growing. Avoid transplanting during heatwaves or frost, as extreme conditions stress roots further. Pick a day with cloudy skies or gentle rain to reduce transplant shock.
Dig your new planting hole twice as wide as the root ball but only as deep as the container or root system. Loosen the soil at the bottom of the hole with a shovel or garden fork to encourage root spread. I always add a handful of compost to the backfill soil—this jumpstarts root growth in the new spot.
✂️ Step 2: Prune and Prepare the Tree for Transport
One to two weeks before moving, prune back any damaged or crossing branches to reduce stress. For trees under 6 feet tall, you can cut back up to 25% of the canopy—this helps balance the root system you're about to disturb. Avoid heavy pruning right before transplanting, as it competes with root recovery.
Water the tree deeply 2-3 days before moving to ensure roots are hydrated. You'll know it's ready when the soil feels damp 6 inches down. Wrap the root ball in burlap or a tarp secured with twine if you're moving it more than 50 feet. This keeps roots moist and prevents soil loss during transport.
🌱 Step 3: Dig Carefully and Preserve the Root Ball
Mark the tree's drip line with stakes to guide your digging. Use a shovel or spade to cut a clean 12-inch deep trench around the tree, 6-8 inches outside the root ball edge. Lift the tree gently by the base—never pull by the trunk—and support the root ball with your hands or a board. The goal is to keep as much soil intact as possible.
If the root ball is loose, wrap it in burlap or a tarp, securing it with twine. For container-grown trees, remove the pot and inspect roots—if they're circling, gently tease them apart with your fingers. This prevents girdling as the tree establishes in its new home. Water the root ball lightly before moving to keep soil cohesive.
💧 Step 4: Plant and Stabilize the Tree in Its New Home
Lower the tree into the prepared hole, ensuring the top of the root ball sits 1-2 inches above ground level. This prevents soil from settling and burying the trunk over time. Backfill with the amended soil you set aside, tamping gently to remove air pockets. Avoid compacting too firmly—roots need loose soil to spread.
Create a wide watering basin around the base by mounding soil to direct water toward the roots. Water deeply until moisture seeps 6 inches down, then add a 2-3 inch layer of mulch (keeping it 6 inches away from the trunk). This retains moisture and regulates soil temperature. Stake the tree only if necessary—over-staking can damage the trunk as it grows.
☀️ Step 5: Monitor and Support Recovery
Water the tree every 2-3 days for the first 4-6 weeks, checking that the soil stays consistently moist but not soggy. You'll see new growth in 6-8 weeks if the transplant was successful—look for fresh leaves along the branches as a sign of recovery. Avoid fertilizing during this time; new roots need energy to establish, not extra nutrients.
Shade the tree with a temporary cloth or burlap wrap if temperatures exceed 85°F for more than a few days. This reduces stress as the tree adjusts. After 3 months**, you can gradually remove any protective coverings. If leaves yellow or wilt, it's often a sign of overwatering—let the soil dry slightly between waterings.
Tips & tricks for perfect small tree transplanting
These insider tricks will help your transplanted tree thrive instead of struggle.
Timing is Everything: Early spring or fall isn't just ideal—it's critical. In Step 1, when you're preparing the new location, check your local weather forecast for the next week. If temperatures are predicted to dip below 45°F or climb above 80°F during your transplanting window, delay the move. Trees transplant best when they can focus all energy on root establishment without fighting temperature extremes. I've seen trees that survived the move but struggled with slow recovery because we transplanted during a heatwave.
Root Ball Protection: In Step 3, when you're digging around the tree, pay special attention to preserving that root ball. The key is to keep it intact—even if it means cutting through some roots. If you notice any circling roots in container-grown trees, gently separate them with your fingers (not a knife!) to prevent girdling. For extra protection during transport, I like to use a sturdy plastic nursery pot slipped over the root ball and secured with twine. This keeps everything contained and prevents soil loss better than burlap alone.
Watering Wisdom: The watering instructions in Step 4 and Step 5 are crucial, but here's what nobody tells you: After transplanting, water deeply but slowly. Use a soaker hose or watering can with a thin spout to avoid creating channels in the soil. In the first 4-6 weeks, check soil moisture by sticking your finger 2-3 inches down—if it feels dry, it's time to water. Overwatering is just as harmful as underwatering during this critical recovery period. I keep a small notebook by my garden tools to track watering dates and amounts.
Shade Strategy: When temperatures exceed 85°F, that's your warning sign from Step 5. But here's the practical tip: Don't just throw any old shade cloth over your tree. Use a lightweight, breathable fabric that allows 30-50% sunlight through. You can also create shade by placing a large cardboard box or even a white sheet on stakes around the tree. The goal is to reduce heat stress while still allowing some light for photosynthesis. I've seen trees wilt dramatically in direct sun after transplanting, only to recover beautifully with proper shade.
Pro Tips for Relocate A Small Tree
- These insider tricks will help your transplanted tree thrive instead of struggle.
- Timing is Everything: Early spring or fall isn't just ideal—it's critical.
- Root Ball Protection: In Step 3, when you're digging around the tree, pay special attention to preserving that root ball.
Frequently asked questions
Got questions about relocating a small tree? You’re not alone—tree moving can feel tricky! Here are answers to the most common concerns to help you tackle the job with confidence.
When is the best time of year to move a small tree?
The ideal window is late fall or early spring—when the tree is dormant but still has moisture in its roots. Avoid extreme heat or frost, as these can stress the tree further. If you must move in summer, do it on a cool, cloudy day and water thoroughly before and after.
How do I know if my tree is too big to relocate?
Stick to trees under 6–8 feet tall with a trunk diameter of 2–3 inches or less. Larger trees risk severe root damage, making survival unlikely. For bigger specimens, consult an arborist—they specialize in professional tree moving techniques like air spading or root ball excavation.
What if my tree’s leaves turn brown after moving?
Brown leaves are normal for 1–2 weeks post-relocation as the tree adjusts. If browning persists beyond 3–4 weeks, check for underwatering, root damage, or transplant shock. Prune any dead branches and keep the soil consistently moist (but not soggy) to aid recovery.
Can I move a tree without digging up the entire root ball?
For small trees, you can use the “root pruning” method: Dig a trench around the tree 6–12 inches from the trunk, then gently loosen roots with a spade. This reduces stress compared to a full root ball. However, bare-root trees (no soil) are riskier—always include at least 50% of the root zone for best results.
How long should I wait before fertilizing after moving?
Hold off on fertilizer for 6–8 weeks to avoid burning the tree’s stressed roots. Instead, focus on watering deeply 2–3 times per week and mulching (2–3 inches of organic mulch) to retain moisture. Once new growth appears, apply a balanced, slow-release fertilizer in early spring.
Do I need special equipment, or can I DIY with basic tools?
For small trees, basic tools like a shovel, pruners, wheelbarrow, and burlap suffice. Rent a tree spade (if available) for cleaner root extraction. Avoid heavy machinery—gentle handling prevents root tears. If the tree is near a sidewalk or driveway, a hand tamper or rubber mallet helps loosen stubborn soil.
Still unsure? Drop your specific scenario in the comments—we’re happy to help troubleshoot!
Wrapping up and next steps
Relocating a small tree doesn’t have to be a daunting task—with the right tools, timing, and care, you can give your tree a fresh start in its new home! 🌱 Remember to plan ahead, dig carefully, and support your tree as it recovers.
Whether you’re revamping your garden or rescuing a struggling sapling, your effort will pay off in lush, healthy growth.
Ready to take the next step? Monitor your tree’s progress over the next few weeks, and don’t hesitate to adjust your care routine as needed. With patience and a little green thumb love, your transplanted tree will thrive—just like you envisioned! 🌿