
Planting
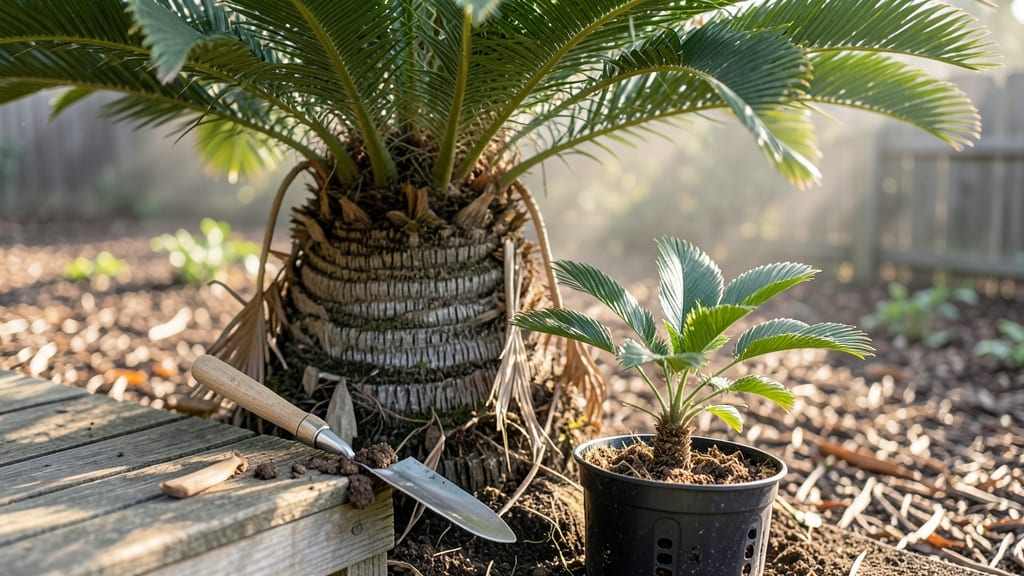
Planting a palm tree turns your yard into a slice of paradise—if you follow the right steps. 🌴 I’ve planted three different species, and the key to success isn’t just digging a hole; it’s matching the palm to your climate, prepping the soil, and giving those delicate roots the perfect start.
My first attempt nearly died because I ignored the drainage—don’t make that mistake.
The process is simpler than it looks, especially with the right tools: a shovel, compost, mulch, and a sturdy stake for support. You’ll need a hole twice as wide as the root ball but no deeper, plus a well-draining soil mix if your native dirt is heavy clay.
Most palms thrive in full sun, but some varieties tolerate partial shade—just check your species’ needs first.
Once planted, your palm will reward you with lush fronds and a tropical vibe that lasts for decades. Within a year, you’ll see new growth, and with proper care, it’ll become the centerpiece of your landscape. The secret? Watering deeply but infrequently and avoiding over-fertilizing in the first season.
This method works for dwarf palms in containers or towering canary palms in the ground. Just adjust spacing—give mature palms at least 10 feet between them—and you’re set for years of low-maintenance beauty. Ready to get started?
📚 In This Guide
- What you need
- Instructions
- Tips and common mistakes
- Wrapping up and next steps
What you need
- ● Palm tree sapling – Choose a healthy, container-grown specimen (3–5 gallons) or a balled-and-burlapped (B&B) tree for mature varieties.
- ● Shovel or digging spade – A wide, flat-edged spade (18–24" wide) works best for digging the planting hole.
- ● Garden hose or bucket – For deep watering (at least 5 gallons per watering session).
- ○ Well-draining soil mix – Optional but ideal for sandy or clay-heavy soils: Mix 1 part native soil + 1 part compost + 1 part perlite/sand (for drainage).
- ○ Mulch (optional but recommended) – 3–4 inches of organic mulch (pine bark, wood chips) to retain moisture and regulate soil temp.
- ● Staking kit (if needed) – Only for tall or top-heavy palms (e.g., Canary Island Date Palm). Use 2–3 stakes + soft tree ties.
- ● Fertilizer (slow-release) – A balanced palm fertilizer (6-6-6 or 8-2-12) with micronutrients (like magnesium and manganese). Apply sparingly—too much can burn roots!
- ● Soil pH test kit – Palms prefer slightly acidic to neutral (5.5–7.0). Adjust with lime (to raise pH) or sulfur (to lower) if needed.
- ● Root stimulator gel – A mycorrhizal inoculant can boost root growth for container-grown palms.
- ● Epsom salt (magnesium sulfate) – Helps prevent yellowing fronds (apply 1 tbsp per gallon of water monthly during dry spells).
- ● Palm tree support collar – Protects the trunk from mulch or stake damage (especially for young trees).
- ● Drip irrigation system – Automates watering for consistent moisture, critical in the first year.
Step-by-step instructions for planting a palm tree
Here’s how I’ve successfully planted palms in various climates—key is timing and soil prep.
🪴 Step 1: Choose the Right Location and Dig the Hole
Palms thrive where they get full sun (6+ hours daily) and shelter from strong winds. I always scout the spot first—look for natural drainage and avoid low areas where water pools. The hole should be twice as wide as the root ball but only as deep as the container’s drainage holes.
Use a shovel to loosen the soil at the bottom—palms hate compacted roots. If your soil drains poorly, mix in 1-2 inches of coarse sand or gravel at the hole’s base. This prevents root rot, which is the #1 killer of newly planted palms. Tap the sides of the hole gently to settle the soil before planting.
🌱 Step 2: Remove the Palm from Its Container and Prepare for Planting
Water the palm 24 hours before transplanting—this keeps the root ball moist and easier to handle. Turn the container on its side and gently squeeze the sides while tapping the bottom. If the palm resists, run a knife around the edges to loosen it. Never pull by the trunk; you’ll damage the roots.
Inspect the roots—healthy ones are white or light tan. If you see black, mushy roots, trim them away with sterilized shears. This is your chance to fix any issues before planting. Place the palm in the hole so the top of the root ball sits 1-2 inches above ground level. Palms settle over time, so starting slightly high prevents sinking.
💧 Step 3: Backfill and Water Deeply
Fill the hole with native soil, pressing lightly as you go to remove air pockets. Don’t compact too hard—you’ll crush the roots. I like to add a handful of slow-release fertilizer (like 10-10-10) mixed into the backfill for a nutrient boost. Water the hole first to help settle the soil around the roots.
After backfilling, water deeply until the soil is saturated—aim for 1-2 gallons depending on the palm’s size. You’ll know it’s enough when water runs out the bottom of the hole. Mulch the base with 2-3 inches of organic mulch, keeping it 6 inches away from the trunk to prevent rot. Mulch retains moisture and regulates soil temperature.
☀️ Step 4: Stake and Protect for the First Year
Unless your palm is naturally sturdy (like a dwarf variety), stake it for support. Use 2-3 bamboo stakes tied loosely with soft fabric strips—tight ties can girdle the trunk as it grows. Angle the stakes outward to form a tripod, then tie them together above the palm’s crown. This gives flexibility for wind without restricting growth.
For the first 3-6 months, check the soil weekly. Water when the top 2-3 inches feel dry. Palms are drought-tolerant once established, but new roots need consistent moisture. Avoid overhead watering—it encourages fungal diseases. Instead, water at the base slowly to encourage deep root growth.
Tips & tricks for planting a thriving palm tree
Here's what I've learned from planting palms in everything from sandy Florida soil to heavy clay—these little details make all the difference.
Location Scout Like a Pro: Before digging, walk your property at different times of day to track sunlight patterns. Palms need that full sun (6+ hours), but afternoon shade helps in hot climates. I once planted a palm in what I thought was perfect morning sun—turns out it got blasted by afternoon heat, and the fronds started browning after just 6 weeks. The moral? Observe for at least 24 hours before committing to a spot.
Root Inspection is Non-Negotiable: That 24-hour pre-watering? It's not just about making removal easier—it lets you properly inspect the roots. Healthy roots should be white or light tan. If you see black, mushy roots, trim them immediately with sterilized shears. I've seen people skip this step and their palm struggles for months because of hidden rot. Think of it as a health check before the big move.
Mulch Placement Matters More Than You Think: When you add that 2-3 inches of organic mulch, keep it 6 inches away from the trunk—this prevents rot while still regulating soil temperature. I've seen beginners pile mulch right against the trunk, which creates moisture traps that lead to fungal diseases. Also, use only organic mulch like wood chips or shredded bark—plastic or inorganic mulches can suffocate roots over time.
Watering Wisdom for New Roots: After planting, those first 3-6 months are critical. Water when the top 2-3 inches of soil feel dry, but don't just splash water everywhere. Use a hose with a gentle spray nozzle or soaker hose to water at the base slowly. This encourages deep root growth rather than shallow, weak roots. I've had palms established in just 6 months using this method, while others took twice as long because of poor watering habits.
Pro Tips for Plant A Palm Tree
- Here's what I've learned from planting palms in everything from sandy Florida soil to heavy clay—these little details make all the difference.
- Location Scout Like a Pro: Before digging, walk your property at different times of day to track sunlight patterns.
- Root Inspection is Non-Negotiable: That 24-hour pre-watering?
Frequently asked questions
When is the best time to plant a palm tree?
The ideal time is during the cooler months—spring or early fall—when temperatures are mild (60–80°F). This gives roots time to establish before extreme heat or cold sets in. Avoid planting in summer’s scorching heat or winter’s frost, which can stress young palms.
Can I plant a palm tree in winter?
It’s possible in mild-winter climates (USDA Zones 9–11), but risky in colder areas. If you must plant in winter, choose a smaller, potted palm and protect it with burlap or frost cloth for the first few weeks. Monitor for frost damage and water sparingly to prevent root rot.
How close to my house can I plant a palm tree?
Keep it at least 10–15 feet away from structures to avoid root damage or foundation issues. Larger palms (like Canary Island palms) need 20+ feet of clearance. Check local HOA rules—some areas restrict palm types or sizes near homes.
What if my palm tree isn’t growing after planting?
Check these fixes:
- Watering issues: Too much (root rot) or too little (drought stress). Water deeply 2–3 times weekly for the first year.
- Soil problems: Amend heavy clay with compost or sand for better drainage.
- Sunlight: Most palms need full sun (6+ hours/day). Move it if shaded by buildings or trees.
- Pests: Inspect for spider mites or palm weevils. Treat with neem oil or insecticidal soap if needed.
Are there dwarf palm tree alternatives for small yards?
Try these space-saving options:
Palm Type
Mature Height
Best For
Pygmy Date Palm
6–10 feet
Containers, patios, or small gardens
Mediterranean Fan Palm
10–15 feet
Urban landscapes, courtyard planting
Dwarf Palmetto
4–6 feet
Borders, foundation plantings, or pots
These thrive in USDA Zones 8–11 and add tropical flair without the bulk!
Wrapping up and next steps
Planting a palm tree is a rewarding way to bring a touch of tropical paradise to your outdoor space! 🌴 By following these steps—choosing the right variety, preparing the soil, digging the perfect hole, and providing ongoing care—you’ll set your palm up for lush, long-term growth.
Remember, patience and consistency are key, especially during those early weeks as your tree establishes roots.
Now that you’re armed with pro tips, why not take the next step? Research local palm species that thrive in your climate, or browse nurseries for the perfect specimen. Happy planting—your future shady retreat awaits! 🌿