
Propagation
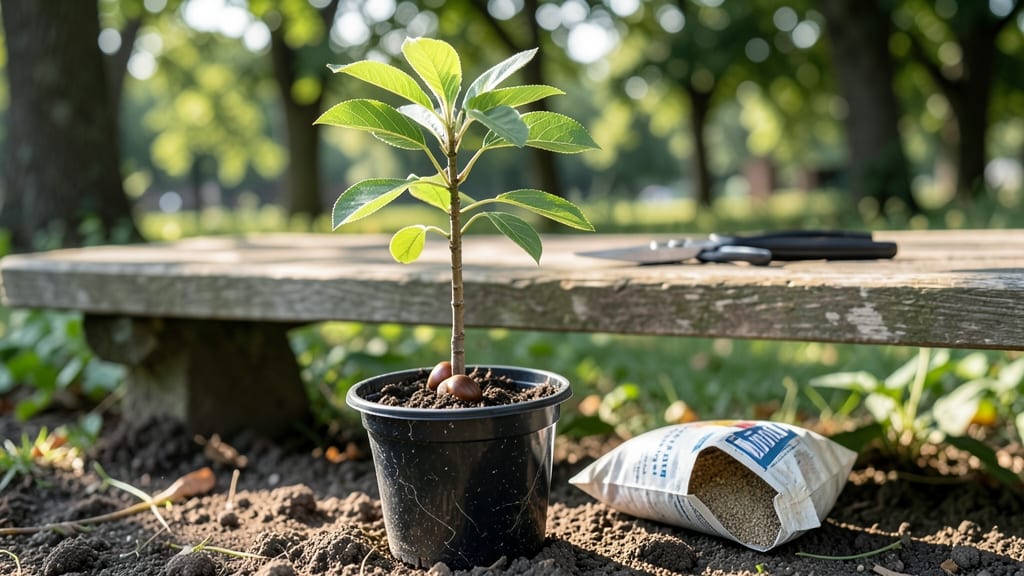
Planting a chestnut tree from seed isn’t just about sticking it in the ground—it’s about breaking dormancy the right way. 🌱 I’ve learned that skipping the layered chill trick means waiting years (or never seeing) those iconic spiky husks.
The secret lies in mimicking nature’s slow, cold preparation, which turns a stubborn seed into a eager sprout in just a few months.
You’ll need three things: fresh chestnuts (not store-bought), a damp paper towel or peat moss, and a little patience. The process starts indoors in late fall, where seeds spend 8-12 weeks in the fridge, then another 4-6 weeks in a warm, sunny spot before transplanting.
No fancy equipment—just a clear plastic bag and a refrigerator shelf.
What you’ll end up with is a 3-4 foot sapling by its third year, ready to outcompete weeds and start storing nutrients in its roots. The first real leaves appear within weeks of planting, and by year five, you’ll see those telltale fuzzy buds—proof the long wait was worth it.
This method works for American, European, and horse chestnuts, though timing varies slightly by species. For colder climates, plant outdoors in early spring; warmer zones can start seeds in late winter. The key? Consistency—don’t rush the chill period, and keep soil evenly moist but never soggy.
📚 In This Guide
- What you need
- Instructions
- Tips and common mistakes
- Wrapping up and next steps
What you need
- ● Fresh chestnut seeds: 3–5 seeds (ensure they’re not roasted or store-bought—fresh, raw nuts only!)
- ● Layered chill setup: 1 small container (e.g., plastic bag, paper towel-lined tray, or seed-starting pot with drainage)
- ● Moist peat moss or coco coir (2–3 inches deep)
- ○ Optional: Vermiculite or perlite (mix 50/50 with peat moss for better aeration)
- ● Refrigerator or cold stratification space: A standard fridge (34–40°F / 1–4°C) for 60–90 days
- ● Planting pot or nursery bed: 6–8 inch pot or well-draining soil bed (for transplanting after stratification)
- ● Basic gardening tools: Small hand trowel or spoon
- ● Spray bottle (for gentle watering)
- ● Twine or rubber bands (to secure bags/trays)
- ● Growth hormone gel: (e.g., Rootone) to boost germination speed
- ● Humidity dome or plastic wrap: To maintain moisture during stratification
- ● pH test kit: Ideal soil pH for chestnuts is slightly acidic (6.0–7.0)
- ● Slow-release fertilizer: (e.g., 10-10-10) for post-transplant care
- ● Tree stake or support: For young saplings (1–2 feet tall)
Step-by-Step instructions for growing chestnut trees from seed
Here's the foolproof method I use to break through chestnut seeds' stubborn dormancy.
🌱 Step 1: Harvest and Prepare the Seeds
Collect fresh chestnut seeds in late fall after they've fallen naturally. The outer husk should be fully brown and cracked open—this means the seed inside is mature and ready. Remove the seeds from their husks and rinse them thoroughly under cool water to remove any remaining debris or mold. Let them air-dry completely for 2-3 days in a well-ventilated area.
Here's the thing—chestnut seeds have a thick, hard shell that blocks water and oxygen. You'll need to break this dormancy before germination can happen. I like to use a sharp knife to make a small slit (about ¼ inch long) in the rounded end of each seed. This doesn't damage the seed inside but lets moisture penetrate. Handle them carefully—chestnut seeds are surprisingly delicate despite their tough exterior.
💧 Step 2: Apply the Layered Chill Trick
Fill a container with a mix of equal parts peat moss and coarse sand—this creates ideal drainage while retaining moisture. Plant each seed about 2 inches deep in the mix, spacing them 3-4 inches apart. Water gently until the soil feels evenly moist but not soggy. The key to this method is patience: chestnut seeds need a period of cold stratification to mimic natural winter conditions.
Place the container in a refrigerator or other cool space (maintain 35-45°F) for 8-12 weeks. Check the seeds weekly—keep the soil consistently moist by misting lightly when the top inch feels dry. You won't see any signs of life yet, but this cold treatment is absolutely critical. Skipping this step means seeds may never germinate, no matter how long you wait.
☀️ Step 3: Move to Warmth and Light
After the cold treatment, remove the container from the refrigerator and place it in a warm, bright location (around 65-75°F). Chestnut seeds germinate best with indirect light at first—direct sun can scorch the tender sprouts. You'll notice the first signs of germination in 2-4 weeks: a small white root will push through the soil, followed by the seedling's first leaves.
Once you see the first true leaves (they'll look like small, rounded leaflets), it's time to transplant each seedling into its own 4-inch pot filled with a mix of 60% potting soil and 40% perlite. This prevents overcrowding and gives roots room to establish. Water gently after transplanting to settle the soil around the roots—don't drown them, but make sure they're well-hydrated for their first week in their new home.
🌿 Step 4: Gradually Acclimate Seedlings
Chestnut seedlings grow slowly at first, but they're tough once established. Keep them in pots for 1-2 years before transplanting outdoors, as they develop a strong root system. During this time, place them in a location with partial shade (they'll get plenty of sun later). Water when the top inch of soil feels dry, but avoid soggy conditions—chestnut roots rot easily if overwatered.
Here's where it gets fun—watch the seedlings develop their characteristic lobed leaves. In their second year, you'll see the first signs of the tree's mature form. When they're ready to move outdoors, choose a spot with full sun and well-draining soil. Chestnut trees have deep roots, so give them plenty of space—they'll grow to 50-70 feet tall at maturity. Plant in early spring for the best establishment.
Tips & tricks for planting chestnut trees from seed
These simple tricks will help you break through chestnut seeds' stubborn dormancy and give your seedlings the best start possible.
Seed Preparation: When making that ¼-inch slit in Step 1, work on a clean cutting surface like a wooden board—it gives you better control than a countertop. I like to use a small paring knife with a sharp tip to avoid crushing the seed. After slitting, place the seeds on a paper towel to dry for 30 minutes before planting. This extra step prevents mold from forming during the cold stratification period.
Cold Stratification: The 8-12 week cold treatment in Step 2 is non-negotiable, but here's how to make it foolproof: Use a clear plastic container with a lid for your peat moss-sand mix. This lets you monitor moisture levels without opening the container, which can disrupt the cold treatment. Place a small dish of water inside the container to maintain humidity—chestnut seeds need consistent moisture during stratification.
Germination Timing: In Step 3, when you move seeds to warmth, place the container under a grow light if you don't have a bright windowsill. Chestnut seedlings need 12-14 hours of light daily, and grow lights provide consistent illumination. Watch for the first white root in 2-4 weeks—this is your signal to start checking daily. The root will appear before you see any leaves, so don't be surprised if you see soil movement before anything emerges above ground.
Transplanting: When transplanting to 4-inch pots in Step 3, use your finger to create small holes in the soil mix before placing each seedling. This prevents root damage and helps establish the seedlings faster. After transplanting, place the pots in a humidity dome (a clear plastic bag with holes) for the first week to create a mini greenhouse effect. Remove the dome gradually over 3-4 days to avoid shocking the tender seedlings.
Pro Tips for Plant A Chestnut Tree From Seed
- These simple tricks will help you break through chestnut seeds' stubborn dormancy and give your seedlings the best start possible.
- Seed Preparation: When making that ¼-inch slit in Step 1, work on a clean cutting surface like a wooden board—it gives you better control than a countertop.
- Cold Stratification: The 8-12 week cold treatment in Step 2 is non-negotiable, but here's how to make it foolproof: Use a clear plastic container with a lid for your peat moss-sand mix.
Frequently asked questions
Got questions?
Here are answers to the most common ones about growing chestnut trees from seed—because even pros need a little extra help sometimes!
How long does it take for chestnut seeds to sprout?
With the layered chill method, germination can take 3 to 6 months. Patience is key—some seeds may sprout sooner, while others need extra time. Keep the soil moist and warm (around 70°F) to encourage growth. If nothing happens after 6 months, gently check for rot or mold.
Can I plant chestnut seeds directly in the ground without stratification?
Not recommended! Chestnut seeds need cold stratification to break dormancy. Planting them directly in the ground without chilling will likely result in little to no germination. The layered chill method mimics winter conditions, giving seeds the best shot at success.
How do I know if my chestnut seed is viable?
A healthy chestnut seed should be plump, firm, and free of mold. Tap it gently—if it sounds hollow, it’s likely empty. For extra assurance, soak a few seeds in water for 24 hours; viable ones will sink. Discard any seeds that float or smell foul.
What’s the best time of year to start the layered chill process?
Start in early fall (September–October) to mimic natural winter conditions. If you miss that window, you can begin anytime—just ensure the seeds get at least 3 months of cold treatment before planting. Spring planting works too, but stratification should still happen first.
Why are my chestnut seedlings dying after sprouting?
Common culprits include overwatering (root rot), underwatering, or pests. Ensure well-draining soil and water only when the top inch feels dry. Check for aphids or fungal spots—treat with neem oil if needed. If seedlings wilt suddenly, they may need more sunlight or better airflow.
Can I grow a chestnut tree from a store-bought chestnut?
Yes! Just ensure it’s a true chestnut (Castanea spp.), not a candied or roasted one. Fresh, raw seeds from a tree (or a reputable supplier) work best. Avoid hybrid varieties like "Japanese chestnuts," as they may not grow true from seed.
Wrapping up and next steps
Growing a chestnut tree from seed is a rewarding journey that combines patience with the joy of nurturing life!
With the layered chill trick and proper care, you’ll soon see those first sprouts break through—proof that your effort is paying off. 🌱 Once your seedling is strong enough, consider transplanting it into a permanent spot in your yard, where it can thrive for decades and even provide delicious nuts in time.
Now that you’re armed with knowledge, why not start today? Grab those chestnuts, follow the steps, and watch your little tree grow into a mighty shade provider and future harvest! 🌳