
Pruning
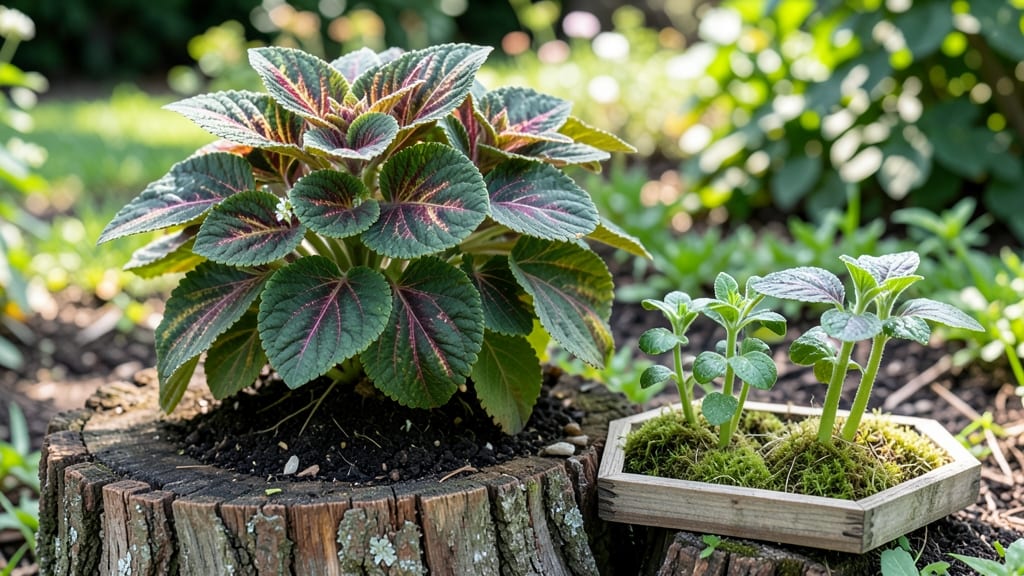
That hollowed-out tree stump in your yard isn’t dead weight—it’s a vertical garden waiting to happen. 🌿 I turned a rotting oak stump into a thriving planter bursting with ferns and impatiens, and now it’s the centerpiece of my shady patio.
The best part? You don’t need fancy supplies, just a few basic tools and a little creativity to breathe new life into what was once an eyesore.
Start by cleaning out the stump’s center completely—this is your planting space. Line the inside with a heavy-duty plastic liner to prevent soil loss, then add a mix of potting soil and compost for drainage and nutrients.
For extra flair, paint the stump’s exterior with weatherproof paint or carve simple designs into the wood before sealing it. The possibilities for customization are endless, from rustic charm to bold colors.
What you’ll end up with is a self-watering planter that stays moist longer and thrives in spots where regular containers struggle. Imagine trailing ivy spilling over the edges or fragrant herbs within arm’s reach—it’s like having a tiny forest growing straight from your yard.
Plus, it’s a conversation starter that turns heads at garden tours.
Works for any stump size, whether it’s a small maple remnant or a massive oak stump left after a storm. The key is matching your plant choices to the stump’s light conditions—shade-loving plants for dark corners, sun-tolerant varieties for brighter spots.
Ready to turn that stump into a garden statement piece?
📚 In This Guide
- What you need
- Instructions
- Tips and common mistakes
- Wrapping up and next steps
What you need
- ● Tree stump: A freshly cut stump (preferably within the last few days) for best results.
- ● Drill: A 1/2-inch or 5/8-inch wood bit (for drainage holes).
- ● Measuring tape or ruler (to mark planting holes evenly).
- ● Potting soil or well-draining mix: 10–20 lbs (depending on stump size).
- ● Plants: Choose small, shallow-rooted varieties like succulents, ferns, or herbs (e.g., sedum, moss, or thyme).
- ● Watering can or spray bottle (for gentle hydration).
- ○ Optional: Moss sheets (for a lush, natural look).
- ● Waterproof liner (to prevent soil spillage).
- ● Decorative mulch or pebbles (for aesthetics).
- ● Stump sealer (if preserving wood long-term).
Step-by-Step instructions for creating tree stump planters
Turn that eyesore into a thriving garden with this simple, creative project.
🪴 Step 1: Clean and Prepare the Stump
Start by removing any loose bark or debris from the stump using a pruning saw or chisel. I like to work with a clean surface so the planter looks polished and the plants have direct contact with the wood. Wear gloves—old stumps can have splinters or rough edges that bite back.
Next, drill ¼-inch drainage holes every 3-4 inches around the stump's perimeter. This prevents waterlogging and keeps roots healthy. I use a 16-inch wood bit and drill slowly to avoid splitting the wood. If the stump is large, focus on the outer 6-8 inches where you'll plant.
Finally, sand any rough edges with 80-grit sandpaper to prevent splinters. A smooth stump is safer for planting and easier to maintain. Wipe away dust with a damp cloth before moving to the next step.
💧 Step 2: Line the Stump with Waterproofing
Lay a plastic nursery liner or heavy-duty trash bag over the stump, ensuring it covers the bottom and sides completely. This keeps moisture from seeping into the wood and rotting it over time. I tuck the edges into the center of the stump and overlap seams by 2 inches to prevent leaks.
Cut a hole in the center of the liner large enough to fit your plants. This allows roots to grow into the soil while keeping the wood dry. Secure the liner with landscape staples or zip ties—just don’t over-tighten, or you’ll tear the plastic.
Here’s the thing—if your stump has deep crevices, fold extra liner into them to create pockets for soil. This maximizes planting space and helps smaller plants thrive. A well-lined stump holds 2-3 gallons of soil, depending on size.
🌱 Step 3: Fill with Soil and Plant
Fill the liner with a mix of potting soil and compost (I use a 50/50 blend) to ensure good drainage and nutrients. Press the soil gently into the crevices so it stays in place. Leave ½ inch of space at the top to prevent spills when watering.
Choose plants that thrive in shallow containers, like sedum, ferns, moss, or small succulents. I like to group plants by water needs—moisture-loving ferns on one side, drought-tolerant sedum on the other. Space them 2-3 inches apart to allow room for growth.
Water the soil until it’s evenly moist but not soggy. A light misting helps settle the soil around roots without disturbing the plants. If the stump tilts, prop it up with bricks or landscape blocks to keep it stable—nothing ruins a planter faster than toppling.
☀️ Step 4: Position and Maintain
Place your stump planter in a spot that gets 4-6 hours of sunlight daily, depending on the plants. Ferns and moss love shade, while sedum and succulents need full sun. I often position mine near a patio or garden path where it adds visual interest.
Water every 2-3 days in hot weather, checking that the soil stays moist but not waterlogged. Overwatering is the fastest way to kill plants in a stump—wood doesn’t drain like regular pots. A drip irrigation line or self-watering globe makes maintenance easier.
Fertilize lightly once a month with a balanced liquid fertilizer (10-10-10). Too much fertilizer can burn roots in confined spaces. I also add a slow-release pellet to the soil at planting time for steady nutrition.
Tips & tricks for perfect tree stump planters
Here's what nobody tells you about turning stumps into stunning planters—tricks that'll make all the difference between a sad eyesore and a thriving garden statement.
Drainage Hack: When drilling those ¼-inch holes every 3-4 inches in Step 1, I like to space them in a slight downward angle toward the center. This creates a natural channel for excess water to flow toward the hole, preventing pooling. I also recommend drilling a few extra holes near the bottom if your stump has deep crevices—this keeps roots from sitting in damp wood.
Liner Mastery: For Step 2, don't just use any old trash bag—opt for a heavy-duty contractor bag or pond liner if you have one. These materials are thicker and won't tear when you're pressing soil into crevices. I also cut the hole for plants slightly larger than needed (about ¼-inch bigger) so roots have room to spread without crowding.
Soil Strategy: In Step 3, that 50/50 blend of potting soil and compost is perfect, but here's the thing: add a handful of perlite or vermiculite to the mix for even better drainage. The wood absorbs moisture differently than regular pots, so extra aeration prevents soggy roots. I also like to add a thin layer of orchid bark at the bottom before the soil—it helps with drainage while adding texture.
Plant Placement: When arranging your sedum, ferns, or moss in Step 3, place taller plants toward the outer edges of the stump. This creates a natural tiered effect that makes the most of your vertical space. I also like to add a few air plants (like tillandsias) to the sides—they don't need soil and add a unique texture without competing for space.
Pro Tips for Make Tree Stump Planter
- Here's what nobody tells you about turning stumps into stunning planters—tricks that'll make all the difference between a sad eyesore and a thriving garden statement.
- Drainage Hack: When drilling those ¼-inch holes every 3-4 inches in Step 1, I like to space them in a slight downward angle toward the center.
- Liner Mastery: For Step 2, don't just use any old trash bag—opt for a heavy-duty contractor bag or pond liner if you have one.
Frequently asked questions
Got questions about turning tree stumps into planters? You’re not alone! Here are some of the most common queries—and their straightforward answers—to help you get started with confidence.
What’s the best time of year to create a tree stump planter?
The ideal time is late spring or early summer when the weather is warm but not scorching. This gives plants enough time to establish roots before winter. If you’re in a mild climate, fall can also work—just avoid freezing temperatures. Pro tip: Skip winter projects unless you’re using cold-hardy plants like moss or ferns.
Can I use a tree stump planter for vegetables or herbs?
Stump planters are great for shallow-rooted veggies like lettuce, radishes, or herbs (basil, thyme, parsley). Just ensure the stump has enough depth (at least 6–8 inches) and drainage. Avoid heavy feeders like tomatoes or peppers—they’ll outgrow the space. Pro tip: Mix compost into the soil to boost nutrients for edibles!
What if my stump rots or decays before the plants grow?
Don’t worry—stumps naturally decompose, but you can slow it down by sealing the edges with waterproof sealant or lining the inside with plastic sheeting. For faster results, opt for pre-made stump planters (like ceramic or metal liners). If decay happens, repurpose the planter for annuals or moss, which thrive in moist conditions. Pro tip: Check the stump’s stability before planting—if it’s crumbly, reinforce it with stakes.
Are there alternatives if I don’t have a tree stump?
No stump? No problem! Try these creative swaps:
- Mason jars or terracotta pots (hang them vertically for a similar look).
- Old boots or wellingtons (paint them and fill with succulents).
- Pallet gardens (stack pallets and plant directly into the gaps).
- Hanging planters (use macramé or wall-mounted designs).
How do I keep pests out of my stump planter?
Pests like slugs or ants love damp stumps! Prevent them with:
- Adding a layer of coarse gravel at the bottom for drainage (pests hate dry conditions).
- Using copper tape around the edges to deter slugs.
- Choosing drought-tolerant plants (like sedum or lavender) to reduce moisture.
- Avoid overwatering—stick your finger in the soil first!
Wrapping up and next steps
Transforming a tree stump into a thriving planter is not only creative but also a fantastic way to repurpose and rejuvenate your outdoor space! With just a few tools, some patience, and a green thumb, you’ve got everything you need to turn an eyesore into a showstopping garden feature.
Whether you’re a seasoned gardener or a beginner, this project is rewarding and totally doable.
Now that you’re armed with tips and tricks, why not take the next step? Grab those supplies, pick your favorite plants, and let your creativity bloom! Happy planting! 🌱✨