
Size
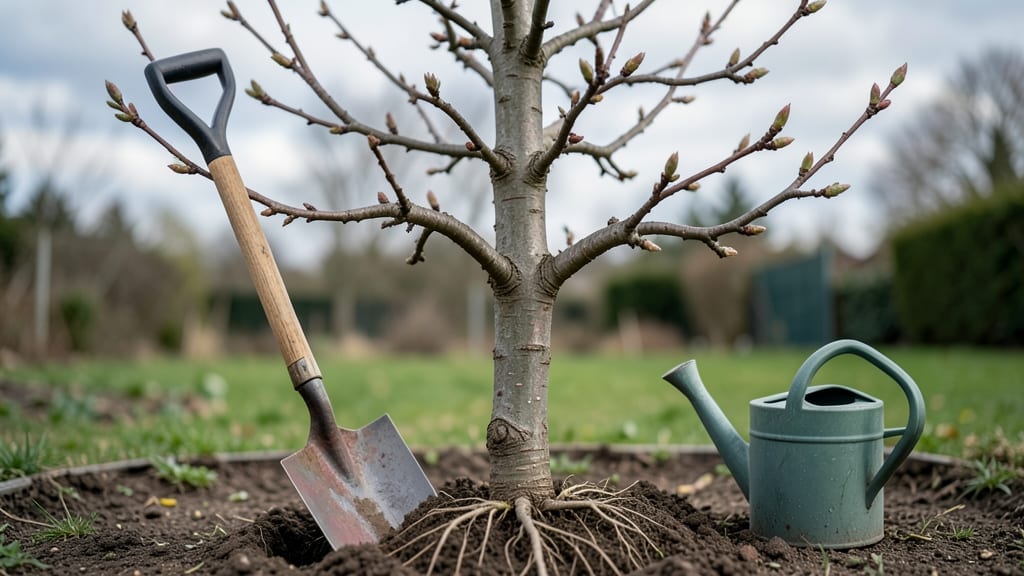
Growing bare root trees isn't just planting—it's unlocking their full potential right from the start. 🌱 I learned the hard way that these dormant plants need special care to establish strong roots before they leaf out.
The key is timing, soil prep, and gentle handling, which turns a $50 tree into a shade-providing giant in just a few years.
You'll need a shovel, compost, mulch, and a sunny spot with well-draining soil. The best time to plant is late fall or early spring when trees are still dormant but about to wake up.
Most bare root trees arrive with their roots wrapped in burlap or burlap-like fabric—keep those roots moist until you're ready to plant.
What you get is a tree that establishes faster than container-grown plants, with fewer transplant shocks. Within a season, you'll see new shoots pushing through the soil, and by year two, that tree will be thriving with minimal effort.
The secret? Proper watering (deep but not soggy) and a little pruning to focus energy on root growth.
Works for fruit trees, shade trees, and even ornamental varieties. Here's exactly how to do it right—no guesswork, just proven results. Let's get those roots in the ground where they belong.
📚 In This Guide
- What you need
- Instructions
- Tips and common mistakes
- Wrapping up and next steps
What you need
- ● Bare root tree(s) – Choose healthy, dormant trees (available in late fall/winter). Check for firm roots and buds.
- ● Shovel or spade – A 10-12 inch wide digging tool works best for most tree sizes.
- ● Garden hose or bucket of water – Keep roots moist before and after planting.
- ● Organic mulch (e.g., wood chips, straw, or pine needles) – 2-3 inches thick to retain moisture and regulate soil temperature.
- ● Well-draining soil or amended native soil – Mix in compost or aged manure (10-20%) for nutrients.
- ○ Tree stakes & soft ties (optional but recommended for young/small trees) – Use 4-6 foot stakes and fabric strips to avoid girdling.
- ● Pruning shears or saw – For trimming damaged roots or branches (sterilize blades with rubbing alcohol).
- ● Gloves & knee pads – Protect your hands and knees during planting!
- ● Root stimulator or mycorrhizal fungi – Boosts root growth (follow package instructions).
- ● Soil moisture meter – Ensures roots stay hydrated post-planting.
- ● Tree guard or protective barrier – Shields young trees from pests or curious critters.
- ● Slow-release fertilizer – Apply 3-4 months after planting for a nutrient boost.
Step-by-Step instructions for planting bare root trees
Here's how I plant bare root trees for maximum survival and rapid growth.
🌱 Step 1: Prepare the Planting Site
Choose a location with well-draining soil and space for mature growth. Dig a hole that's twice as wide as the tree's root ball but only as deep—planting too deep suffocates roots. Use a shovel to loosen the soil another 12 inches beyond the hole's edges to encourage root spread.
If your soil is heavy clay, mix in 2-3 inches of compost into the bottom of the hole. This improves drainage and gives roots an immediate nutrient boost. Tap the soil gently around the edges to remove air pockets while keeping it loose enough for roots to penetrate easily.
🌿 Step 2: Soak the Bare Roots Before Planting
Place the tree in a bucket of water and let the bare roots soak for 1-2 hours before planting. This hydrates the roots and helps them establish faster once in the ground. I know it seems counterintuitive—why water before planting?—but dry roots struggle to take hold immediately.
While soaking, check the roots for any that are circling or damaged. Gently straighten them out with your fingers—this prevents girdling as the tree matures. Don't trim healthy roots; just position them so they spread naturally outward from the trunk.
☀️ Step 3: Position and Backfill the Tree
Place the tree in the hole so the top of the root flare—the natural swelling at the base of the trunk—is level with the surrounding soil. The flare should never be buried; this causes rot and weak growth. Have someone hold the tree upright while you backfill with native soil.
Fill the hole in thirds, tamping down each layer gently with your foot. Water each layer lightly to remove air pockets and settle the soil. Stop when the hole is about 2 inches below the rim—this creates a shallow basin for watering. Finish by mounding soil around the base to form a 3-inch-high berm.
💧 Step 4: Water and Mulch Thoroughly
Water the tree deeply—10-15 gallons for a small tree—to encourage roots to grow outward. You'll know it's enough when water runs out the sides of the hole and the soil feels moist 12 inches deep. Let the water soak in completely before mulching.
Spread 2-3 inches of mulch over the berm, keeping it 6 inches away from the trunk to prevent rot. Use wood chips or straw, not rocks or plastic. This retains moisture, regulates soil temperature, and suppresses weeds—critical for young trees in their first year.
⏰ Step 5: Monitor and Care for the First Year
Water weekly during the first growing season, aiming for 1-2 inches of water per week. Check soil moisture by sticking your finger 2 inches deep—if it's dry, water again. Overwatering is just as harmful as underwatering; soggy soil suffocates roots.
Fertilize only in the second year, using a balanced, slow-release fertilizer. Young trees need time to establish roots before they can handle extra nutrients. Prune only to remove dead or crossing branches—never prune more than 25% of the tree's foliage in the first year.
Tips & tricks for perfect bare root tree planting
Planting bare root trees right means understanding the little details that make all the difference between a struggling sapling and a thriving tree. Here's what I've learned from years of trial and error.
Soaking Secret: That 1-2 hour soak in Step 2 isn't just about hydration—it's about shock prevention. I've seen trees planted without soaking struggle to establish for months. The water jumpstarts root activity while preventing transplant shock. Pro tip: Use room-temperature water, not cold, to avoid temperature stress on the roots.
Root Flare Visibility: In Step 3, getting that root flare perfectly level is critical. I've buried flares before and watched trees develop rot at the base. Here's how to check: After positioning, look for the natural swelling at the trunk's base—this should sit just above soil level. If you can't see it clearly, you're either too high or too low.
Watering Wisdom: The 10-15 gallons in Step 4 might seem like a lot, but this is where most planting mistakes happen. I recommend using a hose with a slow setting to avoid compacting the soil. You'll know you've done it right when water runs out the sides of the hole and the soil stays moist 12 inches down for at least 24 hours.
Mulch Placement: That 2-3 inches of mulch in Step 4 needs careful placement. I've seen people pile it right against the trunk, which causes rot. Keep it 6 inches away—this creates the perfect moisture barrier while preventing disease. Think of it like a donut around your tree, not a hat.
Pro Tips for Grow Bare Root Trees
- Planting bare root trees right means understanding the little details that make all the difference between a struggling sapling and a thriving tree.
- Soaking Secret: That 1-2 hour soak in Step 2 isn't just about hydration—it's about shock prevention.
- Root Flare Visibility: In Step 3, getting that root flare perfectly level is critical.
Frequently asked questions
Got questions about bare root trees?
You’re not alone! Here are some of the most common concerns—and their answers—to help you plant with confidence.
When is the best time to plant bare root trees?
Plant bare root trees during their dormant season—typically late fall (after leaf drop) or early spring (before bud break). Avoid extreme heat or frost. This timing minimizes stress and maximizes root growth. Pro tip: Check your USDA zone for exact timing!
How often should I water bare root trees after planting?
Water immediately after planting, then keep soil consistently moist (not soggy) for the first 2–3 weeks. After that, water deeply 1–2 times per week, adjusting for rain. Mulch helps retain moisture. Watch for: Wilting leaves or dry soil cracks.
Can I plant bare root trees in summer?
While possible, summer planting is riskier due to heat and drought stress. If you must, choose shade-tolerant species (like dogwoods), plant at dusk, and water daily for the first month. Consider waiting for fall—your trees will thank you!
What if my bare root tree’s roots look dry or shriveled?
Soak roots in water for 1–4 hours before planting to rehydrate. If roots are mushy or moldy, trim damaged sections and treat with a fungicide. Avoid planting if roots are completely desiccated—opt for a fresh tree.
Are bare root trees better than container-grown?
Both have pros! Bare root trees are cheaper and often establish faster (no root-bound stress). Container-grown trees offer year-round planting and better options for large species. Choose based on your timeline, budget, and local climate.
Wrapping up and next steps
Growing bare root trees is a rewarding way to establish strong, healthy plants with minimal fuss—especially when you time it right and follow the right steps! 🌱 By choosing the perfect season, preparing the soil, and giving your trees the care they need, you’ll set them up for faster root growth and long-term success.
Whether you’re a seasoned gardener or just starting out, dormant planting is a game-changer for your landscape.
Ready to get started? Pick your favorite bare root tree, mark your calendar for late fall or early spring, and roll up your sleeves—your future shade tree (or fruit orchard!) is waiting. Happy planting! 🌳✨