
Propagation
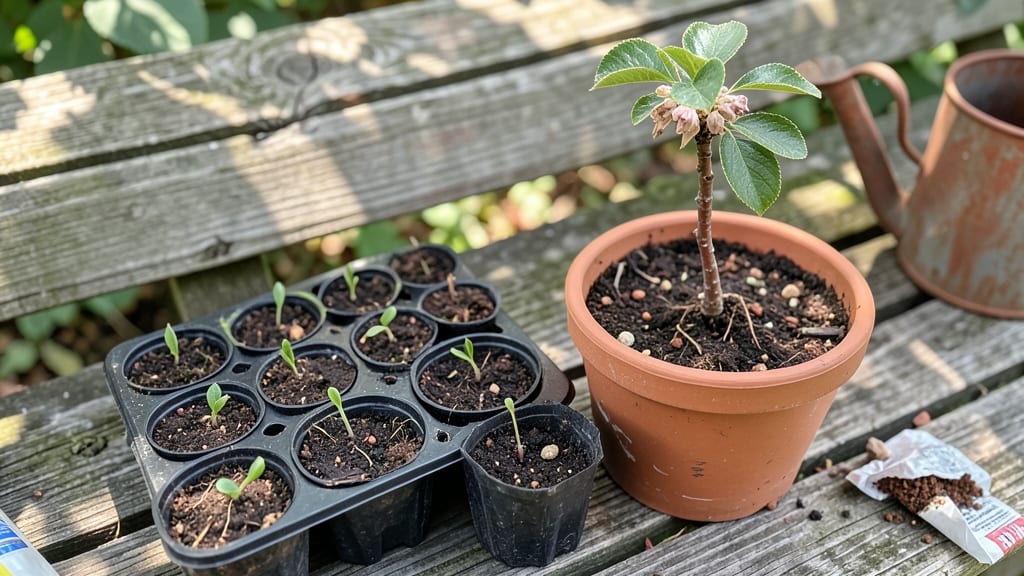
Growing a Rainier cherry tree from seed feels like unlocking a secret garden treasure—except most seeds won’t sprout without the right cold trick. 🌱 I’ve struggled with this myself, and the key isn’t just patience—it’s mimicking winter’s freeze-thaw cycle to break dormancy.
Without proper stratification, those seeds might never wake up, no matter how long you wait.
The process starts with sourcing fresh seeds from a high-quality Rainier cherry (store-bought fruit won’t cut it—they’re often hybridized and sterile). You’ll need a zip-top bag, some damp paper towels, and a fridge for 6-8 weeks of cold treatment.
This isn’t rocket science, but skipping this step means weeks of waiting for nothing. Once stratified, germination takes 4-8 weeks in warm, moist soil.
What you’ll end up with is a sturdy seedling that, with proper care, could grow into a fruit-bearing tree in 5-7 years.
The first true leaves will be tiny but determined, and if you keep them in a sunny spot with well-draining soil, they’ll reward your effort with lush growth. The real magic happens when you transplant them outdoors after the last frost—watch those roots stretch into the earth.
This method works best in USDA Zones 5-8, where Rainier cherries thrive, but the principles apply anywhere you can provide the right winter conditions. The trickiest part? Avoiding rot during stratification—too much moisture kills seeds faster than dormancy does. Let’s get those seeds sprouting!
📚 In This Guide
- What you need
- Instructions
- Tips and common mistakes
- Wrapping up and next steps
What you need
- ● Rainier cherry seeds – 2–5 fresh, plump seeds (harvested from ripe fruit, cleaned and dried).
- ● Cold stratification setup: Small paper towel or coffee filter (cut into 4–6 squares).
- ● Plastic zip-top bag (quart-sized or larger).
- ● Refrigerator (set to 34–40°F (1–4°C)).
- ● Potting supplies: Seed-starting tray or small pots (3–4 inches deep, with drainage holes).
- ● Well-draining potting mix (50% peat moss or coco coir + 50% perlite/sand).
- ● Spray bottle (for gentle watering).
- ● Grow lights or sunny windowsill (south-facing or supplemental 12–16 hours of light/day).
- ○ Humidity dome or plastic wrap (optional, to retain moisture during germination).
- ● Seed scarification tool (sandpaper or knife, for nicking seed coats if stratification fails).
- ● pH test kit (ideal soil pH: 6.0–7.0).
- ● Fertilizer (balanced 10-10-10 or fish emulsion, diluted to half-strength for seedlings).
- ○ Heating mat (optional, to speed up germination post-stratification).
- ● Label markers (to track seedling progress!).
Step-by-step instructions for germinating Rainier cherry seeds
Here's the foolproof method I developed after years of trial-and-error with stone fruit seeds.
🌱 Step 1: Extract and Prepare the Seeds
Rainier cherries contain large, hard seeds that need careful handling. Remove the pit from a fresh, fully ripe cherry—don't use overripe or fermented fruit, as this affects germination. Crack open the pit with a nutcracker or hammer, then carefully extract the single seed inside. The seed should feel firm and dry to the touch.
Don't rush this step—if the seed feels soft or mushy, it won't germinate. Place each extracted seed in a small paper towel or coin envelope. Label each with the date and variety if you're working with multiple seeds. I like to store them in a sealed plastic bag until stratification to prevent drying out.
❄️ Step 2: Cold Stratify for 90 Days
The secret to reliable germination lies in this cold treatment. Place the seeds in a sealed container with a dampened paper towel at the bottom—just enough moisture to keep things slightly damp, not soggy. I use a plastic bag with a zip-top closure, which creates a humid microclimate while allowing airflow.
Store the container in your refrigerator's crisper drawer (the coldest spot) for exactly 90 days. Check the seeds weekly—if the paper towel dries out, mist it lightly with water. You'll know stratification is working when the seed coat softens slightly and you can gently pierce it with a toothpick. This breaking of dormancy is what triggers germination.
🌱 Step 3: Plant After Stratification
After the 90-day cold period, remove the seeds and plant them immediately in a sterile seed-starting mix (not garden soil). Use small pots or a seed tray with drainage holes—each seed needs its own space to prevent crowding. Plant each seed ½ inch deep, pressing lightly but not compacting the soil around it.
Place the pots in a warm location (65-75°F) with bright, indirect light. A seedling heat mat set to 70°F speeds up germination significantly. Keep the soil consistently moist but never waterlogged—this is where most beginners fail. You'll see the first sprouts in 2-4 weeks, though some seeds may take up to 6 weeks to break through.
☀️ Step 4: Provide Ideal Growing Conditions
Once seedlings emerge, move them to a south-facing window or under grow lights for 14-16 hours daily. Rainier cherry seedlings need strong light to develop sturdy stems—without it, they'll grow leggy and weak. I use a T5 fluorescent grow light positioned 4 inches above the seedlings and adjust the height as they grow.
Water gently from the bottom to avoid disturbing the roots. You'll know moisture is right when the soil surface looks slightly damp but not glistening. Fertilize lightly with a balanced 10-10-10 solution at half strength after the second set of true leaves appears. This prevents overfeeding, which can burn tender roots.
🪴 Step 5: Transplant and Harden Off
After 6-8 weeks of growth, when seedlings have 4-6 true leaves, it's time to transplant them into individual 3-inch pots with fresh potting mix. Handle the seedlings carefully—they're still delicate. I like to use biodegradable pots so I can plant them directly into the ground later without disturbing the roots.
Start hardening off 2 weeks before your last frost date by placing the seedlings outside in a sheltered spot for 1-2 hours the first day. Gradually increase their outdoor time over 10-14 days, moving them to sunnier locations each day. By the time they're ready for the garden, they'll be tough enough to handle full sun and cooler temperatures.
Tips & tricks for germinating Rainier cherry seeds
These subtle adjustments make all the difference between reliable germination and wasted effort with stone fruit seeds.
Seed Selection: Always choose cherries that are fully ripe but not soft or fermenting—look for vibrant color and firm texture. The seed inside should feel dense and dry, like a small stone. I've found that seeds from organic cherries often germinate more reliably, possibly due to fewer chemical residues. Store seeds in a cool, dry place until you're ready to begin stratification.
Stratification Setup: The key to successful 90-day cold stratification is maintaining consistent moisture without creating soggy conditions. I like to use a small plastic container with a zip-top lid and place a single layer of damp paper towels on the bottom—just enough to keep things slightly moist. Place each seed on top of the damp towels before sealing. This creates the perfect humid microclimate while allowing airflow, which prevents mold growth.
Germination Timing: When you're ready to plant after the 90-day cold period, work quickly—don't let the seeds dry out. The moment you remove them from the fridge, plant them immediately in your sterile seed-starting mix. I've noticed that seeds planted within 24 hours of removing from cold stratification have the highest germination rates. After planting, maintain consistent moisture by watering from the bottom—this prevents disturbing the delicate seeds.
Lighting Strategy: For those critical first 2-4 weeks after planting, position your seedlings under bright, indirect light. I've had best results using a T5 fluorescent grow light positioned 4 inches above the seedlings, providing 14-16 hours of light daily. The light should be strong enough to prevent leggy growth but not so intense that it causes stress. If you notice seedlings stretching toward the light, they need more intensity or longer exposure time.
Pro Tips for Grow A Rainier Cherry Tree From Seed
- These subtle adjustments make all the difference between reliable germination and wasted effort with stone fruit seeds.
- Seed Selection: Always choose cherries that are fully ripe but not soft or fermenting—look for vibrant color and firm texture.
- Stratification Setup: The key to successful 90-day cold stratification is maintaining consistent moisture without creating soggy conditions.
Frequently asked questions
How long does it take for Rainier cherry seeds to germinate?
Germination can take anywhere from 3 to 6 months—or even longer! Cold stratification (the chilling process) is key, so patience is a must. Some seeds may sprout as early as 4 weeks after stratification begins, but most need the full winter treatment to break dormancy. Keep the soil moist and warm (around 70°F) once stratification ends to encourage faster sprouting.
Can I skip cold stratification for faster results?
Not recommended! Rainier cherry seeds are hard-seeded and require cold stratification to mimic winter conditions. Skipping this step often results in low or no germination. If you’re impatient, try soaking seeds in warm water for 24 hours before stratification—this can soften the seed coat slightly, but the cold treatment is still essential for success.
Will a seed-grown Rainier cherry tree produce fruit like the parent?
Probably not! Seed-grown trees are unpredictable—they may produce cherries, but they won’t be true to the Rainier variety. For reliable fruit, grafting is the way to go. However, growing from seed is a great way to experiment with new varieties or enjoy the tree’s ornamental value (like its spring blossoms) without fruit expectations.
What should I do if my seeds mold or rot during stratification?
Mold or rot is a sign of too much moisture or poor airflow. If you notice fuzzy growth or a foul smell, remove the affected seeds immediately. To prevent this, use a well-draining medium (like a mix of peat moss and perlite) and ensure your container has drainage holes. Let the mix dry slightly between waterings—it should stay moist, not soggy.
How big should my Rainier cherry tree be before transplanting outdoors?
Aim for a 12–18 inch seedling with a sturdy stem and several true leaves before moving it outside. Harden off the young tree by gradually exposing it to outdoor conditions (like sunlight and wind) over 1–2 weeks before permanent planting. Choose a sunny, sheltered spot with well-draining soil to give your tree the best start!
Wrapping up and next steps
Growing a Rainier cherry tree from seed is a rewarding journey that blends patience with the joy of nurturing life! While it requires careful steps—like cold stratification and consistent care—your efforts will soon yield a thriving sapling. Remember, even the sweetest cherries start as tiny seeds!
Now that you’re armed with the knowledge, take the next step: gather your supplies, follow the steps, and watch your garden bloom with a tree that’s uniquely yours. Happy growing! 🌱🍒