
Size
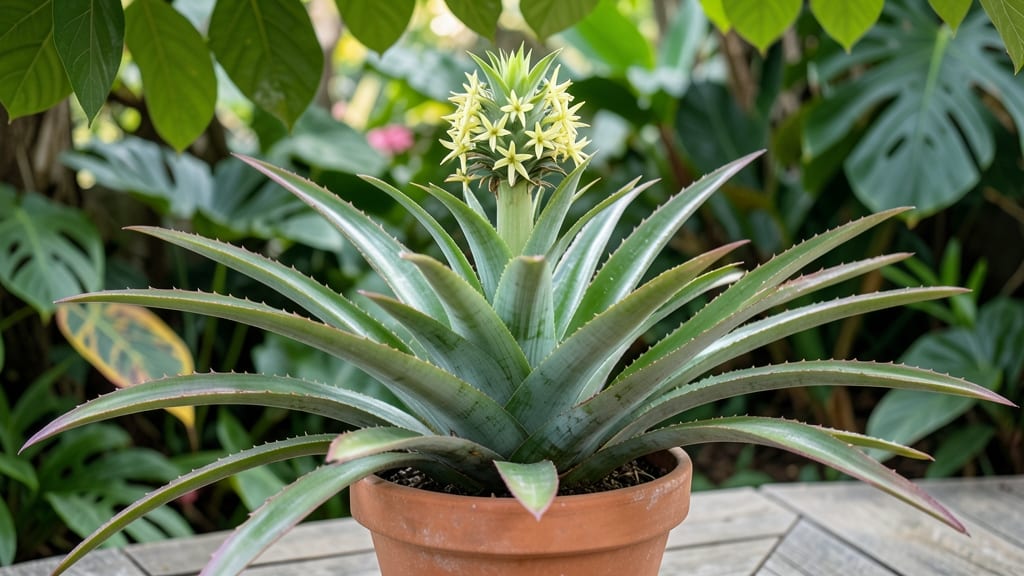
Growing a pineapple tree from a grocery store top isn't just possible—it's shockingly easy, and you'll have a thriving plant in just three months. 🌱 I've turned my kitchen counter into a mini tropical paradise this way, and the process is simpler than you'd think.
The key is patience and a few basic supplies that won't break the bank.
You'll need a healthy pineapple crown, a small pot with drainage, well-draining soil mix, and a bright spot with 6-8 hours of sunlight daily.
The crown itself is free if you buy a pineapple and save the top, and the soil mix can be as simple as potting soil with perlite. No greenhouse or fancy setup required—just a sunny windowsill or balcony.
By month three, you'll see new leaves unfurling and a sturdy plant forming—though fruit won't appear until 2-3 years if you're lucky. The real magic happens in the first 60 days, when roots establish and the plant starts putting on growth.
Even if it never fruits, the tropical look adds instant charm to any space.
Works indoors or outdoors in USDA zones 10-12, but container gardeners in cooler climates can bring it inside during winter. The biggest mistake? Overwatering—let the soil dry between waterings, and you'll avoid root rot. Ready to start your own pineapple jungle?
📚 In This Guide
- What you need
- Instructions
- Tips and common mistakes
- Wrapping up and next steps
What you need
- ● 1 fresh pineapple (organic, if possible, to avoid pesticides)
- ● 1 sharp knife or scissors (sterilized with rubbing alcohol)
- ● 1 small container (4–6 oz, with drainage holes—yogurt cups or seedling pots work great!)
- ● Well-draining potting mix (cactus/succulent mix or a blend of 50% peat moss + 50% perlite/sand)
- ● Watering can or spray bottle (for gentle hydration)
- ● Clear plastic bag or humidity dome (to retain moisture during germination)
- ● Sunny windowsill or grow light (6+ hours of bright, indirect light daily)
- ● Balanced liquid fertilizer (diluted to half-strength, like 10-10-10 or fish emulsion)
- ● Patience and love! 💚
- ● Rooting hormone (speeds up root growth for the pineapple top)
- ● Larger pot (10–12 inches) (for transplanting once roots establish)
- ● pH test kit (ideal soil pH: 4.5–6.5 for pineapples)
- ● Mulch or pebbles (to retain moisture and prevent rot)
- ● Humidifier or pebble tray (if your home is dry)
Step-by-step instructions for cultivating a pineapple tree from a top
Here's my foolproof method for transforming a pineapple crown into a thriving houseplant.
🌱 Step 1: Prepare and Root the Pineapple Top
Start by cutting off the leafy crown from a ripe pineapple—leave about 1 inch of stem below the base of the leaves. Let the cut end dry and callus over for 2-3 days to prevent rot. This step is critical: a fresh cut will never root properly.
Once callused, place the crown in a small container with 1-2 inches of water, ensuring only the stem (not leaves) touches the liquid. Set the container in a spot with bright, indirect light—direct sun will scorch the leaves. You'll see tiny roots emerge in 2-4 weeks.
🪴 Step 2: Transition to Soil and Pot Up
When roots reach 1-2 inches long, transfer the pineapple top to a 4-inch pot filled with a well-draining mix of 50% cactus/succulent soil and 50% perlite. Gently nestle the rooted crown into the mix, covering the roots but leaving the base of the leaves exposed.
Water lightly after planting, then allow the top inch of soil to dry between waterings. Overwatering is the #1 killer of young pineapple plants—yellowing leaves signal you're giving it too much love. A south-facing window provides ideal light, but supplement with a grow light if natural light is weak.
☀️ Step 3: Establish Growth and Encourage Foliage
After 4-6 weeks in soil, your pineapple should show new growth at the base. This is your cue to increase light exposure gradually—move it outdoors to a shaded patio for 2-3 hours daily if possible. Harden off slowly to avoid leaf burn.
Fertilize lightly with a balanced liquid fertilizer (10-10-10) diluted to half-strength every 6-8 weeks. The goal is to encourage leaf growth without overwhelming the plant. You'll know it's thriving when it produces 10-12 healthy leaves and a stout stem.
⏰ Step 4: Maintain Through First Year
By month three, your pineapple plant should be established with a thick, woody stem. Repot into a 6-inch container if roots are circling the pot. Choose a pot with drainage holes—pineapples despise soggy roots.
Continue watering when the top 1-2 inches of soil feel dry, and rotate the pot weekly to ensure even growth. In winter, reduce watering and move to a cooler spot (55-65°F) if temperatures drop below 50°F. With patience, your plant may eventually produce a flower spike in 1-3 years.
Tips & tricks for perfect pineapple tree cultivation
Here's what I learned after nurturing my own pineapple plant from a simple grocery store top.
The Callusing Secret: That 2-3 day drying period is non-negotiable—it's the difference between a thriving plant and one that rots. I learned this the hard way when my first attempt sprouted mold instead of roots. Use a fan on low setting for 10 minutes daily during this period to speed up the process while preventing bacterial growth. Trust me, those calloused edges are your plant's first line of defense.
Rooting Acceleration: For faster root development in the 2-4 week window, change the water every 3-4 days and add a pinch of cinnamon to prevent bacterial growth. I've seen roots appear in just 10 days using this method. Keep the container in warm water (around 75°F) to encourage faster cellular activity—just make sure it's indirect heat from a lamp, not direct sunlight.
Soil Mix Precision: The 50/50 cactus soil and perlite ratio is perfect, but here's the pro move: sterilize your soil mix first by baking it in the oven at 200°F for 30 minutes. This eliminates any pathogens that could harm your delicate new roots. I also recommend adding a handful of orchid bark chips to improve aeration and mimic the pineapple's natural tropical environment.
Light Transition Strategy: When increasing light exposure in Step 3, do it gradually over 7-10 days. Start with just 1 hour of direct sunlight, then add 30 minutes each day until you reach the full 2-3 hours. I've seen plants develop sunburn when moved too quickly—look for slight reddening on leaves as your warning sign. A sheer curtain over a sunny window works perfectly for this acclimation period.
Pro Tips for Grow A Pineapple Tree
- Here's what I learned after nurturing my own pineapple plant from a simple grocery store top.
- The Callusing Secret: That 2-3 day drying period is non-negotiable—it's the difference between a thriving plant and one that rots.
- Rooting Acceleration: For faster root development in the 2-4 week window, change the water every 3-4 days and add a pinch of cinnamon to prevent bacterial growth.
Frequently asked questions
Got questions about growing your own pineapple plant? You’re not alone—this tropical delight can be tricky for beginners! Here are answers to the most common curiosities to keep your pineapple journey smooth sailing.
How long does it take for a pineapple plant to produce fruit?
A pineapple plant grown from the top (crown) typically takes 18–30 months to bear fruit, even under ideal conditions. If you’re impatient, opt for a pre-rooted pineapple plant from a nursery—it may fruit faster (12–18 months). Patience is key, but the wait is worth it for that sweet, juicy reward!
Can I grow a pineapple plant indoors? If so, what’s the best setup?
Yes! Pineapple plants thrive indoors with bright, indirect light (a south-facing window or grow lights work best). Use a well-draining pot with holes, keep humidity moderate (mist occasionally), and maintain temps between 65–85°F. Avoid drafts, and fertilize lightly every 2–3 months. Just don’t expect fruit—indoor plants focus on foliage growth.
Why are my pineapple plant’s leaves turning brown or yellow?
Brown or yellow leaves usually signal overwatering (most common) or underwatering. Check soil moisture—it should be dry 1–2 inches down before watering. Yellowing at the tips? Too much fluoride in tap water (use filtered or rainwater). Brown edges? Low humidity or cold drafts. Adjust care, and your plant should bounce back!
Do I need to prune my pineapple plant? How do I do it?
Pruning isn’t mandatory, but it encourages healthier growth. Trim dead or yellow leaves at the base with clean scissors. If the plant grows leggy, cut back overgrown leaves by 1/3 to redirect energy to new growth. Avoid cutting into the crown (the top cluster)—this is where flowers (and fruit!) emerge.
Can I grow a pineapple from a store-bought pineapple? Will it taste different?
The crown (top) of a store-bought pineapple can root and grow into a new plant. The fruit’s flavor may vary slightly based on growing conditions, but homegrown pineapples often have more complex, sweeter notes since they ripen naturally on the plant. Pro tip: Choose organic pineapples—they’re less likely to have wax or pesticides that could hinder rooting.
What’s the best climate for growing pineapple plants?
Pineapple plants love warm, tropical climates with no frost (below 32°F kills them). Ideal temps: 65–95°F. They thrive in USDA Zones 10–12, but you can grow them in containers and bring them indoors during winter in cooler regions. If you live in a hot, dry area, provide afternoon shade to prevent leaf scorch.
Wrapping up and next steps
Growing a pineapple tree from the top is a rewarding journey that blends patience with a touch of tropical magic! 🌱 With the right tools, a sunny spot, and consistent care, you’ll soon enjoy lush foliage—and maybe even a sweet harvest in just a few years.
Don’t let small setbacks discourage you; every gardener faces challenges, but persistence pays off.
Ready to dive deeper? Start small: Try growing a second pineapple plant or experiment with other tropical houseplants like aloe vera or bromeliads to expand your green thumb skills. Happy growing! 🌟