
Pruning
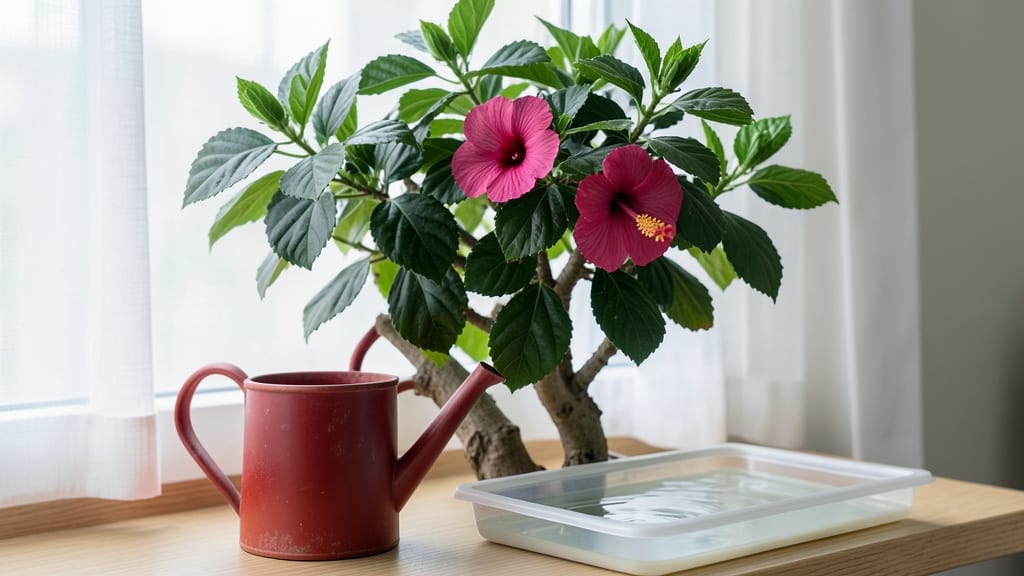
Caring for a hibiscus tree indoors means bringing its tropical personality inside—bright blooms and glossy leaves that thrive when you nail light, humidity, and a little strategic pruning.
The key is mimicking its natural habitat: bright, indirect light, high humidity, and a consistent routine that keeps its roots happy without drowning them.
I’ve nursed my own hibiscus back from winter dormancy to summer glory, and the difference comes down to these three things—light, moisture, and a little elbow grease when it’s time to shape it up.
Your hibiscus will reward you with bold, dinner-plate-sized blooms if you give it 6+ hours of bright, filtered light daily—a south- or west-facing window is ideal, or a grow light if natural light falls short.
Water when the top inch of soil feels dry, then let excess drain away to avoid soggy roots. The soil should stay slightly moist but never waterlogged, and a well-draining potting mix with perlite or orchid bark keeps things airy.
Pruning isn’t just about shaping—it’s about encouraging new growth where you want it, and I’ll show you how to do it without sacrificing next year’s flowers.
Humidity is where most indoor hibiscus struggles begin. If your air feels drier than a desert, your plant will let you know with crispy edges and dropped buds.
A pebble tray with water beneath the pot, a humidifier nearby, or even misting the leaves a few times a week can make all the difference.
In winter, when heating systems dry out the air, these tricks become even more critical—your hibiscus might enter a light dormancy, but it shouldn’t look like it’s wilting away. With the right balance, you’ll see buds forming by late winter, ready to burst into color by spring.
Seasonal adjustments are the secret sauce. Summer calls for more frequent watering and occasional outdoor time (acclimate it slowly to avoid shock), while winter slows everything down.
Prune lightly after blooming to shape the tree and encourage next year’s growth, but avoid heavy cuts in fall—your hibiscus needs all its energy to store for dormancy.
Stick with this routine, and you’ll have a hibiscus that blooms year after year, turning your living room into a tropical oasis without the bugs or the rain.
📚 In This Guide
- What you need
- Instructions
- Tips and common mistakes
- Wrapping up and next steps
What you need
- ● Hibiscus plant: Choose a healthy, potted Hibiscus rosa-sinensis (or a dwarf variety like 'Lana'). Ensure it’s disease-free and has vibrant leaves.
- ● Well-draining potting mix: A blend of 50% peat moss or coconut coir, 30% perlite or pumice, and 20% compost or worm castings (1–2 gallons per 6-inch pot). Avoid heavy garden soil!
- ● Pot with drainage holes: A container 2–4 inches larger in diameter than the current root ball, made of terracotta (for breathability) or plastic (for moisture retention).
- ● Watering can with a narrow spout: For precise hydration without oversaturating the soil.
- ● Balanced liquid fertilizer: A 10-10-10 or 20-20-20 NPK formula (diluted to half-strength) for feeding every 4–6 weeks during spring/summer.
- ● Pruning shears: Sharp, bypass-style shears (sterilized with rubbing alcohol) for trimming.
- ● Humidity tray or pebble tray: A shallow tray filled with gravel or pebbles and water (place pot on top, not in water).
- ○ Grow lights (optional but helpful): A full-spectrum LED grow light (12–16 hours/day) if natural light is insufficient.
- ● Misting bottle: For daily humidity boosts (especially in dry climates).
- ● Soil moisture meter: To check moisture levels before watering.
- ● Root stimulator: Like Mycorrhizal fungi or seaweed extract to encourage root growth after repotting.
- ● Decorative pot cover: A saucer or cache pot to protect surfaces from water spills.
- ● Support stake or trellis: For tall varieties to prevent toppling.
Step-by-Step guide to thriving indoor hibiscus care
Here's how I keep my hibiscus blooming year-round with minimal fuss.
💧 Step 1: Master the Watering Routine
Water your hibiscus when the top 2 inches of soil feel dry to the touch. Stick your finger in—if it comes out clean, it's time. Overwatering is the #1 killer of indoor hibiscus, so always use a pot with drainage holes and empty the saucer after watering to prevent root rot.
In winter, when growth slows, let the soil dry out slightly more between waterings. Yellowing leaves often mean you're watering too much, while crispy edges signal underwatering. Find that sweet spot where the soil stays consistently moist but never soggy.
☀️ Step 2: Position for Optimal Light Exposure
Place your hibiscus within 3-6 feet of a south- or west-facing window where it gets bright, indirect light for at least 6 hours daily. Direct midday sun can scorch leaves, so if you notice brown patches, move it back a few feet.
If your home lacks natural light, supplement with a grow light placed 12-18 inches away for 12-14 hours daily. Leggy growth with sparse leaves means your plant is stretching for light—rotate the pot weekly so it grows evenly toward all light sources.
🌿 Step 3: Boost Humidity and Encourage Blooms
Hibiscus love humidity—aim for 50-60%. Mist the leaves daily or place the pot on a tray filled with pebbles and water (keep the pot above the water line). In dry climates, consider a small humidifier nearby or group plants together to create a microclimate.
For blooms, feed with a balanced liquid fertilizer every 2-4 weeks during spring and summer. Stop fertilizing in fall and winter when growth slows. Deadhead spent flowers by pinching them off just above a leaf node—this redirects energy to new blooms.
✂️ Step 4: Prune Strategically for Shape and Health
Prune after flowering to shape your hibiscus and encourage bushier growth. Use clean, sharp shears to cut back leggy stems by one-third just above a leaf node. This prevents the plant from becoming top-heavy and promotes new branching.
Remove any yellow or diseased leaves immediately to prevent spread. In late winter, give your hibiscus a light haircut—trimming back overgrown branches stimulates fresh spring growth. Never prune more than one-third of the plant at once, or you'll shock it.
⏰ Step 5: Monitor and Adjust Seasonally
Watch for pests like spider mites or aphids—wipe leaves with a damp cloth weekly to remove dust and deter infestations. If you spot pests, treat with neem oil or insecticidal soap, following package directions.
Rotate the pot quarter-turn weekly so all sides get even light. In winter, reduce watering slightly and avoid fertilizing. With consistent care, your hibiscus will reward you with vibrant blooms from spring through fall—and sometimes even winter!
Tips & tricks for perfect indoor hibiscus care
Keeping your hibiscus thriving indoors takes just a few key adjustments—here's what I've learned after years of trial and error.
Soil Check Secret: Instead of guessing, use a wooden skewer to test moisture in Step 1. Insert it into the soil up to 2 inches—if it comes out clean, water thoroughly. If it's damp, wait another day. This method is foolproof for avoiding both overwatering and underwatering, which are the biggest killers of indoor hibiscus.
Light Rotation Strategy: In Step 2, when you rotate your hibiscus weekly, take a moment to examine the leaves facing the window. If you notice one side is significantly darker than the others, that's your plant telling you it needs to turn a bit more. Hibiscus grow toward light, so adjust the rotation direction until all sides get even exposure.
Humidity Hack: For Step 3, if you're struggling to maintain 50-60% humidity, try placing a small fan near the plant on low setting. The gentle airflow creates microclimates that help retain moisture around the leaves. I also keep a tray of water with pebbles beneath the pot—just make sure the pot isn't sitting in water.
Pruning Timing Tip: When you're ready for Step 4, time your pruning right after a flowering cycle. Look for stems that have just finished blooming—they'll be easier to shape. Cut just above a leaf node at a 45-degree angle to encourage new growth from that point. This creates a more natural shape and prevents those awkward, bare spots.
Pro Tips for Care For Hibiscus Tree Indoors
- Keeping your hibiscus thriving indoors takes just a few key adjustments—here's what I've learned after years of trial and error.
- Soil Check Secret: Instead of guessing, use a wooden skewer to test moisture in Step 1.
- Light Rotation Strategy: In Step 2, when you rotate your hibiscus weekly, take a moment to examine the leaves facing the window.
Frequently asked questions
about caring for your indoor hibiscus tree—here’s what you need to know!How often should I water my indoor hibiscus tree?
The top 2 inches of soil should be slightly dry before watering—usually every 5–7 days, depending on humidity and light. Overwatering is the #1 killer! Use well-draining soil and a pot with drainage holes to prevent root rot.
Can hibiscus survive indoors in winter?
Yes, but they need bright, indirect light (a south-facing window is ideal) and higher humidity (40–60%). Keep temps above 55°F (13°C)—drafts and cold windowsills can shock the plant. A humidifier or pebble tray helps!
When is the best time to prune my hibiscus tree?
Prune in early spring (before new growth) to shape the tree and encourage blooms. Remove dead, yellowing, or leggy branches first, then trim back by 1/3 to maintain its shape. Avoid heavy pruning in fall/winter—it stresses the plant!
Why are my hibiscus leaves turning yellow or dropping?
Yellow leaves often mean overwatering (check soil moisture) or nutrient deficiency (feed with a balanced fertilizer every 4–6 weeks). Dropping leaves? It could be low humidity or sudden temp changes. Move it to a more stable spot and mist regularly.
How do I get my hibiscus to bloom indoors?
Blooms thrive with 6+ hours of bright light, regular feeding (high-phosphorus fertilizer in spring/summer), and proper pruning. Remove spent flowers to encourage new buds. If blooms stop, check for underwatering or lack of sunlight—hibiscus are dramatic divas!
Wrapping up and next steps
Caring for a hibiscus tree indoors is a rewarding journey that brings vibrant blooms and lush greenery into your home! With the right balance of light, humidity, and pruning, your plant will thrive and flourish. Remember, patience and consistency are key—soon, you’ll be enjoying those stunning flowers year-round!
Ready to level up your green thumb? Start by observing your hibiscus’s progress—adjust care as needed—and don’t hesitate to experiment with different techniques. Happy gardening! 🌸✨