
Pruning
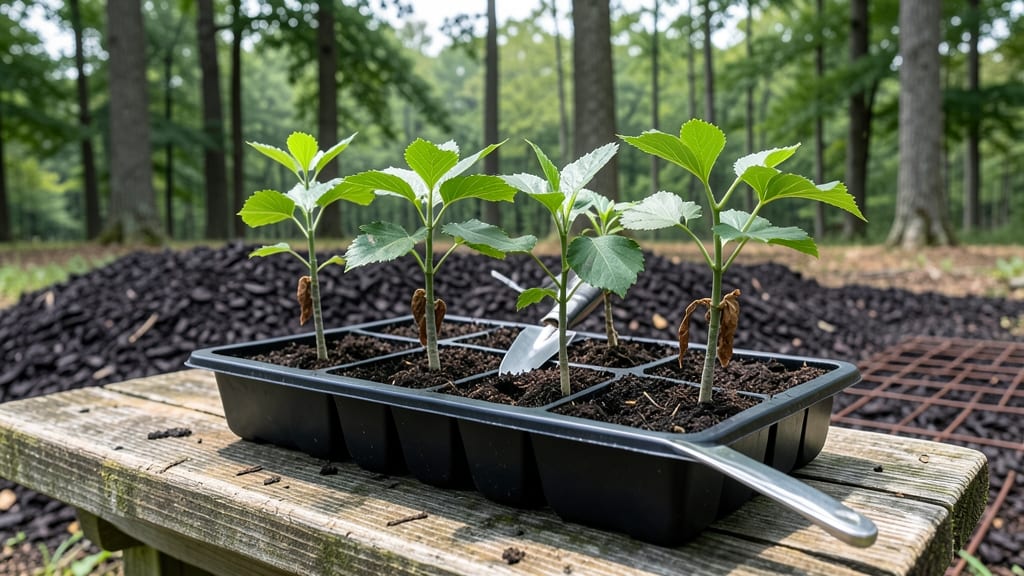
Growing hickory tree seedlings from seed requires a layered chill method—the secret to breaking dormancy and ensuring those first green shoots appear right on schedule. I’ve learned that skipping this step means waiting years for germination, if it ever happens at all.
The process mimics nature’s slow release of seeds from fallen husks, tricking them into thinking spring has arrived when it’s still winter.
You’ll need a few simple supplies: hickory nuts (fresh or stored properly), damp paper towels, a sealed plastic bag, and a cold fridge. The key is patience—this method takes 6-8 weeks of consistent chilling before you even plant outdoors.
Once you’ve stratified the seeds correctly, you’ll see 90% germination rates in spring, compared to the hit-or-miss results of planting untreated seeds.
The payoff comes when those first 2-inch seedlings push through the soil in early spring, already hardened against frost. By summer, you’ll have sturdy young trees ready for transplanting, with roots deep enough to handle years of growth.
This isn’t just luck—it’s a predictable system that turns unreliable seeds into reliable forest giants.
Works best in USDA Zones 4-9, though adjustments are needed for southern climates where winter chilling is less severe. The same principles apply whether you’re growing a single tree or restoring a woodlot—just scale the seed quantity. Ready to turn those nuts into future shade providers?
📚 In This Guide
- What you need
- Instructions
- Tips and common mistakes
- Wrapping up and next steps
What you need
- ● Hickory tree seeds: 10–20 fresh, viable seeds (harvested from mature trees or purchased from a trusted supplier).
- ● Seed-starting mix: 2–3 bags (1 cubic foot each) of sterile, well-draining potting soil (e.g., Pro-Mix or FoxFarm).
- ● Seed trays or small pots: 12–24 biodegradable or plastic cell trays (2–3 inches deep) or 4–6-inch nursery pots.
- ● Grow lights or sunny window: Full-spectrum LED grow lights (1–2 bulbs) or a south-facing window with 6+ hours of sunlight.
- ● Misting bottle: 1 (for gentle hydration).
- ● Plastic wrap or humidity dome: 1 roll or set (to retain moisture).
- ● Refrigerator or cold stratification setup: A standard fridge (34–40°F) with a ventilated container (e.g., a sealed plastic bin with small air holes).
- ● Moist paper towels or peat moss: Enough to surround seeds snugly (keep damp, not soggy!).
- ● Timer or calendar: To track 60–90 days of cold treatment.
- ● Pruning shears: Small, sharp pair (for trimming seedlings later).
- ● pH test kit: To check soil acidity (ideal: 6.0–7.0).
- ○ Fertilizer (balanced 10-10-10 or slow-release): Optional for post-chill growth.
- ○ Heat mat (optional): For faster germination if your space is chilly.
- ● Label markers: To track seed varieties and planting dates.
How to stratify hickory tree seeds for reliable germination
This layered chill method breaks dormancy so you'll see strong, predictable sprouts in spring.
Collect and Prepare Fresh Hickory Seeds
Harvest seeds from fully mature nuts in fall when they've fallen naturally—they'll have thick, hard shells. Remove any that show cracks or insect damage, as these won't store well. I like to soak the seeds in warm water for 24 hours first to soften the husk slightly and help identify any that float (discard those—they're hollow).
After soaking, spread the seeds on a paper towel to dry completely. This prevents mold during stratification. Store them in a cool, dark place until you're ready to begin the cold treatment. The key here is patience—hickory seeds need time to break dormancy naturally, and rushing this step often leads to weak germination.
Create the Layered Chill Setup
Fill a quart-sized plastic container with a mix of moistened peat moss and perlite (equal parts). I use a ratio of 1:1 because the peat holds moisture while the perlite ensures good airflow. Press the mixture down gently but firmly—you want it dense enough to support the seeds but not compacted.
Arrange the seeds in a single layer on top of the mix, spacing them about 1 inch apart to prevent crowding. Cover them with an additional 1-inch layer of the same peat-perlite mix. This layered approach mimics natural forest conditions where seeds experience alternating moisture and cold. Seal the container with its lid or wrap it tightly in plastic wrap, leaving no gaps for moisture to escape.
Stratify for 90 Days in Controlled Conditions
Place the sealed container in your refrigerator's crispier drawer where temperatures stay consistently between 35-40°F. This range mimics winter soil temperatures and is crucial for breaking dormancy. Check the container every 10-14 days—the mix should feel damp but not soggy. If it's drying out, lightly mist the top layer with water and reseal.
After 90 days, remove the container and let it sit at room temperature for 7-10 days to acclimate. This gradual warming simulates spring conditions. You'll see the first signs of germination as tiny white roots emerge from the seeds. Here's the thing—don't rush this process. Hickory seeds need this extended cold period to develop the energy reserves required for strong growth.
Plant Stratified Seeds in Nursery Beds
Fill 4-inch deep nursery pots with a sterile seed-starting mix (never garden soil—it's too dense). Make a small hole about ½ inch deep and place one stratified seed in each pot. Cover it with a thin layer of additional mix, just enough to hold the seed in place. Water gently until the soil is moist but not saturated.
Place the pots in a shade cloth-covered area with indirect light for the first 2 weeks. This prevents shock from sudden exposure. Once you see first true leaves (not the initial seed leaves), gradually move them to brighter conditions. Keep the soil consistently moist but never waterlogged—hickory seedlings are particularly sensitive to root rot during this early stage.
Transition to Outdoor Conditions
After 4-6 weeks when seedlings have developed 3-4 sets of true leaves, it's time to harden them off. Start by placing them outside in a sheltered, partially shaded spot for 1-2 hours the first day. Increase their outdoor time by 1 hour daily until they can tolerate full sun exposure for a full day.
Transplant to their permanent location after the last frost date when soil temperatures reach at least 60°F. Space seedlings 10-12 feet apart to allow for their mature size. The first year is about establishing a strong root system—focus on watering deeply once a week unless rainfall provides sufficient moisture. You'll know you've succeeded when you see vigorous new growth in spring.
Tips & tricks for perfect hickory seedling stratification
Patience and precision are your best tools when working with hickory seeds—these tips will help you avoid common pitfalls and maximize your success rate.
Soaking Insight: During the 24-hour soak in Step 1, use warm (not hot) water to prevent cracking the seed shells. I add a few drops of diluted dish soap to the water—this helps break surface tension and makes it easier to spot hollow seeds that float. After soaking, pat them dry with a paper towel and let them air-dry completely before storage. This drying step is critical for preventing mold during the 90-day cold treatment, which can ruin your entire batch.
Layering Technique: When creating your 1:1 peat moss and perlite mix in Step 2, I recommend pressing it down firmly but not compacting it completely. Think of it like packing snow for a snowball—firm enough to hold the seeds in place, but still allowing water to penetrate. The 1-inch spacing between seeds is non-negotiable; crowding leads to uneven moisture distribution and potential mold growth. For larger batches, use multiple containers rather than increasing depth, as deeper layers can create anaerobic conditions that inhibit germination.
Temperature Consistency: The 35-40°F range in Step 3 is crucial—any warmer and you risk breaking dormancy too quickly, any cooler and the process slows dangerously. If your refrigerator's crispier drawer fluctuates, consider using a small appliance thermometer to monitor temperatures. I've found that placing the container on a wire rack inside the drawer improves airflow and helps maintain consistent temperatures. During the 10-14 day checks, resist the urge to open the container more frequently than necessary—each time you open it, you introduce warm air that can disrupt the cold treatment.
Acclimation Strategy: After the full 90 days of cold treatment, the 7-10 day room temperature acclimation period in Step 3 is where most people make mistakes. Instead of moving containers directly to warm, sunny windowsills, I place them in a spot with indirect light and gradually increase exposure. This mimics natural spring conditions and prevents seed shock. Watch for the first signs of root emergence—these tiny white roots are your signal that the seeds are ready for planting. If you see mold during this stage, immediately remove affected seeds and increase ventilation.
Pro Tips for Hickory Tree Seedlings
- Patience and precision are your best tools when working with hickory seeds—these tips will help you avoid common pitfalls and maximize your success rate.
- Soaking Insight: During the 24-hour soak in Step 1, use warm (not hot) water to prevent cracking the seed shells.
- Layering Technique: When creating your 1:1 peat moss and perlite mix in Step 2, I recommend pressing it down firmly but not compacting it completely.
Frequently asked questions
When is the best time to start the layered chill method with hickory seedlings?
The ideal time to begin the layered chill method is late fall (October-November) or early winter (December). This mimics natural winter conditions, ensuring seedlings experience a consistent 30-45°F (1-7°C) temperature for 6-8 weeks. If you start too early, seedlings may not fully harden off; if too late, they risk dormancy without proper stratification.
How do I know if my hickory seedlings are getting enough cold exposure?
Seedlings need 6-8 weeks of cold, moist conditions (like a refrigerator or cold frame). Check by monitoring soil temps with a thermometer—aim for 32-45°F (0-7°C). If mold appears or soil dries out, adjust humidity or moisture. No sprouting yet? Don’t worry! Hickory seeds often wait until spring to germinate.
Can I use regular potting soil for the layered chill method?
No—use a moist, well-draining mix like peat moss or coconut coir (avoid garden soil). Regular potting soil can compact, trap excess moisture, and invite mold. For extra insurance, mix in perlite or vermiculite (10-20%) to improve aeration. Pro tip: Sterilize your mix by baking it at 200°F (93°C) for 30 minutes to kill pathogens.
What if my hickory seedlings sprout too early during stratification?
If seedlings sprout prematurely (usually a sign of warmth or light exposure), move them back to cold storage immediately. Do not transplant them yet—wait until all risk of frost has passed (late April-May in most zones). If roots emerge, gently trim them and return to chill conditions. Patience is key!
Are there faster alternatives to the layered chill method for hickory seedlings?
While the layered chill method is the most reliable, you can try sand stratification (bury seeds in moist sand for 3 months) or hot water treatment (soak seeds in 180°F/82°C water for 5 minutes). However, these methods are less predictable for hickory. For best results, stick with the cold stratification—it mimics nature’s timing perfectly!
Wrapping up and next steps
Growing hickory tree seedlings using the layered chill method is a rewarding way to ensure strong, predictable spring sprouting—perfect for both novice and experienced gardeners! 🌱 By following the right steps, you’ll give your seedlings the best start, setting them up for years of healthy growth.
Ready to take the next step?
🌿 Next Steps:
- Monitor progress as the seedlings break dormancy—adjust care as needed.
- Transplant outdoors once temperatures stabilize (typically late spring).
- Share your success! Tag us in your garden updates or ask questions in the comments.
Your future hickory trees are just sprouts away—get planting! 🌳✨