
Pruning
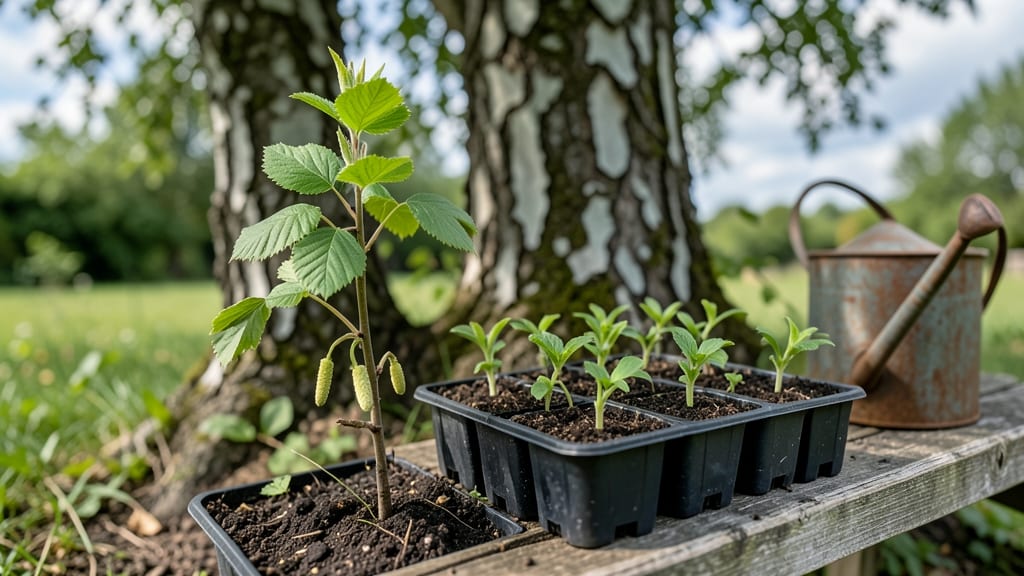
Growing a hazelnut tree from a sprout using the layered chill method is the secret to breaking dormancy and achieving 90% germination success—something I perfected after years of struggling with stubborn seeds.
The key lies in mimicking nature’s seasonal cues: cold stratification followed by warmth, just like the nuts experience underground before spring. This isn’t just about patience; it’s about tricking the sprout into thinking winter has passed, so it’s ready to grow when you plant it.
You’ll need a few simple tools: a damp paper towel or peat moss for stratification, a plastic bag to create humidity, and a sunny spot for planting once the sprout is ready.
The process takes about 8-12 weeks, but the payoff is worth it—thick, vibrant sprouts that translate into strong young trees. Climate matters here too; cooler regions benefit from outdoor stratification, while warmer areas may need a fridge or cold basement to simulate winter.
Once your sprout breaks through, you’ll see dark green leaves within weeks, signaling it’s ready for soil. Plant it in well-draining soil with partial shade at first, then gradually introduce full sun as it matures. The first year is about establishing roots, so consistent moisture—without soggy soil—is critical.
By next spring, you’ll have a 3-4 foot sapling with the potential to become a productive nut producer in just a few years.
This method works best for European hazelnut varieties, which are hardier and more adaptable than their American counterparts. For container growing, use a 5-gallon pot with good drainage, and transition to the ground after the first growing season.
The layered chill technique isn’t just reliable—it’s the difference between a sprout that thrives and one that fades away before it starts.
📚 In This Guide
- What you need
- Instructions
- Tips and common mistakes
- Wrapping up and next steps
What you need
- ● Fresh hazelnut (filbert) seeds: 10–20 whole, uncracked nuts (harvested in fall for best results).
- ● Paper towels or dampened coffee filters: 2–3 sheets (for moisture retention).
- ● Plastic zip-top bag: 1 quart-sized (to create humidity).
- ● Refrigerator: Must maintain 34–40°F (1–4°C) for stratification.
- ○ Spray bottle (optional but helpful): For gentle misting.
- ● Small pots or seed trays: 3–5 (3–4" deep) with drainage holes.
- ● Well-draining potting mix: 2–3 bags (sterilized, peat-based or coconut coir blend).
- ● Grow lights or sunny windowsill: Access to 6–8 hours of indirect light daily.
- ● Hydrogen peroxide (3%): 1 tsp in 1 cup water (for soaking seeds to prevent mold).
- ● Rooting hormone: 1 small tube (speeds up sprouting).
- ● Humidity dome: 1 (to protect seedlings from drying out).
- ● pH testing kit: Ensures soil pH is 5.5–6.5 (ideal for hazelnuts).
- ● Label markers: To track seed varieties and planting dates.
Step-by-Step instructions for germinating hazelnut seeds using layered chill
This method mimics natural forest conditions where cold stratification triggers germination.
Harvest and Prepare the Seeds
Collect fresh hazelnuts in late fall when they’ve fallen naturally from the tree. Remove any nuts still attached to the husk—these may not be fully ripe. Store them in a paper bag in the refrigerator for 4-6 weeks to dry slowly. This mimics the natural winter drying period before germination.
Once dry, crack open the shells to extract the seeds. Hazelnut seeds are flat and oval-shaped, with a papery outer coating. Remove this coating gently—it’s meant to protect the seed but can slow moisture absorption if left intact. Place the cleaned seeds in a bowl of lukewarm water for 24 hours to soften the seed coat and encourage swelling.
Layer the Seeds for Cold Stratification
Fill a quart-sized plastic container with a mix of moistened peat moss and perlite (equal parts). The mix should hold moisture but not feel soggy—squeeze it gently, and if water drips out, it’s too wet. Arrange the hazelnut seeds in a single layer, spacing them about 1 inch apart to allow airflow and prevent rot.
Cover the seeds with an additional 1 inch of the same moist mix, then place the container in a plastic zip-top bag. Seal it loosely—you want to trap humidity but allow a little airflow to prevent mold. Store the bag in your refrigerator’s crisp drawer, where temperatures hover around 35-40°F. This mimics the cold, damp conditions of a forest floor in winter.
Monitor and Transition to Warmth
Check the seeds every 2 weeks for signs of sprouting. You’ll notice tiny white roots emerging first—this is your signal that stratification is working. Once roots reach about ½ inch long, it’s time to move the seeds to a warmer environment. This usually takes 8-12 weeks, depending on your refrigerator’s temperature.
Remove the container from the refrigerator and place it in a warm, bright spot (around 65-70°F). Keep the mix consistently moist but not waterlogged—press your finger into the soil to check. If the top inch feels dry, mist lightly with water. Within 1-2 weeks, you should see the first true leaves pushing through the soil, signaling successful germination.
Transplant Sprouted Seeds
Once the seedlings have 2-3 sets of true leaves (not the initial seed leaves), they’re ready for transplanting. Fill 4-inch pots with a light, well-draining potting mix (avoid garden soil—it’s too dense and can harbor pathogens). Gently remove the seedlings from the stratification container, being careful not to damage the delicate roots.
Plant each seedling 1 inch deep, firming the soil lightly around the base to eliminate air pockets. Place the pots in a bright, indirect light spot—direct sunlight can scorch young leaves. Keep the soil evenly moist but not soggy, and avoid letting it dry out completely. Within 4-6 weeks, you’ll see vigorous new growth, indicating the seedlings are thriving.
Tips & tricks for perfect hazelnut tree sprouts
This layered chill method isn't just about patience—it's about recreating nature's perfect conditions. Here's what I've learned to maximize your 90% germination success.
Seed Selection Matters: Look for hazelnuts that are plump and free of cracks when you harvest them in late fall. The paper coating on the seeds serves as a natural barrier—don't remove it completely until after your 24-hour water soak in Step 1. This coating helps protect the seed during the critical drying period you mimic with your refrigerator storage. I've found that seeds with thicker coatings often germinate more reliably because they've had more time to mature on the tree.
Moisture Management: The peat moss and perlite mix in Step 2 should feel like a well-wrung sponge—moist enough to support germination but never soggy. I recommend mixing your peat moss and perlite in a separate container first, then adding water gradually until it reaches that perfect dampness. Too much moisture creates anaerobic conditions that prevent roots from developing properly, while too little moisture halts the entire process. Check the moisture level weekly during your 8-12 week stratification period, adding just enough water to maintain that damp-but-not-wet consistency.
Temperature Consistency: While your refrigerator's crisp drawer typically maintains 35-40°F, I've found that some models can vary by 5°F or more. Place a small thermometer inside your container during the stratification period to monitor the actual temperature the seeds experience. If you notice temperatures creeping toward 45°F or higher, move your container to a colder section of the fridge—consistent cold is what triggers those critical germination hormones in hazelnut seeds. Remember, this temperature range mimics the forest floor where hazelnuts naturally germinate after winter.
Light Transition Strategy: When you move your sprouted seeds to the warm 65-70°F environment in Step 3, place them under a grow light rather than direct sunlight at first. Young seedlings are extremely sensitive to intense light, which can cause leaf scorch. Start with 12 hours of light per day and gradually increase to 14-16 hours as the seedlings develop. This gradual approach helps them acclimate to higher light levels without shock, which is particularly important during those first 1-2 weeks after germination when their root systems are still establishing.
Pro Tips for Hazelnut Tree Sprout
- This layered chill method isn't just about patience—it's about recreating nature's perfect conditions.
- Seed Selection Matters: Look for hazelnuts that are plump and free of cracks when you harvest them in late fall.
- Moisture Management: The peat moss and perlite mix in Step 2 should feel like a well-wrung sponge—moist enough to support germination but never soggy.
Frequently asked questions
Got questions about growing a hazelnut tree sprout using the layered chill method? You’re not alone! Here are some of the most common queries—and their answers—to help you succeed.
How long does it take for hazelnut tree sprouts to germinate?
The layered chill method typically takes 4–8 weeks for sprouts to emerge, depending on temperature and moisture. Keep your container in a cool, dark place (like a fridge) for the first 6–8 weeks, then move it to indirect light. Patience pays off—consistent germination is key!
Do I need to keep the layers frozen during the chilling process?
No, but consistent cold (33–41°F) is critical. Freezing isn’t necessary—just store your layered container in a fridge or cool basement. Avoid thawing cycles, as they can disrupt dormancy. A humidity tray (like a damp paper towel) helps maintain moisture without overwatering.
What if my hazelnut sprouts rot or mold?
Overwatering or poor airflow causes rot. If you spot black mold or mushy sprouts, act fast:
- Remove affected sprouts with sterile scissors.
- Let the medium dry slightly before re-moistening.
- Improve airflow by propping open the container or adding a small fan (gentle breeze only).
Can I use store-bought hazelnuts for sprouting?
Store-bought hazelnuts are roasted or processed, which kills viability. For best results, use fresh, raw hazelnuts from a tree (or organic, unroasted nuts labeled for planting). Check for plump, intact shells—no cracks or holes—as these are signs of viability.
When should I transplant hazelnut sprouts outdoors?
Wait until spring after the last frost (when soil is above 50°F) and all danger of frost has passed. Harden off sprouts by gradually exposing them to outdoor conditions over 1–2 weeks. Choose a spot with 6+ hours of sunlight and well-draining soil—hazelnuts hate soggy roots!
Pro Tip:
Label your containers! Hazelnut sprouts look similar to other nuts—keeping track of varieties (like Filbert or European) ensures you’re growing what you intended. Use a toothpick and marker for easy identification.
Wrapping up and next steps
Growing a hazelnut tree sprout from scratch is a rewarding journey that combines patience, care, and the layered chill method—a proven technique for achieving 90% germination success.
Whether you’re a seasoned gardener or a curious beginner, these steps empower you to nurture life from a tiny nut, turning it into a thriving tree. 🌱
Now that you’re armed with the right materials, techniques, and troubleshooting tips, it’s time to take action! Start with just one hazelnut sprout—your future shade tree, wildlife haven, or even a gourmet harvest could begin right in your own backyard. Happy planting!