
Size
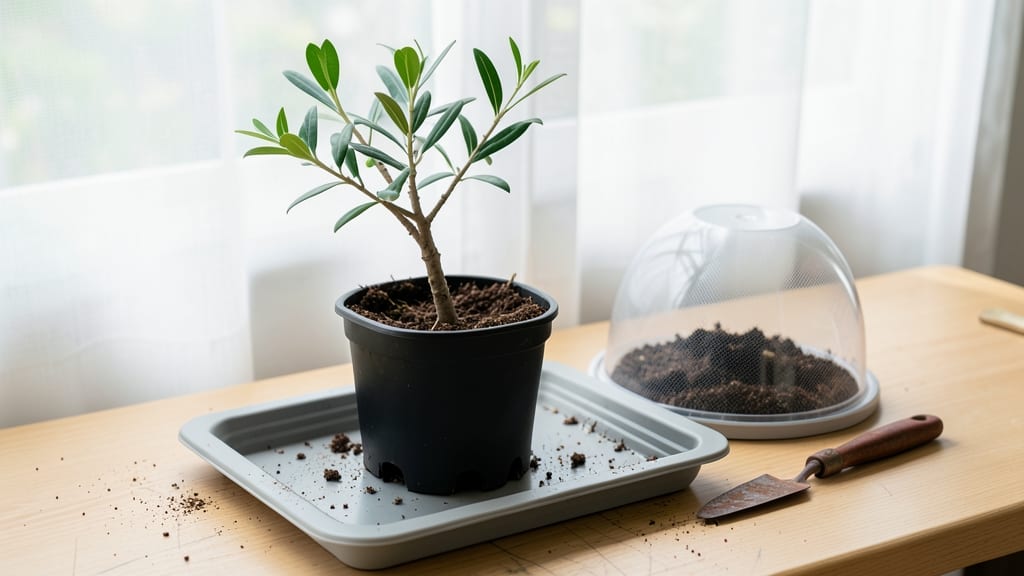
Growing an olive tree from a pit is the kind of slow-motion magic that rewards patience with a tree that could live for centuries. 🌱 I’ve watched my own olive sapling push through stubborn soil for months before finally breaking the surface—each tiny leaf a reminder that good things take time.
The secret isn’t forcing speed; it’s creating the right conditions for nature to do its work.
You’ll need just a few things: a fresh olive pit (the fresher, the better), a small pot with drainage, and a sunny spot that mimics the Mediterranean climate olives crave.
The soil should be gritty and well-draining—think sand mixed with compost—to prevent rot. Water lightly but consistently, keeping the soil damp but never soggy, because olive pits hate soggy starts.
Once your pit sprouts (which can take anywhere from a few weeks to a year), you’ll nurture a delicate sapling that needs bright light and occasional pruning to stay strong.
In a few years, you could have a tree that thrives in pots or even the ground, depending on your climate. The payoff? Fresh olives, shade, and a piece of history growing in your own backyard.
Fair warning: olive trees grow slowly—think decades before you harvest fruit. But that’s part of the charm. Every step, from germination to maturity, is a lesson in persistence. Ready to start your olive tree journey? Let’s get those pits sprouting.
📚 In This Guide
- What you need
- Instructions
- Tips and common mistakes
- Wrapping up and next steps
What you need
- ● Olive pits: 3–5 fresh, firm pits (avoid soft or moldy ones—they won’t sprout!).
- ● Small pots or containers: 3–5 (4–6 inches deep) with drainage holes. Plastic cups with holes poked in the bottom work too!
- ● Well-draining potting mix: 1–2 bags of cactus/succulent mix or a blend of 50% potting soil + 50% perlite/sand.
- ● Water: Room-temperature, filtered if possible (olives hate chlorine!).
- ● Plastic wrap or humidity dome: To create a mini greenhouse effect.
- ● Spray bottle: For gentle watering (a 16–32 oz. misting bottle is ideal).
- ● Label markers: To track your pits (olive trees can take 6–12 months to sprout!).
- ● Seedling heat mat: Keeps soil warm (70–80°F) to speed up germination.
- ● Grow lights: If your space lacks bright, indirect sunlight (12+ hours/day).
- ● Fertilizer: A balanced 10-10-10 or fish emulsion (once leaves appear).
- ● Pruning shears: For trimming future branches (sterilize with rubbing alcohol!).
- ● Larger pot (1+ gallon): For transplanting after 6–12 months.
How to grow an olive tree from a pit: essential starting steps
Here's the straightforward method I've used to coax olive trees from pits—no fancy tools, just patience.
🌱 Step 1: Select and Prepare the Pit
Choose a large, fresh olive pit—slightly smaller than a golf ball—and remove any remaining flesh. Rinse it thoroughly under cool water to eliminate residue, then let it dry completely for 24 hours. This prevents mold and rot during germination. I like to soak the pit in warm water for 24 hours before planting to soften the hard outer shell slightly—this speeds up the process.
Here's the thing—olive pits have thick shells that resist cracking. After soaking, gently tap the pit against a hard surface (like a countertop) until you hear a slight crack. Don't force it—just enough to see a tiny opening. This is where the root will emerge. If the pit feels too hard, soak it another 12 hours and try again.
💧 Step 2: Start Germination in Moist Media
Fill a small container (like a 4-inch pot) with moistened perlite or coarse sand—these materials drain well but retain enough moisture for germination. Olive pits need consistent dampness, not soggy conditions. Press the prepared pit halfway into the medium, with the cracked side facing downward. This positions the potential root growth downward naturally.
Cover the container loosely with plastic wrap to trap humidity, but leave a small gap for airflow. Place it in a warm spot (70-75°F)—a sunny windowsill or on top of a refrigerator works well. Check the moisture every 2-3 days; the medium should feel damp like a wrung-out sponge. If it dries out, mist lightly with water. Germination can take 4-12 weeks, so don't rush it.
☀️ Step 3: Encourage Early Growth and Light
Once the first green shoot breaks through the soil (usually 8-12 weeks after planting), remove the plastic wrap immediately. Olive seedlings are delicate and prone to damping-off if kept too moist. Move the pot to a bright location with indirect sunlight—direct sun can scorch the tiny leaves. If using a grow light, keep it 6-8 inches away to avoid burning.
You'll notice the shoot grow slowly at first, then accelerate. When it reaches 2-3 inches tall, gently expose it to 2-3 hours of morning sun daily, gradually increasing to full sun over 2 weeks. This hardening process prevents shock when you eventually transplant outdoors. Watch for yellowing leaves—this signals too much light or overwatering.
🪴 Step 4: Transplant to a Permanent Pot
After 3-4 months, when the seedling has 4-6 true leaves and a 2-inch root system, it's ready for its first repotting. Use a 6-inch pot with well-draining potting mix (a blend of 50% potting soil, 30% perlite, and 20% sand). Fill the pot halfway, place the seedling in the center, and add more mix around the roots, pressing lightly to eliminate air pockets.
Water deeply until it drains from the bottom, then let the top inch of soil dry out before watering again. Olive trees hate soggy roots—always check moisture by sticking your finger 1 inch deep before adding water. Place the pot in full sun (at least 6 hours daily) and protect it from strong winds, which can damage young stems.
Tips & tricks for growing an olive tree from a pit
Here's what nobody tells you—these small details make all the difference between success and frustration with your olive tree project.
Pit Selection Tip: Look for pits that are slightly smaller than a golf ball but still heavy for their size. Lighter pits often have less viable embryos inside. I also avoid pits with any soft spots or cracks—they're more likely to rot during the 24-hour drying period. If you're using store-bought olives, check the pit size before buying to ensure you have good candidates.
Germination Strategy: The 24-hour soak is your friend, but don't skip the drying period afterward. After soaking, place your pit on a paper towel in a single layer and let it air dry completely for those full 24 hours. This prevents mold from forming during germination, which can happen if moisture gets trapped. I've lost count of how many pits I ruined by rushing this step—trust me, it's worth the wait.
Temperature Matters: While the instructions mention 70-75°F as ideal, I've found that consistency matters more than exact degrees. If your home runs cooler, place the germination container on top of a refrigerator or near a warm spot like a sunny window. Just avoid heat sources that fluctuate—like near ovens or heaters—which can cause uneven germination. A simple thermometer near your setup helps track conditions.
Light Transition Tip: When your seedling reaches 2-3 inches and you're ready to introduce more sunlight, do it gradually over those 2 weeks. Start with just 2-3 hours of morning sun, then add 30 minutes each day. I've seen seedlings get sunburned when moved too quickly—it looks like tiny brown spots on the leaves. If this happens, move it back to indirect light immediately and wait a few days before trying again.
Pro Tips for Grow An Olive Tree From A Pit
- Here's what nobody tells you—these small details make all the difference between success and frustration with your olive tree project.
- Pit Selection Tip: Look for pits that are slightly smaller than a golf ball but still heavy for their size.
- Germination Strategy: The 24-hour soak is your friend, but don't skip the drying period afterward.
Frequently asked questions
Got questions? You're not alone—growing an olive tree from a pit is a rewarding but nuanced process! Here are answers to the most common queries to help you succeed.
How long does it take for an olive pit to sprout?
Patience is key! Under ideal conditions (warmth, moisture, and a dark, humid environment), you may see tiny roots or a sprout in 4–12 weeks. Once transferred to soil, growth slows—expect leaves in 3–6 months, but full maturity (fruit-bearing) takes 5–10 years.
Can I grow an olive tree indoors or in a cold climate?
Olive trees thrive in USDA Zones 8–11, but with care, you can grow them indoors or in containers. Place them near a south-facing window or under grow lights during winter. If outdoors, protect young trees with mulch or frost cloth in freezing temps. Dwarf varieties (like ‘Arbequina’) adapt better to pots.
What if my olive pit rots or molds instead of sprouting?
Rotting or mold (Fusarium or Rhizoctonia) usually means too much moisture or poor drainage. Try these fixes:
- Rinse the pit with hydrogen peroxide (3%) to kill fungi.
- Use a well-draining mix (50% perlite/sand, 50% peat).
- Let the pit dry slightly between waterings.
- Move to a warmer spot (70–80°F)—olive pits need heat to germinate!
Can I use store-bought olives instead of fresh pits?
Store-bought olives are cured and treated (often with chemicals or brine), making germination nearly impossible. Stick to fresh, fleshy pits from ripe olives—rinse them well to remove residue. If you must use cured olives, soak the pit in water for 24+ hours to leach out preservatives, but success rates drop significantly.
How do I speed up germination?
Boost your pit’s chances with these science-backed tricks:
- Stratification: Chill the pit in the fridge (30–60 days) to mimic winter dormancy.
- Scarification: Lightly sand or nick the pit’s hard shell with a file to help water penetrate.
- Hormone gel: Dab a rooting hormone on the pit before planting.
- Bottom heat: Use a seedling heat mat (75–85°F) to mimic tropical conditions.
Will my homegrown olive tree produce edible olives?
Yes, but patience is required! Trees grown from pits are unpredictable—they may take 5–10 years to bear fruit, and olives could be smaller or less flavorful than grocery-store varieties. For consistency, graft your sapling onto a dwarf rootstock or buy a named cultivar (like ‘Manzanillo’ or ‘Kalamata’).
Wrapping up and next steps
Growing an olive tree from a pit is a rewarding journey that blends patience with the joy of nurturing life from something as simple as a seed.
With the right care—consistent watering, proper sunlight, and a little love—you’ll watch your tiny sapling transform into a thriving plant. Now’s your chance to take that next step! Whether you’re gifting a tree to a loved one or simply embracing the magic of gardening, start today and enjoy the fruits of your labor—literally! 🌱💚