
Pruning
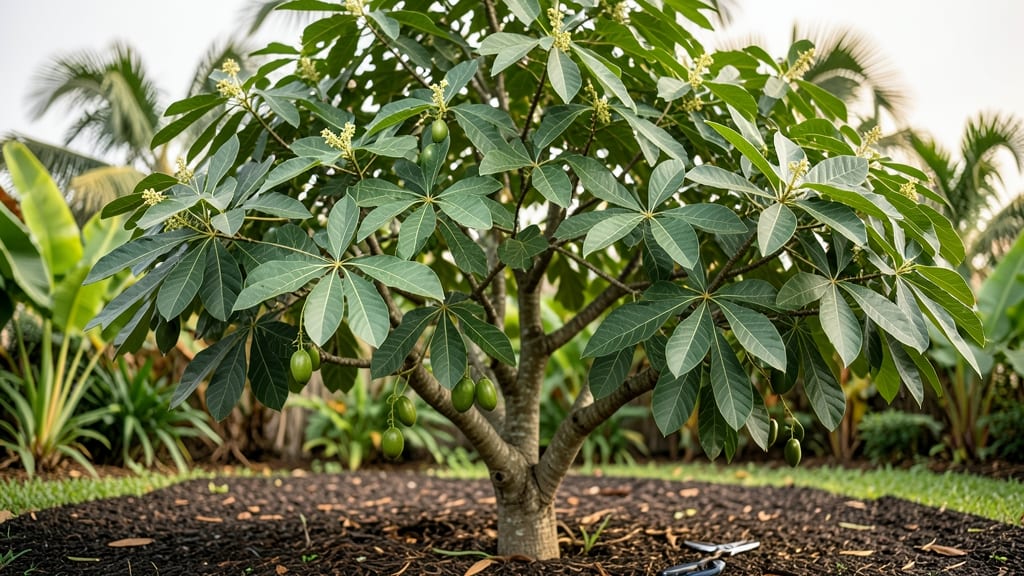
Growing a green almond tree (Terminalia catappa) means lush, glossy foliage and edible nuts—but only if you prune it right. 🌿 I learned the hard way that skipping regular shaping leads to sparse harvests and leggy branches, even in the perfect subtropical climate.
The key isn’t just cutting back; it’s understanding when to prune for both beauty and bounty.
This tree thrives in USDA zones 10-12, where it handles heat and humidity without fuss. Start with well-draining soil and full sun—partial shade in peak afternoon heat keeps leaves vibrant. Water deeply once established, but avoid soggy roots.
The real magic happens with year-round light pruning: trim leggy growth in spring, shape the canopy in summer, and remove dead wood in winter.
With consistent care, you’ll see thicker foliage, more shade, and heavier nut production by year three. The nuts ripen in fall, and the tree’s striking purple leaves in cooler months make it a standout.
Just remember: patience is key—these trees take 5-7 years to bear heavily, but the payoff is worth it.
Works equally well as a street tree, privacy screen, or edible landscape plant. Whether you’re growing for shade, beauty, or harvests, the pruning schedule is the secret to keeping it productive. Let’s get those shears ready!
📚 In This Guide
- What you need
- Instructions
- Tips and common mistakes
- Wrapping up and next steps
What you need
- ● Pruning shears – Bypass shears (sharp, clean-cutting blades, 6"–8" size) for small branches.
- ● Loppers – 20"–24" reach, for thicker branches (½"–1.5" diameter).
- ● Pruning saw – Curved-tooth design for branches over 1.5" thick.
- ● Disinfectant – 70% isopropyl alcohol or bleach solution (1:9 ratio) to sterilize tools.
- ● Garden gloves – Cut-resistant, breathable (e.g., leather or synthetic mesh).
- ● Rubbing alcohol or hydrogen peroxide – For cleaning wounds on the tree.
- ○ Pruning sealant – Optional but helpful (e.g., Tanglefoot Tree Wound Pruning Seal) for large cuts.
- ● Ladder or step stool – Sturdy, non-slip (8–10 ft tall for mature trees).
- ● Heavy-duty trash bags – For collecting pruned debris.
- ● Sharpie or permanent marker – To label cuts for future reference.
- ● Pole pruner – For high branches without a ladder.
- ● Tree pruning rope – To stabilize branches during heavy cuts.
- ● Pruning paint – Non-toxic, water-based to seal small wounds (e.g., Tree Wound Dressing).
- ● Garden hose with nozzle – To clean tools and rinse off sap.
- ● Camera or phone – Document your tree’s progress before/after pruning!
- ● Compost bin – For repurposing small pruned branches.
Step-by-step year-round pruning for a thriving green almond tree
Mastering pruning transforms a struggling almond tree into a productive powerhouse. Here's my battle-tested approach.
✂️ Step 1: Late Winter Pruning for Structure
Start in late February or early March, when the tree is still dormant but before buds swell. This is when you'll see the framework of your tree's future harvest potential. Remove any dead, diseased, or crossing branches first—these are the obvious culprits that steal energy from nut production.
Next, cut back any branches that grow inward or rub against others. Use clean, sharp pruners to make 45-degree cuts just above an outward-facing bud. I always step back after each cut to visualize the tree's shape—you want an open center that lets sunlight reach all branches. Aim to remove no more than 25% of the tree's canopy in this first pruning.
☀️ Step 2: Summer Thinning for Airflow and Light
In June or July, when the tree is actively growing but before new growth hardens, focus on thinning the canopy. This isn't about removing branches—it's about creating space. Look for branches that are too dense or growing too close together. You'll want to remove suckers (vigorous shoots at the base) and water sprouts (vertical shoots growing from the trunk or branches).
Make your cuts just above a lateral bud or branch junction. The goal here is to improve airflow and sunlight penetration to the inner branches. A well-thinned tree produces 30% more nuts because every branch gets equal access to sunlight and nutrients. I always prune on a dry day to prevent disease entry points—wet cuts invite bacterial infections.
🌿 Step 3: Post-Harvest Cleanup for Winter Preparation
After your harvest in late August or early September, perform a light cleanup to prepare the tree for winter. Remove any branches that produced poor-quality nuts or showed signs of disease. These branches are energy sinks that could weaken the tree for next year's harvest. Also, trim back any overly vigorous growth that might be damaged by frost.
This is also the time to remove any dead or broken branches that might have formed during the growing season. I like to make these cuts on a clear day when the tree is dry. The fresh cuts will heal better before winter dormancy begins. Avoid heavy pruning now—you don't want to stimulate new growth that won't harden off before cold weather arrives.
⏰ Step 4: Light Winter Pruning for Safety
In mid-winter (January), perform a final light pruning to remove any branches that might have died back during the cold months. You'll recognize these as branches that are completely bare, brittle, or showing no signs of life. This is also when I remove any branches that are growing in directions that could cause them to break under snow or ice load.
Keep cuts minimal—just enough to maintain the tree's shape and remove hazards. The tree is already stressed by winter conditions, so don't push it. I always use a sterilized saw for larger branches to prevent disease transmission. This final pruning ensures your tree enters spring in the best possible condition for another productive season.
Tips & tricks for perfect year-round almond tree pruning
These battle-tested strategies will help you avoid common pruning mistakes and maximize your almond tree's productivity.
Timing is Everything: The late February to early March window for Step 1 is critical because it's when your tree is still dormant but ready to respond to pruning. If you prune too early, you risk damaging buds that haven't yet formed. I've learned the hard way—pruning in January can stress the tree unnecessarily. The same goes for summer thinning in June or July; timing it just before new growth hardens prevents unnecessary stress on the tree.
Visualizing the Canopy: After each cut in Step 1, step back and visualize your tree's shape as if looking at it from all angles. You want an open center that resembles an upside-down cone—this allows sunlight to penetrate all the way to the inner branches. I keep a small notepad to sketch my tree's shape after each pruning session. This helps me track progress and ensures I'm not removing too much foliage (remember, no more than 25% of the canopy).
Disease Prevention: Sterilizing your tools between cuts is absolutely essential, especially during summer thinning (Step 2). I keep a small bottle of rubbing alcohol and a clean rag in my pruning kit. Wipe down your tools after every 3-4 cuts, particularly when working with wet wood or in humid conditions. This simple step prevents bacterial infections that can spread through fresh cuts and weaken your tree.
Post-Harvest Inspection: During Step 3's cleanup, take time to examine each branch you remove. Look for signs like discolored wood, fungal growth, or unusual spots—these are red flags for disease. I've found that removing these branches immediately prevents the spread of pathogens to healthy parts of the tree. Also, pay special attention to branches that produced poor-quality nuts; these are often the first to show signs of stress or disease.
Pro Tips for Green Almond Tree
- These battle-tested strategies will help you avoid common pruning mistakes and maximize your almond tree's productivity.
- Timing is Everything: The late February to early March window for Step 1 is critical because it's when your tree is still dormant but ready to respond to pruning.
- Visualizing the Canopy: After each cut in Step 1, step back and visualize your tree's shape as if looking at it from all angles.
Frequently asked questions
Got questions about nurturing your green almond tree? You’re not alone! Whether you’re a pruning pro or just starting, these answers will help you grow a thriving tree with fewer headaches and more harvests.
How often should I prune my green almond tree for the best harvest?
Prune your green almond tree twice a year: once in late winter or early spring (before new growth) to shape the tree and remove dead wood, and again in summer (after harvest) to encourage fruit production. Avoid heavy pruning in fall—it can stress the tree before winter. Focus on open-center shaping to improve airflow and sunlight exposure.
When is the ideal time to plant a green almond tree?
The best time to plant is in early spring (after the last frost) or fall (6–8 weeks before the first frost). This gives roots time to establish before extreme temperatures. Choose a sunny, well-draining spot with at least 6–8 hours of sunlight daily. Avoid planting in waterlogged soil—green almond trees hate soggy roots!
How do I protect my green almond tree from cold weather?
Green almond trees are hardy to USDA Zones 7–10, but younger trees or colder climates need extra care. Mulch the base with 2–3 inches of organic mulch (like straw or wood chips) to insulate roots. In freezing temps (<20°F), wrap the trunk with burlap or use a tree guard to prevent sunscald. Water deeply before winter to help roots withstand frost.
Can I grow a green almond tree in a container? Is it possible?
Yes, but it’s challenging long-term. Green almond trees have deep roots and can outgrow most containers (aim for at least 20-gallon pots with drainage holes). Use a fast-draining potting mix and repot every 2–3 years. Containers dry out faster—water daily in summer and move pots to a sunny, sheltered spot in winter. For heavy harvests, a ground-planted tree is ideal.
Why are my green almond tree’s leaves turning yellow? What’s wrong?
Yellow leaves usually signal overwatering, nutrient deficiency, or pests. Check the soil—it should be moist but not soggy. Nitrogen deficiency (common in sandy soils) causes yellowing; fertilize with a balanced 10-10-10 or almond-specific feed in spring. Inspect for aphids or spider mites (use neem oil if spotted). If only lower leaves yellow, it’s likely natural aging—prune them to redirect energy upward.
Wrapping up and next steps
Growing a thriving green almond tree is all about patience, precision, and a little green thumb love! 🌱 With the right pruning techniques—like year-round shaping, disease prevention, and strategic cuts—you’ll soon be rewarded with abundant harvests of sweet, nutritious almonds.
Remember, consistency is key, so keep an eye on your tree’s health and adjust as needed.
Ready to take the next step? Start by marking your calendar for seasonal pruning sessions and experiment with a few branches to refine your skills. Happy growing—your future harvest (and neighbors!) will thank you! 🌿✨