
Trees
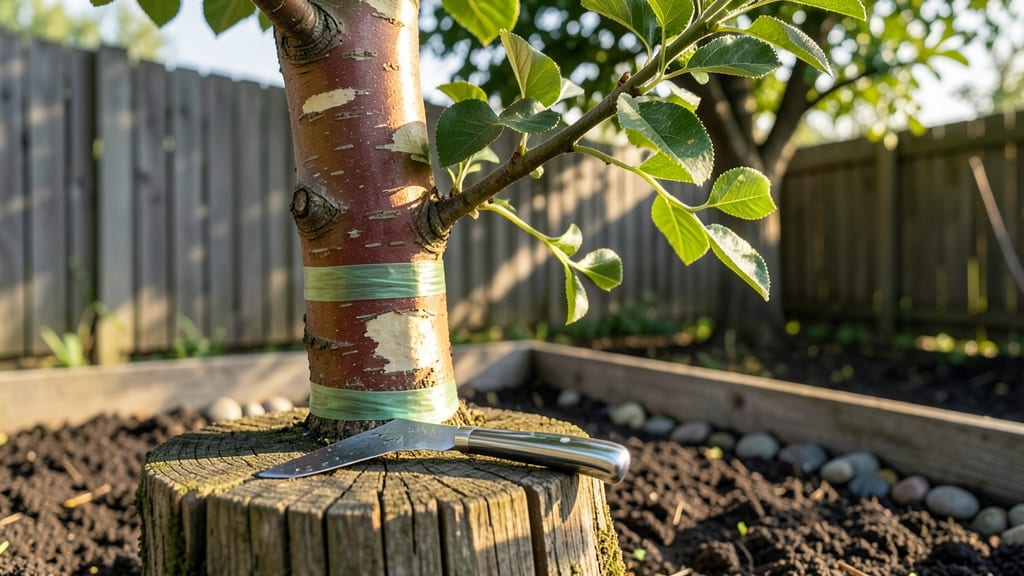
Grafting nectarine trees transforms a weak root system into a fruit-bearing powerhouse with just four precise cuts. 🌱 I still remember the first time I saw a scion take—it felt like magic, watching two trees become one.
The key is timing: late winter or early spring, when sap flows but buds haven't swollen yet.
You'll need sharp grafting tools, compatible rootstock and scion wood, and a clean workspace. The whip-and-tongue method works best for nectarines—it's simple but creates a strong union. Most beginners struggle with cambium alignment, but once you see how the layers match up, it becomes intuitive.
By summer, your grafted union will be unbreakable, and next year you'll harvest sweeter, more abundant fruit. The right combination of rootstock and scion can even improve disease resistance or adaptability to your soil. This is how you build a nectarine tree that outperforms nursery stock.
Works for backyard orchards, container-grown trees, or even grafting onto existing peach trees. The technique scales from one tree to an entire grove. Let's get those cuts perfect—your future harvest depends on it.
📚 In This Guide
- What you need
- Instructions
- Tips and common mistakes
- Wrapping up and next steps
What you need
- ● Rootstock: 1-2 healthy, dormant nectarine or peach rootstocks (1–2 years old, ~½" diameter). Pro tip: 🌡️ Choose cold-hardy varieties for your zone!
- ● Scion wood: 3–5 nectarine scions (½" diameter, 6–8" long, with 3–5 buds). ✨ Store in a damp paper towel in the fridge until use!
- ● Grafting tools: 1 sharp grafting knife (or pruning shears)
- ● 1 grafting tape (or parafilm)
- ○ 1 pruning sealant (optional, for extra protection)
- ● Timing: Late winter/early spring (when rootstock buds swell but aren’t open).
- ● Location: Clean workspace (outdoors or garage) with access to water.
- ○ Safety: Wear gloves (optional) and sanitize tools with rubbing alcohol.
- ● 1 humidity dome or plastic bag (to retain moisture post-graft)
- ● 1 label tags (to track scion varieties)
- ● 1 spray bottle (for misting scions)
Step-by-Step instructions for grafting nectarine trees
Here's how I make grafting nectarines foolproof—no fancy tools, just sharp cuts and patience.
🪴 Step 1: Prepare the Rootstock and Scion Wood
Choose a healthy, dormant rootstock with a 1-inch diameter trunk. I always select branches that are smooth and free of cracks—rough bark makes grafting harder. Cut the rootstock 6-8 inches above the graft union (where it meets the soil) using a sterilized grafting knife or pruning shears. Make the cut at a 45-degree angle, about 2-3 inches long. This slanted cut is key—it gives the scion more surface area to bond.
For the scion, pick last year's growth from a nectarine tree you love. Look for pencil-thick branches (about ½-inch diameter) with 3-4 buds. Cut a 6-inch section from the base of the branch, just above a bud. Make your first cut 1 inch below a bud, then angle the blade upward to create a tongue-shaped notch. This notch will interlock perfectly with the rootstock.
✂️ Step 2: Make the Perfect Slip Cuts
Here's where it gets fun—the slip cut. Hold the scion at a 45-degree angle and make a 1-inch vertical cut down the center of the tongue. Now you have two matching pieces: the rootstock with a V-shaped notch and the scion with a tongue. The goal is a tight fit—when you insert the scion, the cambium layers (that green ring just under the bark) should align perfectly. If they don’t match, trim a little more until they do.
I always test the fit by pressing the scion into the rootstock. It should slide in snugly but not forcefully—no gaps, no bending. If it feels loose, adjust the cuts. Pro tip: Keep everything moist with a damp paper towel while you work. Dry wood won’t graft well, and you’ll waste time trying to force a bad union.
💧 Step 3: Seal the Graft with Wax or Tape
Once the scion is seated, wrap the graft union tightly with rafting tape or plastic wrap. Start at the bottom and spiral upward, overlapping each turn by ½ inch. This keeps the cut clean and prevents drying. For extra security, I add a thin layer of grafting wax over the tape. The wax seals in moisture and protects against disease. If you don’t have wax, a damp cloth works in a pinch—just secure it well.
Leave the top of the scion exposed (about 2 inches above the graft). This ensures the buds stay accessible for growth. Cover the entire graft with a plastic bag to create a humid microclimate. Check daily to make sure nothing’s drying out—condensation inside the bag is a good sign.
☀️ Step 4: Monitor and Encourage New Growth
Place the grafted rootstock in a shady, sheltered spot for 2-3 weeks while the union forms. You’ll know it’s working when you see tiny green shoots emerging from the scion’s buds—usually within 3-4 weeks. At this stage, move it to bright, indirect light to strengthen the new growth. Avoid direct sun until the graft is fully established, or the scion might scorch.
Real talk: Not every graft takes. If the scion wilts or turns brown, don’t panic—it might still recover. Keep the rootstock hydrated and give it time. Once the new shoots are 3-4 inches tall, you can remove the tape and wax. Prune any suckers (shoots growing below the graft) to focus energy on the scion. Within a season, you’ll have a thriving nectarine tree!
Tips & tricks for perfect grafting nectarine trees
These simple tricks will help you nail the grafting process and avoid common pitfalls that can ruin your union.
Selection Tip: When choosing your rootstock, look for branches with smooth bark and a diameter of exactly 1 inch—this is ideal for a strong union. I've found that younger, more flexible branches graft more successfully than older, woody ones. For the scion, always select pencil-thick branches with 3-4 buds—this gives you the best chance of establishing a vigorous new tree. The key is to work with fresh, healthy wood that hasn't been exposed to extreme temperatures or drying winds.
Tool Prep: Sterilizing your grafting knife between cuts is absolutely critical. I use rubbing alcohol on a paper towel to wipe down the blade after each cut—this prevents disease transmission between rootstocks and scions. A sharp blade is also essential; dull knives crush the cambium layer, making successful grafting nearly impossible. If your knife starts feeling resistant, take a moment to sharpen it before continuing.
Moisture Management: Keeping everything damp during the grafting process is non-negotiable. I keep a bowl of water nearby and periodically mist my cuts with a spray bottle. The cambium layer needs to stay hydrated to form a proper union. After grafting, the plastic bag you use to create a humid microclimate should have visible condensation—this tells me the environment is just right for successful bonding. Check daily to ensure nothing's drying out.
Visual Cues for Success: In Step 4, when you're monitoring growth, look for these signs: the tiny green shoots should appear within 3-4 weeks, but don't be surprised if they take up to 6 weeks in cooler climates. The new growth should be firm and vibrant, not wilted or yellowing. If you see suckers growing below the graft, trim them immediately—they're competing with your scion for energy. The goal is to direct all the rootstock's resources toward establishing your new nectarine tree.
Pro Tips for Grafting Nectarine Trees
- These simple tricks will help you nail the grafting process and avoid common pitfalls that can ruin your union.
- Selection Tip: When choosing your rootstock, look for branches with smooth bark and a diameter of exactly 1 inch—this is ideal for a strong union.
- Tool Prep: Sterilizing your grafting knife between cuts is absolutely critical.
Frequently asked questions
Got questions about grafting nectarine trees? You’re not alone! Here are some of the most common concerns—plus clear, actionable answers to help you succeed.
When is the best time to graft nectarine trees?
The ideal window is late winter to early spring (before buds break), when the rootstock is dormant but sap starts flowing. For warmer climates, February–March works best; in colder zones, aim for March–April. Avoid grafting after leaves emerge—it stresses the tree.
What if my graft fails or doesn’t take?
Don’t panic! Grafts can fail due to poor cuts, incompatible varieties, or disease. Check these first:
- Callus formation: A swollen, white bump at the graft union means it’s working.
- Scion growth: New shoots from the grafted branch? Success!
- Rootstock health: If it’s dying, the graft may not survive—try again with a fresh rootstock.
If it fails, re-graft in 2–3 weeks using the same method.
Can I graft a nectarine onto a peach tree (or vice versa)?
Yes! Nectarines and peaches are cross-compatible (same genus, Prunus persica). Just ensure the rootstock is healthy and the scion is disease-free. Pro tip: Nectarines graft slightly easier than peaches—choose a vigorous rootstock (like ‘Lovell’ or ‘Halford’) for best results.
Do I need special tools, or can I use household items?
While sharp grafting knives and rafting tape are ideal, you can improvise:
- Use a clean, sharp knife (sterilized with rubbing alcohol).
- Replace grafting tape with plastic wrap or even rubber bands (remove after 4–6 weeks).
- Skip a grafting compound if you’re in a humid climate—just seal the cut tightly.
Warning: Avoid dull tools—they crush cambium layers, killing the graft.
How do I protect my graft from pests or disease?
Prevention is key! Start with disease-resistant rootstock (e.g., ‘Nemaguard’). After grafting:
- Apply a fungicide (like copper spray) to cuts.
- Keep the area moist but not soggy—use a plastic bag temporarily if humidity is low.
- Watch for aphids or borers; treat with neem oil if spotted.
If the graft union turns black or mushy, it’s likely infected—remove and start over.
Wrapping up and next steps
Grafting nectarine trees is a rewarding way to expand your orchard, blend flavors, or revive old trees with fresh vigor—and you’ve got all the tools to succeed! 🌱 With the right scion, sharp tools, and a little patience, you’ll soon see those buds burst with new life.
Now that you’re ready to act, why not pick your favorite nectarine variety and start grafting this spring? Grab your supplies, follow your instincts, and watch your orchard thrive!