
Landscaping
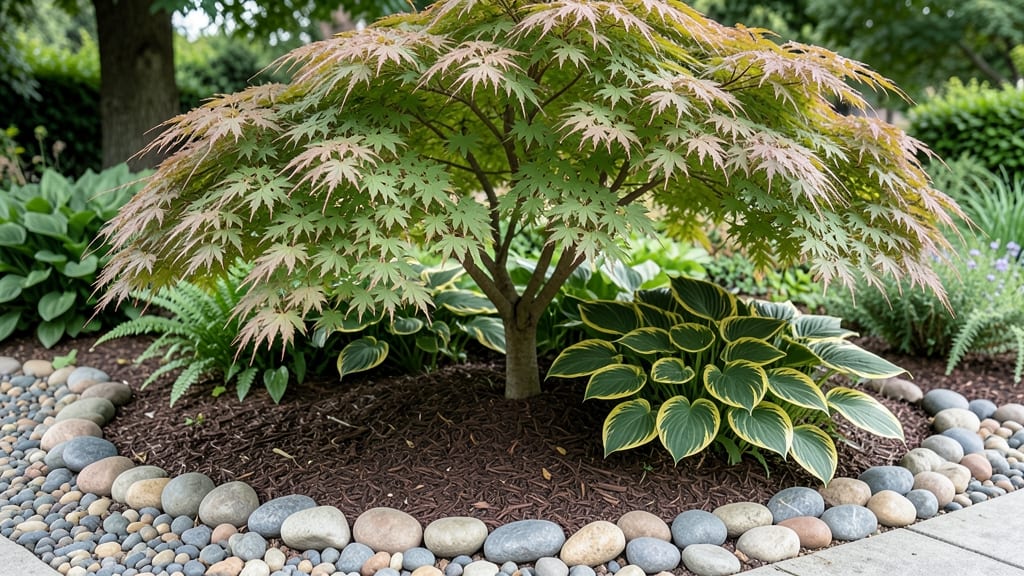
Landscaping around mature trees transforms your front yard from ordinary to extraordinary—without harming their roots or stealing their spotlight. 🌳 I’ve designed front yards where shade-loving perennials frame oak trees while pollinator-friendly shrubs add color beneath maples, all while keeping maintenance simple.
The key is working with the tree’s natural shape and light patterns, not against them.
Start with mulch—not just for looks, but to protect roots and suppress weeds. A 3-inch layer of wood chips keeps soil moist while preventing compaction from foot traffic. Pair that with drought-tolerant ground covers like creeping thyme or ajuga underfoot, and clumping ornamental grasses (like Miscanthus) for vertical contrast.
These plants thrive in low light and won’t compete with tree roots for water.
By summer, your design will showcase layered texture: velvety hostas near the trunk, airy ferns in partial shade, and bold hydrangeas along the property line. A winding flagstone path (set at least 12 inches from the trunk) keeps foot traffic away from roots while adding structure.
The result? A yard that looks intentional, not crowded—and requires less water and fuss once established.
This approach works for any climate, whether you’re dealing with fast-growing willows that need wide clearances or slow-growing dogwoods that appreciate cozy companions. The same principles apply to urban lots with power lines or rural properties with century-old oaks.
Let’s make your trees the stars while the rest of the yard plays supporting roles.
📚 In This Guide
- What you need
- Instructions
- Tips and common mistakes
- Wrapping up and next steps
What you need
- ● Soil & Mulch: Topsoil (1–2 cubic yards, depending on yard size)
- ● Organic mulch (3–4 bags, 2–3 cubic feet each, like pine bark or shredded wood)
- ● Compost (1–2 bags, 40–50 lbs each, for nutrient boost)
- ● Plants & Ground Cover: Perennials/shrubs (5–10 plants, based on spacing needs)
- ● Grass seed or sod (if replacing lawn areas, 10–20 lbs for ~50 sq ft)
- ○ Optional: Hosta, ferns, or ornamental grasses (for texture)
- ● Hardware & Edging: Landscape fabric (1 roll, 3–4 ft wide, to suppress weeds)
- ● Garden edging (plastic, metal, or stone—10–20 ft length)
- ● Garden stakes & twine (for plant support, 10–15 stakes)
- ● Tools: Shovel & spade (for digging)
- ● Pruners (bypass or anvil type)
- ● Rake (leaf/landscaping rake, 18–24 inches wide)
- ● Wheelbarrow (for hauling materials)
- ● Measuring tape & string line (for layout)
- ● Knee pads (because, let’s be real—you’ll need ‘em!)
- ● Must-Haves: Clear weather (avoid rainy days for digging)
- ● Tree health check (prune dead branches beforehand)
- ● Local plant hardiness zone knowledge (check USDA zone map!)
- ● Nice-to-Haves: Drip irrigation kit (for low-maintenance watering)
- ● Solar-powered landscape lights (for evening ambiance)
- ● Decorative rocks or pebbles (for pathways or borders)
- ● Hose with adjustable nozzle (for efficient watering)
Strategic plant placement for year-round tree landscaping
Here's how to create a thriving front yard that highlights your trees while keeping maintenance simple.
🌱 Step 1: Assess Tree Canopy and Root Zones
Start by mapping your tree's drip line—the area directly below where branches extend. This is where 70% of roots live and where most competition for water and nutrients occurs. Use a measuring tape to mark a 3-foot radius from the trunk as the root protection zone (never disturb roots here). I like to sketch a quick diagram to visualize planting zones.
Next, observe sunlight patterns. Trees cast partial shade in their drip line and full shade directly beneath the canopy. Note where morning sun hits (warmer, drier soil) versus afternoon shade (cooler, moister soil). This will dictate which plants thrive where—drought-tolerant perennials for dry zones, ferns or hostas for shadier spots.
🪴 Step 2: Layer Plants by Height and Function
Build three distinct layers to maximize visual interest while keeping the tree as the focal point. Begin with understory shrubs (3-6 feet tall) like inkberry holly or dwarf fothergilla placed 6-8 feet from the trunk. These create structure without competing with the tree's roots. I always space them 2-3 feet apart to allow airflow and prevent disease.
Add mid-height perennials (1-3 feet) like foamflower or Japanese forest grass in the drip line's outer edge. These fill gaps while their shallow roots won't disrupt deeper tree roots. Finally, use ground covers (like sweet woodruff or creeping phlox) in the shadiest areas—they suppress weeds and retain moisture. Avoid anything with aggressive roots like mint or bamboo.
☀️ Step 3: Choose Drought-Tolerant and Seasonal Interest Plants
Prioritize native plants—they're adapted to your climate and require less water. For spring color, plant bloodroot or hepatica near the tree's base where light filters through. In summer, add black-eyed Susan or coneflower in the drip line for pollinators. I always include one evergreen (like dwarf boxwood) to maintain winter structure when deciduous trees lose leaves.
For textural contrast, mix broadleaf plants (like hostas) with needle-like foliage (like Japanese sedge). Mulch with 3 inches of shredded bark (but keep it 6 inches away from the trunk) to retain moisture and suppress weeds. Replenish mulch annually—it breaks down faster than you think, especially in rainy seasons.
✂️ Step 4: Maintain with Seasonal Pruning and Soil Care
Prune once a year in late winter or early spring before new growth starts. Remove dead, diseased, or crossing branches first, then thin out 20% of the canopy to improve air circulation. Never prune more than 25% at a time—this stresses trees. I use clean, sharp pruners and seal larger cuts with pruning sealant to prevent pests.
Test soil every 2-3 years—trees often deplete nutrients faster than surrounding plants. Amend with compost in fall (when roots are still active) and slow-release fertilizer in early spring. Water deeply once a week during dry spells, focusing on the drip line where roots spread. A soaker hose buried 2 inches deep delivers moisture efficiently without runoff.
Tips & tricks for perfect year-round tree landscaping
Between us, the real magic in front yard landscaping happens under the trees—where most homeowners make costly mistakes. Here’s how to create harmony without the headaches.
Root Zone Precision: That 3-foot radius around your tree’s trunk isn’t just arbitrary—it’s where 70% of roots live. I’ve seen homeowners plant right up against trunks, only to watch trees struggle later. Use a garden flag to mark this zone permanently, and avoid digging or planting within it. For extra protection, install a flexible root barrier (like landscape fabric) in the outer edge of this zone if you have aggressive plants nearby.
Sunlight Mapping Secret: The difference between thriving plants and wilting ones often comes down to understanding your tree’s shade patterns. I recommend testing sunlight exposure for a week before planting: Place a white plate under the tree at noon each day—where it stays clean is full shade (ideal for hostas), where it gets partial dirt is partial shade (perfect for ferns), and where it’s fully dirty is morning sun (great for drought-tolerant perennials). This simple test saves hours of trial-and-error later.
Layering Like a Pro: When you’re placing those understory shrubs 6-8 feet from the trunk, don’t just eyeball it—use your measuring tape to ensure consistent spacing. I’ve seen beautiful designs fail because shrubs were too close together, leading to crowded growth and disease. For mid-height perennials in the drip line’s outer edge, consider grouping them in odd-numbered clusters (3, 5, or 7 plants) for natural-looking arrangements that still allow airflow.
Mulch Maintenance: That 3 inches of shredded bark you’re applying? It’ll disappear faster than you think—especially in rainy climates. I’ve made the mistake of assuming mulch lasts all season, only to find bare soil by summer. Mark mulch depth with small landscape stakes at planting time, and replenish it every spring before the growing season. Pro tip: Use a mulch volcano-free technique—pile it higher at the outer edges and taper it toward the trunk to prevent moisture buildup that can rot roots.
Pro Tips for Front Yard Landscaping Around Trees
- Between us, the real magic in front yard landscaping happens under the trees—where most homeowners make costly mistakes.
- Root Zone Precision: That 3-foot radius around your tree’s trunk isn’t just arbitrary—it’s where 70% of roots live.
- Sunlight Mapping Secret: The difference between thriving plants and wilting ones often comes down to understanding your tree’s shade patterns.
Frequently asked questions
Got questions about transforming your front yard around trees?
You’re not alone! Here are answers to the most common concerns—so you can landscape with confidence and ease.
Can I plant flowers or shrubs directly under a mature tree?
While it’s possible, root competition is the big challenge. Opt for shade-tolerant plants like ferns, hostas, or wildflowers that thrive with minimal sunlight and moisture. Avoid deep-rooted plants like azaleas or boxwoods—they’ll battle your tree for water and nutrients. Pro tip: Use mulch (2–4 inches) to protect roots and retain moisture!
When is the best time to landscape around trees?
Timing matters! Early spring or fall (when temps are mild) are ideal—trees are dormant, so you minimize stress. Avoid peak summer heat or winter frosts, which can shock roots. If you must plant in summer, water deeply 2–3 times per week to help new plants establish.
What’s the cheapest way to add curb appeal around trees?
Skip expensive hardscapes! Try these budget-friendly ideas:
- Mulch: Use wood chips or shredded bark ($10–$30 per bag) for a polished look.
- Ground cover: Creeping thyme or clover ($5–$15 per plant) smothers weeds naturally.
- DIY stone paths: Repurpose bricks or pavers from a thrift store for a rustic trail.
- Container gardening: Potted ferns or succulents ($10–$25 each) add color without digging.
My tree’s bark is peeling or oozing sap—can I still landscape nearby?
Peeling bark or sap are often signs of stress, pests, or disease. Before landscaping, inspect the tree closely:
- If it’s minor (small cracks, dry bark), proceed cautiously—keep mulch 3+ inches away from the trunk to prevent rot.
- If it’s severe (large wounds, fungal growth, or oozing), consult an arborist first. Avoid planting near the affected area until the tree recovers.
Are there low-maintenance alternatives to grass around trees?
Grass struggles in shady, dry spots under trees. Try these zero-mow solutions:
Option
Pros
Cons
Wood mulch
Suppresses weeds, retains moisture, and looks neat.
Needs replenishing every 1–2 years; can attract termites if piled too high.
Gravel or decomposed granite
Drains well, weed-resistant, and modern aesthetic.
Can get hot in summer; may need edging to contain.
Living ground cover (e.g., moss, clover)
Eco-friendly, no mowing, and improves soil health.
Slower to establish; may require occasional trimming.
Wrapping up and next steps
Transforming your front yard landscaping around trees doesn’t have to be overwhelming—it’s all about strategic planning, seasonal layers, and a little creativity! 🌿 Whether you’re mulching, adding ground cover, or incorporating hardscapes, these ideas will help you create a stunning, low-maintenance space that thrives year-round.
Start small, experiment with textures, and don’t forget to protect those roots—your trees will thank you with lush, vibrant growth.
Ready to take the next step? Pick one project—like mulching, planting perennials, or adding lighting—and dive in! Grab your tools, sketch a simple design, and watch your front yard become the envy of the neighborhood. Happy landscaping! 🌟