
Pruning
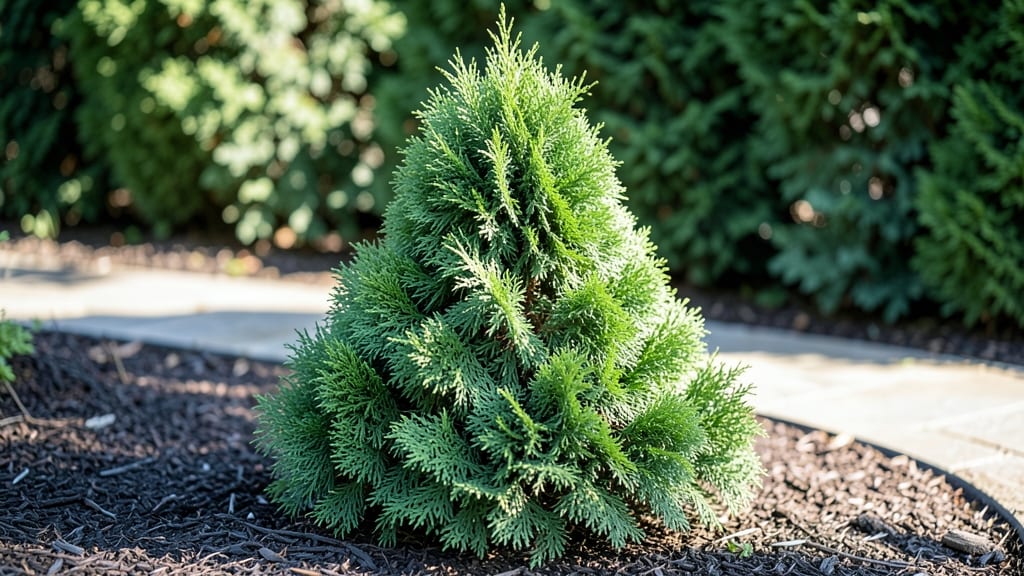
Planting an emerald arborvitae tree means adding a year-round green sentinel that stays vibrant through winter, summer, and everything in between. I remember the first time I saw one in a snowy yard—its deep green needles stood out against white like a living jewel.
This tree thrives in zones 3-7, making it one of the most reliable evergreens for cold climates.
The key to success starts with the right spot: full sun to partial shade and well-draining soil. Most nurseries sell them as 2-3 foot tall plants, but they grow slowly—expect about 6-12 inches per year.
The first year is critical: water deeply once a week unless rain does the work, and mulch heavily to protect roots from temperature swings.
You'll love how low-maintenance this tree is once established. Prune only to shape (never to "thin out"), and watch as it develops that classic tapered, columnar form. By year three, you'll have a 10-foot privacy screen that needs almost no attention beyond occasional watering during droughts.
Winter care is minimal—just avoid heavy snow buildup—but spring is when you'll notice the real magic. New growth emerges in bright green, and those browning tips you might see?
Usually just dry air or salt spray. A light spray of anti-desiccant in late fall can prevent that, and most pests stay away if the tree is healthy.
📚 In This Guide
- What you need
- Instructions
- Tips and common mistakes
- Wrapping up and next steps
What you need
- ● Pruning shears: Bypass pruners (sharp, 5–8" blades) for clean cuts on small branches.
- ● Loppers: 16–24" for thicker branches (up to 1.5" diameter).
- ○ Pruning saw: Curved-bladed saw for stubborn, thick stems (optional for mature trees).
- ● Gloves: Heavy-duty, cut-resistant gloves (gardening or pruning-specific).
- ● Disinfectant: 70% isopropyl alcohol or pruning sealant (to prevent disease spread).
- ● Ladder or step stool: Sturdy, extendable (8–12 ft for tall trees).
- ● Trash bags: Heavy-duty (for debris disposal).
- ● Pruning shears oil: Light mineral oil (to maintain blade sharpness).
- ● Hand pruners with ratcheting mechanism: Eases pressure on tough cuts.
- ● Extension pole pruners: For high branches (10–15 ft reach).
- ● Tree wound dressing: (Controversial—skip if your arborvitae is healthy!)
- ● Notebook & pen: To track pruning notes (e.g., branch sizes, growth patterns).
- ● Safety glasses: Protects eyes from debris.
How to plant and care for an emerald arborvitae tree
This narrow, evergreen beauty delivers year-round structure with minimal fuss. Here’s how to establish it for decades of reliable growth.
Select the Perfect Planting Site
Emerald arborvitae thrives in full sun to partial shade, but its signature blue-green color deepens with 6+ hours of direct sunlight daily. Avoid low-lying areas where cold air pools—this tree handles USDA Zones 3-7, but winter burn risks rise in poorly drained spots. Test your site’s moisture: dig a 12-inch hole and check drainage over 24 hours. If water pools, amend the soil with 2-3 inches of compost to improve aeration.
This tree’s narrow, upright form makes it ideal for tight spaces, but give it 3-4 feet of clearance on all sides for airflow. If planting near a fence or wall, position it at least 6 inches away to prevent root competition. The key is balance—too much shade dulls its color, while too much sun can scorch tender new growth in hot climates.
Dig and Prepare the Planting Hole
Dig a hole twice as wide as the root ball but no deeper—this prevents root suffocation. Loosen the sides of the hole with a shovel to encourage root spread into native soil. If your soil is heavy clay, mix 1 part native soil with 1 part peat moss to improve drainage. For sandy soil, add a handful of slow-release fertilizer (like 10-10-10) to the backfill mix.
Gently remove the arborvitae from its container and tease apart any circling roots with your fingers. Place the tree in the hole so the top of the root ball sits level with the surrounding soil—never bury the trunk deeper than it was in the nursery pot. This prevents rot and ensures proper water absorption. Tap the soil lightly around the edges to eliminate air pockets.
Water Deeply and Mulch for Retention
Water thoroughly immediately after planting to settle the soil and eliminate air gaps. Aim for 1-2 gallons per inch of root ball diameter—a 3-gallon container would need 3-6 gallons total. Let the water soak in completely; you’ll see it disappear into the soil rather than pooling. Over the next 2-3 weeks, water 2-3 times per week to encourage root establishment, then taper to once weekly once new growth appears.
Spread 2-3 inches of mulch (like shredded bark) over the soil surface, keeping it 6 inches away from the trunk to prevent rot. This layer locks in moisture and regulates soil temperature, which is critical during the arborvitae’s first growing season. Avoid piling mulch against the trunk—this creates a moist environment that invites fungal diseases. Replenish mulch annually to maintain its protective barrier.
Prune and Protect for Long-Term Health
Skip pruning for the first year—let the tree focus on root and shoot growth. In subsequent years, prune only to shape or remove dead branches in late winter or early spring, before new growth begins. Use clean, sharp pruners to make cuts just outside the branch collar for a smooth heal. Never remove more than 25% of the foliage in one season, as this stresses the tree and reduces its cold hardiness.
Young arborvitae are vulnerable to deer browsing and winter burn. Install deer-resistant fencing (like 8-foot tall mesh) if local wildlife is a threat, or wrap the lower trunk in tree guard to deter chewing. For winter protection, apply an anti-desiccant spray in late fall to prevent moisture loss from cold winds. This tree’s natural resilience will shine once established, but these steps ensure it starts strong.
Monitor and Adjust for Seasonal Changes
Check soil moisture weekly during the first year—stick your finger 2 inches deep into the soil. If it feels dry, water deeply. In Zones 3-4, arborvitae may show winter burn (brown tips) if exposed to salt spray or harsh winds. Trim affected branches in early spring once new growth emerges. For Zones 6-7, focus on summer watering during droughts to prevent leaf scorch.
Fertilize lightly in early spring with a balanced, slow-release formula (like 10-10-10) if the tree shows signs of stress, such as yellowing needles or stunted growth. Over-fertilizing encourages soft, weak growth that’s more susceptible to pests. Instead, prioritize well-draining soil and consistent moisture—these are the real secrets to an arborvitae that stays lush for decades.
Tips & tricks for perfect emerald arborvitae planting
Here's what I've learned after helping countless clients establish thriving emerald arborvitae—the details that make all the difference in long-term success.
Soil Testing is Non-Negotiable: The 24-hour drainage test in Step 1 is crucial, but I recommend taking it a step further by using a simple soil test kit ($10 at garden centers) to check pH levels. Emerald arborvitae prefer slightly acidic soil (pH 6.0-7.0). If your test shows alkaline soil (above 7.0), mix in 2 pounds of sulfur per 100 square feet of planting area 2-3 months before planting. This adjustment prevents nutrient lockout that can stunt growth from the start.
Root Ball Preparation Secret: When teasing apart circling roots in Step 2, don't just pull them—make clean cuts with pruning shears at the root's base. This prevents damage to healthy roots while eliminating the competition from circling roots. I've seen trees planted with intact circling roots struggle for years because these roots strangle themselves as they grow. Take 5 extra minutes here to ensure your tree's roots can spread freely into the surrounding soil.
Winter Protection Strategy: For Zone 3-4 plantings, consider adding a burlap windbreak on the north and west sides of your arborvitae during its first winter. This creates a microclimate that reduces wind desiccation by 30-40%. Install it after the first hard frost but before sustained cold winds arrive. Remove it in early spring once new growth appears—this prevents heat buildup that can stress the tree.
Mulch Layer Precision: The 2-3 inch mulch recommendation in Step 3 is perfect, but here's the pro move: use two layers. First, spread 1 inch of coarse wood chips directly on the soil to improve drainage at the root zone. Then add your 2 inches of shredded bark mulch on top. This dual-layer system prevents soil compaction while maintaining moisture—exactly what young arborvitae roots need to establish quickly.
Pro Tips for Emerald Arborvitae Tree
- Here's what I've learned after helping countless clients establish thriving emerald arborvitae—the details that make all the difference in long-term success.
- Soil Testing is Non-Negotiable: The 24-hour drainage test in Step 1 is crucial, but I recommend taking it a step further by using a simple soil test kit ($10 at garden centers) to check pH levels.
- Root Ball Preparation Secret: When teasing apart circling roots in Step 2, don't just pull them—make clean cuts with pruning shears at the root's base.
Frequently asked questions
Got questions about keeping your Emerald Arborvitae thriving? Here are some of the most common concerns—plus expert tips to tackle them like a pro!
How often should I prune my Emerald Arborvitae?
Prune your Emerald Arborvitae once a year, ideally in late winter or early spring (before new growth starts). Light shaping is key—avoid heavy cuts, as these evergreens prefer gradual trimming. Focus on removing dead branches and maintaining its signature columnar shape. Pro tip: Use sharp, clean shears to prevent tearing!
Is Emerald Arborvitae truly cold-hardy? What zones does it tolerate?
This tree thrives in USDA Zones 3-7, making it perfect for snowy climates. It handles dry, cold winters and hot summers with ease, though it prefers full sun to partial shade. Just ensure well-draining soil—waterlogged roots are its kryptonite.
Can I grow Emerald Arborvitae in containers? If so, how?
Yes, but it’s best for small spaces or patios. Use a large container (at least 18" wide) with drainage holes and a fast-draining potting mix. Water regularly (containers dry out faster!) and fertilize once a year in spring. Note: Container-grown trees may need winter protection in Zone 3.
What pests or diseases should I watch for?
Emerald Arborvitae is disease-resistant, but watch for:
- Spider mites (tiny webs on foliage—spray with water or neem oil).
- Bagworms (chewing caterpillars—handpick or use Bt spray).
- Root rot (from overwatering—ensure soil drains well).
What’s a good alternative if Emerald Arborvitae isn’t available?
Try these similar cold-hardy evergreens:
- Green Giant Arborvitae (faster-growing, broader shape).
- American Holly (spiny leaves, berries, Zone 4-9).
- Colorado Blue Spruce (needles, striking blue-green hue).
Wrapping up and next steps
The Emerald Arborvitae is a cold-hardy, low-maintenance champion for Zones 3-7, offering year-round greenery with minimal fuss.
Whether you’re pruning for shape, health, or aesthetics, its resilience and adaptability make it a standout choice for any landscape—just remember to time your cuts and wield your tools with care! 🌿
Ready to transform your yard? Start small: Grab your shears, pick a sunny day, and give your Emerald Arborvitae the love it deserves. Happy pruning—your future evergreen oasis awaits! 🌟