
Pruning
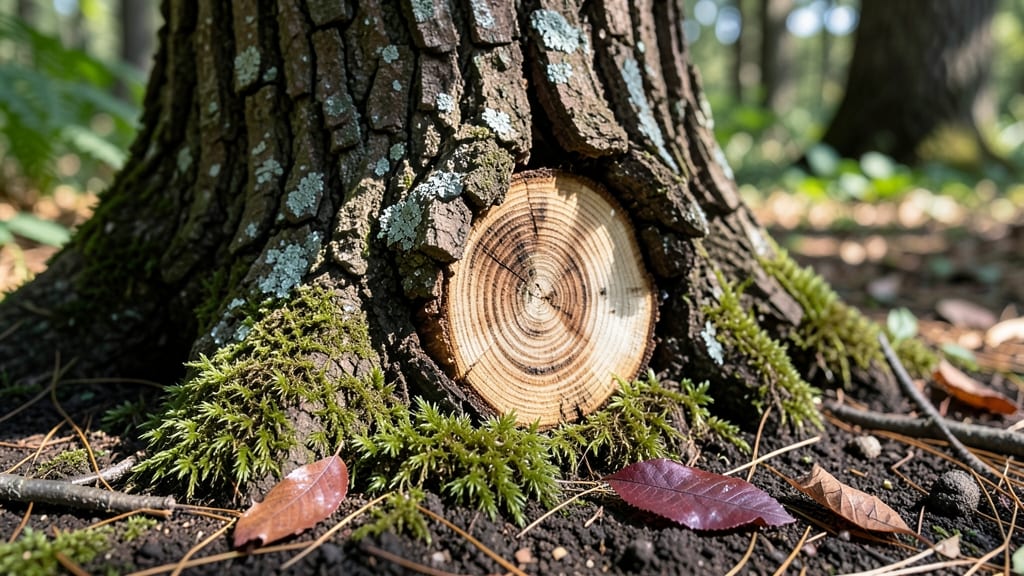
That stubborn cherry tree stump won’t stay gone—unless you use the right method. I’ve learned the hard way that cutting it down isn’t enough; regrowth sneaks up like weeds after rain. The key is starving the roots while keeping your yard safe and usable.
You’ll need basic tools: a stump grinder, safety gear, and maybe a shovel if you’re tackling it manually. My first attempt with just a chainsaw left half the stump behind and a mess of splinters. This time, I’m doing it right—clean, fast, and with minimal cleanup.
By the end, you’ll have a flat, usable space ready for planting or landscaping. No more tripping hazards, no more sprouts popping up next spring. The stump will be gone for good, and your yard will thank you.
Works for both backyard stumps and larger landscape projects. Let’s get that stump out of the way once and for all—no regrets this time.
📚 In This Guide
- What you need
- Instructions
- Tips and common mistakes
- Wrapping up and next steps
What you need
- ● Safety gear: Work gloves (heavy-duty, cut-resistant) – 1 pair
- ● Safety goggles – 1 pair
- ● Ear protection (if using power tools) – 1 set
- ● Pruning & cutting tools: Pruning saw (for clean cuts) – 1
- ● Handsaw or chainsaw (for larger stumps) – 1
- ● Shovel (for digging) – 1
- ○ Stump grinder (optional but helpful for large stumps) – 1 rental or owned
- ● Repurposing supplies (depends on project): New tree sapling (if replanting) – 1
- ● Mulch or wood chips (for garden beds) – 5–10 gallons
- ● Firewood seasoning rack (if making firewood) – 1
- ● Stain/sealant (for decorative stump projects) – 1–2 cans
- ● Knee pads (for comfort during digging) – 1 pair
- ● Post-hole digger (for precise planting holes) – 1
- ● Wheelbarrow (for hauling debris/mulch) – 1
- ● Drill & bits (for decorative carvings or planters) – 1 set
- ● Compost or fertilizer (to boost new growth) – 5–10 lbs
Simple instructions for reviving and repurposing a cherry tree stump
Here’s how to transform that old stump into something useful without complicated tools or techniques.
Clean and Prep the Stump Surface
Start by removing any loose bark or debris from the stump’s top surface. Use a sharp knife or pruning shears to scrape away dead wood or moss—this exposes fresh wood for better growth. I like to work in small sections, cleaning as I go so the surface stays dry and ready for the next step. Avoid cutting too deep; you only need to clear away the top layer, about ½ inch down.
Once the surface is smooth, give it a quick rinse with water to remove dust and sap. Let it dry completely before moving on—this prevents rot and ensures whatever you plant next takes hold properly. If the stump is large, focus on the center area where you’ll be planting or drilling holes later.
Choose and Plant Your New Addition
Decide what you want to grow on or around the stump. For a classic look, consider planting wildflowers, shrubs, or even a small ornamental tree in the hollowed-out center. Use a hand trowel to create small holes, about 2-3 inches deep, spaced evenly around the edges. This keeps roots from competing directly with the stump’s old root system.
If you’re planting a new tree, select a species that thrives in partial shade, like a dogwood or serviceberry. Water the soil thoroughly after planting to help roots establish. For a low-maintenance option, try moss or lichen—just keep the stump moist and shaded. Watch for signs of new growth within 2-4 weeks, depending on the season and your climate.
Mulch and Maintain for Long-Term Success
Spread a 2-3 inch layer of mulch around the base of the stump to retain moisture and suppress weeds. Use shredded bark or wood chips—avoid fresh sawdust, as it can draw moisture away from the soil. Keep the mulch 2 inches away from the stump’s trunk to prevent rot. Water the area lightly after mulching to settle everything in place.
Check the stump and any new plants regularly for signs of stress, like wilting or discoloration. If you notice pests or fungus, treat them early with a natural spray or by removing affected leaves. Over time, the stump will blend seamlessly into your landscape, becoming a natural focal point. With minimal care, it’ll stay vibrant for years.
Tips & tricks for perfectly reviving a cherry tree stump
Here's what nobody tells you about turning a forgotten stump into a garden centerpiece—without the headaches.
Prep Like a Pro: When cleaning that ½-inch layer in Step 1, work in concentric circles starting from the center outward. This prevents gouging the edges and creates a smooth, even surface for planting. I learned this the hard way after ruining three stumps with uneven scraping—always keep your knife at a shallow angle. The goal is to expose fresh wood, not carve a sculpture.
Planting Strategy: For the 2-3 inch deep holes in Step 2, use a small garden auger if you have one—it makes clean, precise holes without disturbing surrounding soil. If you're planting wildflowers, space them about 6 inches apart in the center, leaving the edges clear for shrubs or moss. This creates visual layers that look intentional rather than random. For trees, dig slightly larger holes to accommodate root balls.
Mulch with Purpose: That 2-3 inch mulch layer in Step 3 isn't just for looks—it's a moisture barrier. Apply it in a volcano shape, thicker in the center and tapering toward the edges. This directs water toward the roots while keeping the stump's base dry. And remember: pine straw works beautifully here, but avoid cedar chips—they release oils that can inhibit plant growth.
Seasonal Timing: Spring is ideal for planting, but if you're working in summer, water the stump thoroughly every other day for the first two weeks. In fall, reduce watering as temperatures drop. The 2-4 week growth window mentioned in Step 2 assumes average conditions—adjust expectations if you're in extreme heat or cold. A simple soil thermometer helps track ideal planting temperatures.
Pro Tips for Cherry Tree Stump
- Here's what nobody tells you about turning a forgotten stump into a garden centerpiece—without the headaches.
- Prep Like a Pro: When cleaning that ½-inch layer in Step 1, work in concentric circles starting from the center outward.
- Planting Strategy: For the 2-3 inch deep holes in Step 2, use a small garden auger if you have one—it makes clean, precise holes without disturbing surrounding soil.
Frequently asked questions
Got questions about dealing with a cherry tree stump? You’re not alone! Here are some of the most common concerns—and straightforward answers—to help you tackle the project with confidence.
Can I just leave a cherry tree stump in the ground?
While leaving a stump might seem low-effort, it can become a nuisance over time. Stumps attract pests, rot, and even regrow unwanted shoots. Plus, they’re a tripping hazard and can harbor diseases. Removing it now saves you headaches (and potential yard work) later! Pro tip: If you’re not ready to remove it, at least grind it down to reduce risks.
How long does it take to remove a cherry tree stump?
Removal time depends on the stump’s size and method. Digging it out manually can take 1–3 hours for small stumps, while stump grinding usually takes 30–60 minutes (plus cleanup). Chemical treatments require weeks to months to fully break down the wood. Renting a grinder or hiring a pro cuts time significantly!
Is it cheaper to remove a cherry tree stump myself or hire a pro?
DIY stump removal (digging or grinding) costs $20–$50 in tools/rentals, while hiring a pro runs $100–$300+ depending on size and location. If you’re handy and have the right tools, DIY saves money—but pros handle large or stubborn stumps efficiently. Pro tip: Check local rental shops for affordable grinders!
What can I do with the stump after removal?
Don’t toss it! Repurpose it creatively:
- Firewood: Seasoned cherry wood burns hot and smells great (if disease-free).
- Mulch: Chip it into mulch for flower beds or garden paths.
- Art/Decor: Sand and stain it for a rustic table, planter, or garden art.
- Compost: Break it down into compost over time (adds nutrients!).
What if the stump keeps regrowing?
If shoots sprout from the stump, it’s likely due to dormant buds. To stop regrowth:
- Apply vinegar or salt to fresh cuts (kills new growth).
- Use a stump grinder to remove the root crown.
- Try a copper nail hammered into the center (old-school trick!).
For stubborn cases, a stump removal chemical (like potassium nitrate) works but takes patience.
Wrapping up and next steps
Transforming a cherry tree stump into something useful is easier—and more rewarding—than you think! Whether you’re turning it into a firewood treasure, a garden planter, or a cozy seating nook, you’ve got the tools, know-how, and creativity to make it happen. 🌱✨
Ready to take action? Pick your project, gather your supplies, and get started today—your stump’s new life is waiting! Need extra inspiration? Browse DIY guides or local gardening forums for more creative ideas.