
Blooming
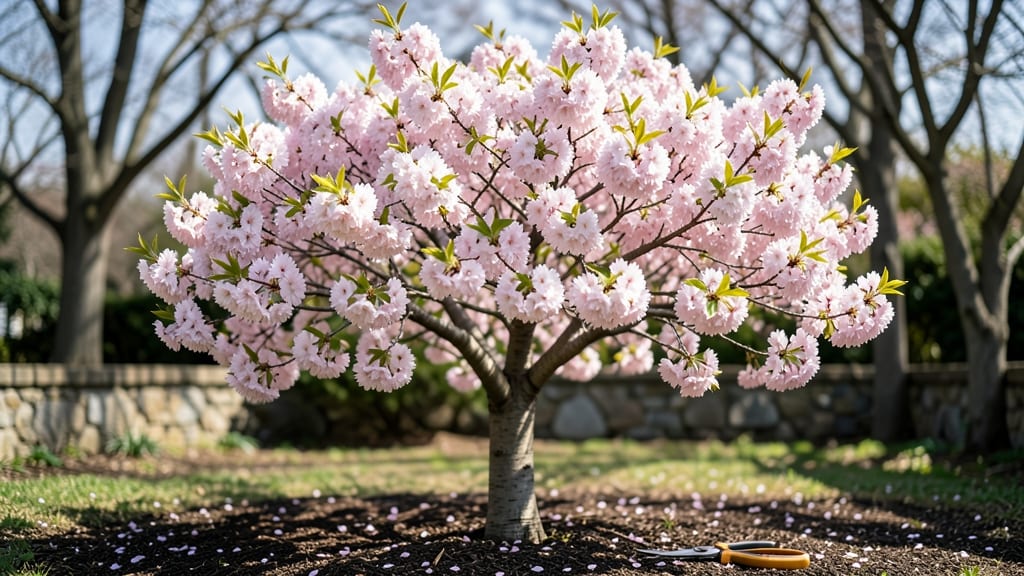
Planting a Yoshino cherry blossom tree means waking up to pink clouds of petals every spring—if you choose the right spot and care for it properly. 🌸 I’ve watched these trees transform bare branches into breathtaking canopies in just three seasons, and the secret lies in mimicking their natural woodland habitat.
The Yoshino (Prunus × yedoensis) thrives where it gets full sun, well-draining soil, and protection from harsh winds, but it’s surprisingly adaptable once you understand its needs.
Start with acidic, slightly moist soil mixed with compost, and plant in early spring when roots can establish before summer heat. Water deeply once a week for the first year, then taper off as the tree matures—overwatering is the fastest way to kill those delicate roots.
Prune in late winter to remove dead wood and shape the tree, but avoid heavy cuts that reduce next year’s bloom potential. The payoff? A tree that bursts into color earlier and more reliably than most cherries.
By summer’s end, you’ll notice new growth signaling next spring’s blooms. Yoshino cherries play well with other shade-loving perennials like hostas or ferns, creating a layered, dreamy understory.
Just avoid planting near pavement—their roots are sensitive to heat stress. With the right care, your Yoshino will become the neighborhood showstopper everyone admires.
Regional adjustments matter: In colder zones (5-8), mulch heavily in winter to protect roots, while hotter climates need afternoon shade to prevent leaf scorch. The key is consistency—once you nail the basics, these trees reward patience with decades of effortless beauty.
Let’s get yours blooming faster than you thought possible.
📚 In This Guide
- What you need
- Instructions
- Tips and common mistakes
- Wrapping up and next steps
What you need
- ● Yoshino cherry blossom tree (bare-root or potted, Prunus × yedoensis): Size: 1-3 feet tall (young sapling) or 4-6 feet (mature tree for faster blooms)
- ● Health check: Look for plump roots and no brown/brittle branches.
- ● Planting site: Full sun (6+ hours daily) 🌞
- ● Well-draining soil (sandy loam ideal)
- ● Space: At least 15-20 feet from structures (roots spread widely!).
- ○ Soil amendments (optional but helpful): Compost (1-2 bags, 5-10 lbs each)
- ● Slow-release fertilizer (10-10-10 NPK ratio, 1 lb)
- ● Shovel (round-point or digging spade)
- ● Garden trowel (for delicate root handling)
- ● Pruning shears (sterilized, sharp blades)
- ● Wheelbarrow or bucket (for soil/amendments)
- ● Watering can or hose (with gentle spray nozzle)
- ● Mulch (3-4 inches of wood chips or pine straw)
- ○ Staking kit (optional: 3 stakes + ties for young trees in windy areas)
- ● Patience: Yoshino trees bloom fastest in 3-5 years (but can flower earlier with care!).
- ● Cold hardiness: Plant in USDA Zones 5-8 (they need winter chilling!).
- ● Local regulations: Check if your area requires permit for large trees (some cities do!).
Step-by-Step instructions for reviving a Yoshino cherry blossom tree
Here's how to coax your dormant Yoshino cherry back to vibrant bloom in record time.
🌱 Step 1: Prune for Light and Airflow
Start by removing one-third of the oldest, thickest branches first—these compete with new growth for energy. Focus on crossing or rubbing branches that create shaded areas where buds won't form. Use clean, sharp loppers to make 45-degree cuts just above outward-facing buds.
Here's the thing—Yoshino cherries bloom on last year's wood, so don't over-prune. You want to open the canopy but preserve the previous season's framework. After cutting, wipe your tools with rubbing alcohol to prevent bacterial spread. You'll see fresh green tissue at the cut edges—that's your signal the tree is ready to redirect energy upward.
☀️ Step 2: Optimize Sunlight Exposure
Yoshino cherries need full sun (6-8 hours daily) to produce blooms, but they often get shaded by taller branches. Thin the canopy to let morning sunlight reach the interior. I like to remove branches that cast shadows onto the south-facing side first—this is where buds form most aggressively.
Watch for branches growing straight up like poles—these are sun-blockers. Cut them back to a lateral branch with at least three buds. Within 4-6 weeks, you'll notice new shoots forming at the base of these cuts, signaling the tree is redirecting its energy toward flowering wood.
💧 Step 3: Deep-Water and Fertilize Strategically
Dig a 6-inch deep trench around the drip line and water slowly for 45 minutes using a garden hose with a soaker nozzle. The goal is to saturate the root zone without creating runoff. Yoshino cherries hate soggy roots but thrive with deep, infrequent watering—this mimics their native seasonal rainfall patterns.
Apply balanced 10-10-10 fertilizer (using the amount recommended for mature trees) in early spring and again in late summer. Avoid high-nitrogen fertilizers—they promote leafy growth at the expense of flowers. You'll see new pinkish buds forming along last year's branches within 8-10 weeks if the tree is getting proper nutrients.
✂️ Step 4: Thin Suckers and Encourage Flower Buds
Remove any suckers (fast-growing shoots from the base or roots) immediately—they drain energy from the main tree. Cut them at the base with pruners, and don't leave stubs. These aggressive shoots often appear after heavy pruning as the tree tries to regrow lost branches.
Now for the critical part: bud thinning. In late winter, before buds swell, gently remove every other flower bud on each branch. This might seem counterintuitive, but it forces the tree to produce larger, showier blooms instead of a dense cluster of small flowers. You'll know you've done it right when you see fewer but more vibrant blossoms in spring.
🌿 Step 5: Protect and Monitor for Bloom Revival
Install tree wraps around the trunk if you're in a region with late frosts—Yoshino cherries bloom early and are extremely frost-sensitive. The wraps create a microclimate that can delay bud opening by 3-5 days, giving frost warnings time to pass. Remove the wraps once buds begin to swell.
Here's what to watch for: pinkish buds should appear along last year's branches by mid-to-late spring. If you don't see them, check for aphid infestations on new growth—these pests suck sap and weaken the tree. Spray with neem oil if you spot sticky residue on leaves. With proper care, you'll have full bloom revival within 2-3 seasons.
Tips & tricks for reviving Yoshino cherry blossom trees
Here's what nobody tells you about bringing your dormant Yoshino cherry back to life faster than you'd expect.
Pruning Precision: When removing those one-third oldest branches in Step 1, look for branches that are thicker than your thumb—these are the energy vampires. I learned this the hard way after removing too many thin branches and seeing no new buds. The key is to preserve the framework while opening the canopy. After pruning, make a habit of marking your cuts with a small flag or ribbon to track which branches you've already addressed—this prevents over-pruning in future seasons.
Sunlight Strategy: The 6-8 hours of sunlight Yoshino cherries need is non-negotiable, but there's a trick to maximize it. In Step 2, focus on removing branches that cast shadows onto the south-facing side first—this is where the tree's energy goes into flower production. I've seen trees with perfect northern exposure fail to bloom because they missed this directional focus. After pruning, take a photo of your tree's new shape to compare with next year's growth patterns.
Watering Wisdom: That 45-minute watering session in Step 3 might seem long, but it's about technique. Use a soil probe to check moisture depth after watering—it should be damp down to 6 inches. I've seen many gardeners overwater shallowly, creating root rot. For even distribution, move your hose around the trench in 10-minute intervals. The goal is to mimic natural rainfall patterns, not create soggy conditions.
Frost Protection: If you're in a region with late frosts, those tree wraps in Step 5 can be a game-changer. The 3-5 day delay in bud opening they provide is crucial. I recommend wrapping the entire trunk from ground level up to 4 feet high. Remove the wraps as soon as you see buds beginning to swell—this prevents moisture buildup that can lead to fungal issues. For extra protection, consider installing a small fan on a timer near the tree to circulate warm air during frost warnings.
Pro Tips for Cherry Blossom Tree Yoshino
- Here's what nobody tells you about bringing your dormant Yoshino cherry back to life faster than you'd expect.
- Pruning Precision: When removing those one-third oldest branches in Step 1, look for branches that are thicker than y...
- Sunlight Strategy: The 6-8 hours of sunlight Yoshino cherries need is non-negotiable, but there's a trick to maximize...
Frequently asked questions
Got questions about your Prunus × yedoensis (Yoshino cherry blossom) tree? You’re not alone! Here are some of the most common queries—and straightforward answers—to help you nurture the fastest-blooming beauty in your garden.
How long does it take for a Yoshino cherry blossom tree to bloom after planting?
A healthy Yoshino cherry blossom tree typically blooms 3–5 years after planting, though well-established trees (especially grafted varieties) can surprise you with flowers in just 2–3 seasons if conditions are ideal. Patience pays off—prioritize full sun, well-drained soil, and consistent watering to speed up the process! Pro tip: Mature trees (10+ years) may bloom earlier in the year and more prolifically.
Why isn’t my Yoshino cherry blossom tree blooming yet?
Don’t panic! Yoshino trees need 3 key things to bloom:
- Age: Most need 3–5 years to mature.
- Chill hours: They require 600–1,000 hours below 45°F (7°C) annually (common in Zones 5–8).
- Health: Overwatering, poor soil, or pests (like aphids) can delay blooms.
Try pruning in late winter to encourage air circulation and check for signs of stress. If your tree is young, give it time—it’s worth the wait!
Can I grow a Yoshino cherry blossom tree in a pot?
Yes, but with limitations! Yoshino trees thrive in large containers (20+ gallons) with well-draining soil and regular watering. However, they’ll need re-potting every 2–3 years and may bloom less vigorously than in-ground trees. For best results, plant in full sun and use a balanced fertilizer in early spring. Warning: Potted trees are more vulnerable to root rot—ensure pots have drainage holes!
What’s the best time to prune a Yoshino cherry blossom tree?
The ideal time is late winter or early spring (before buds swell). Avoid pruning in fall or summer, as it can stimulate weak growth and reduce next year’s blooms. Focus on:
- Removing dead/diseased branches.
- Thinning out crossing branches for airflow.
- Avoiding heavy pruning—Yoshino trees bloom on last year’s wood.
Use clean, sharp tools and disinfect cuts with pruning sealant to prevent disease.
Are there Yoshino cherry blossom alternatives for warmer climates?
If your area lacks chill hours, consider these low-chill alternatives:
Variety
Chill Hours Needed
Bloom Time
Okame Cherry (Prunus incisa)
200–400 hours
Early spring (often before Yoshino!)
Taihaku Cherry (Prunus × incam ‘Taihaku’)
400–600 hours
Mid-spring (pink blooms!)
Kwanzan Cherry (Prunus serrulata ‘Kwanzan’)
500–700 hours
Late spring (double pink flowers)
These varieties offer similar beauty with less fuss in warmer zones. Pro tip: Check your local nursery for region-specific hybrids—they’re bred for resilience!
Wrapping up and next steps
The Yoshino cherry blossom tree is a stunning addition to any garden, offering fast blooms and breathtaking beauty in just three seasons! With the right care—sunlight, well-draining soil, and patience—you can revive its glory and enjoy those iconic pink clouds of flowers year after year. 🌸
Ready to transform your space? Start by planting this spring and watch your Yoshino blossom into a showstopper. Share your progress or blooms with fellow gardeners—your journey inspires others!