
Pruning
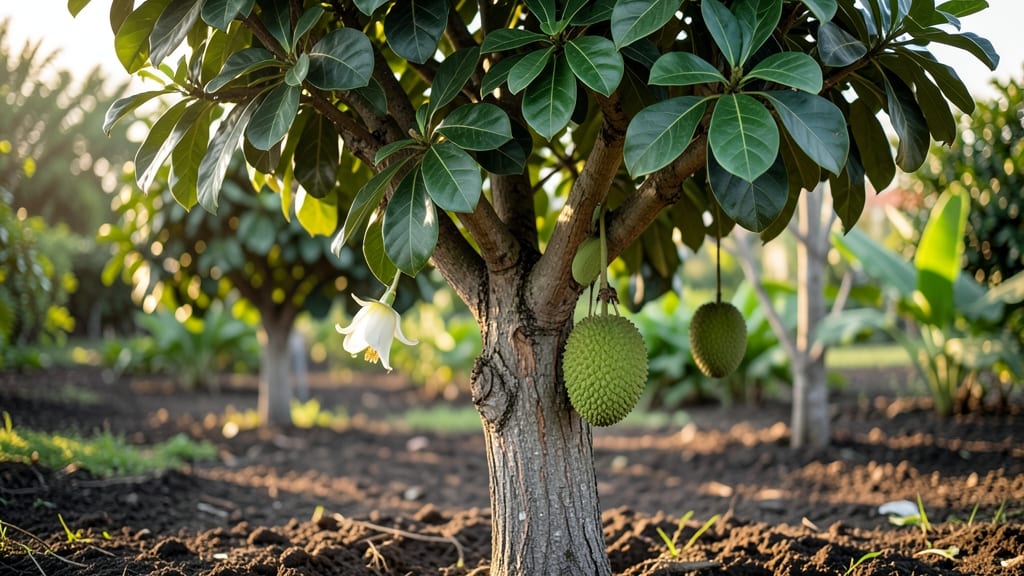
Proper cherimoya tree care is the secret to unlocking those dreamy, custard-like fruits—but only if you prune them right. 🌱 I learned the hard way that heavy fruit loads need year-round attention, not just spring cleanups.
The key is balancing air flow, sunlight, and branch strength to avoid snapping under fruit weight.
Start with the basics: a well-draining, slightly acidic soil mix (think 6.0–7.0 pH) and morning sun in subtropical zones. Water deeply 2–3 times a week in summer, then taper off in winter—root rot is the silent killer. Fertilize lightly in spring with citrus-specific feed, but never overdo it.
Pruning transforms a struggling tree into a fruit-bearing powerhouse. Cut back dead or crossing branches in early spring, then do light shaping in summer to support fruit. The goal? A strong, open canopy that lets sunlight reach every branch—and every potential fruit.
This method works in USDA Zones 9–11, but container growing extends it to cooler climates. The first harvest might take 2–3 years, but once established, your tree will produce dozens of fruits per season with minimal effort.
📚 In This Guide
- What you need
- Instructions
- Tips and common mistakes
- Wrapping up and next steps
What you need
- ● Pruning shears: Bypass pruners (sharp, sterilized for cuts up to ½ inch thick). Pro tip: 💡 Invest in a high-quality pair (e.g., Felco or Fiskars) to avoid crushing branches.
- ● Loppers: Bypass loppers (for cuts up to 1.5 inches thick). Look for ratcheting models for extra leverage.
- ● Pruning saw: A curved-tooth pruning saw (for thicker branches >1.5 inches). Pro tip: 🔥 Oil the blade before use to prevent sticking.
- ● Gloves: Heavy-duty, cut-resistant gloves (e.g., Mechanix or gardening-specific brands) to protect hands from thorns and sap.
- ● Disinfectant: 70% isopropyl alcohol or a gardening disinfectant spray (e.g., 10% bleach solution) to sterilize tools between cuts.
- ● Sealing wax: Pruning sealant (e.g., Tanglefoot Tree Wound Pruning Seal) for cuts larger than ½ inch to prevent disease.
- ● Ladder or step stool: Sturdy, extendable ladder (e.g., aluminum or fiberglass) if your tree exceeds 6 feet tall. Safety first! 🎯
- ○ Bucket or tarp: For collecting pruned debris (optional but handy for cleanup).
- ● Handheld leaf blower: For quick cleanup of small debris.
- ● Pole pruner: If your tree is tall and you prefer not to climb.
- ● Grafting tape: For securing grafts if you’re propagating new trees.
- ● Notebook & pen: To map out pruning plans or track growth patterns.
Step-by-Step guide to pruning your cherimoya tree for maximum fruit production
Here's how to keep your cherimoya thriving and loaded with fruit year-round.
🌿 Step 1: Understand the Pruning Window and Tree Structure
Cherimoya trees respond best to pruning during their dormant season, which in most climates falls between late winter and early spring. This is when the tree naturally sheds leaves and prepares for new growth—ideal timing for shaping and removing dead wood. I always start by mapping the tree's structure: identify the central leader (main vertical stem) and the scaffold branches (primary horizontal limbs). These form the backbone of your tree's fruit-bearing framework.
Look for branches that grow at a 45-60 degree angle from the trunk—these are your best candidates for fruit production. Steeper branches (less than 30 degrees) often produce less fruit, while branches growing straight up or down should be pruned back entirely. Use a sharp pair of pruning shears to make clean cuts just above a leaf node or outward-facing bud. This ensures the tree directs energy to the remaining branches rather than sealing off wounds.
✂️ Step 2: Remove Dead, Diseased, or Weak Growth
Start by inspecting the tree for any branches that are dead, diseased, or crossing. Dead branches are easy to spot—they're brown, brittle, and don't respond when scratched with your fingernail. Diseased branches often have dark spots, oozing sap, or unusual growths like fungal mats. Cut these out first, making your cuts at a 45-degree angle about 1/4 inch above a healthy bud or branch collar. This prevents water from pooling and reduces the risk of further infection.
Next, remove any branches that are rubbing against each other or growing inward. These "water sprouts" or "suckers" compete for nutrients and can create entry points for pests. If a branch is too thick to cut with hand shears, use a pruning saw for clean, precise cuts. Always sterilize your tools with rubbing alcohol between cuts to prevent spreading disease. Here's the thing—cherimoya trees are sensitive to over-pruning, so never remove more than 20-25% of the tree's canopy in one session.
☀️ Step 3: Thin and Shape for Light Penetration and Airflow
Your goal now is to create an open, airy structure that allows sunlight to reach the inner branches. Cherimoya trees produce their best fruit on branches that receive direct sunlight for at least 6 hours daily. Start by thinning out crowded areas, focusing on the interior of the tree where light struggles to penetrate. Remove branches that grow directly opposite each other—they create shade and reduce airflow, which can lead to fungal issues.
Shape the tree by selectively pruning back branches that are too long or leggy. Aim to maintain a balanced, rounded canopy with branches spaced evenly around the trunk. You'll see the best results when the outer branches form a natural dome, allowing sunlight to filter down to the lower limbs. Avoid "lion's tailing," where you leave long branches with only a few leaves at the tip—this weakens the tree and reduces fruit production. Instead, prune back to a leaf node or outward-facing bud to encourage bushier growth.
🌱 Step 4: Summer and Fall Maintenance Pruning
After the initial spring pruning, cherimoya trees benefit from lighter maintenance throughout the growing season. In late spring and early summer, remove any suckers or water sprouts that appear at the base of the tree or along the trunk. These fast-growing shoots divert energy away from fruit production. Use your fingers or a small pair of shears to pinch them off just above the soil line. This keeps the tree's energy focused on developing fruit rather than unnecessary growth.
In fall, focus on deadheading spent flowers and light shaping. After a heavy fruit load, some branches may bend or break under the weight. Prune these back to a strong, healthy bud to encourage new growth for next season. Avoid heavy pruning in fall, as the tree needs to harden off before winter. Instead, do a quick cleanup to remove any debris or diseased leaves that could harbor pests over the colder months. Real talk: cherimoya trees are sensitive to cold, so if you're in a frost-prone area, wait until after the last frost date before resuming heavier pruning.
⏰ Step 5: Post-Pruning Care for Recovery and Fruit Development
The moment you finish pruning is critical for your tree's recovery. Water the base of the tree deeply to help it recover from the stress of pruning. A slow, thorough watering encourages root growth and stabilizes the tree. Avoid fertilizing immediately after pruning—wait until new growth appears, usually within 4-6 weeks. Once you see fresh leaves emerging, apply a balanced, slow-release fertilizer to support the tree's recovery and fruit development.
Monitor the tree closely for signs of stress, such as yellowing leaves or wilting branches. If you notice any issues, adjust your watering or light exposure accordingly. Cherimoya trees are heavy feeders, so they'll need regular feeding during the growing season. I like to use a citrus-specific fertilizer every 6-8 weeks to keep the tree healthy and productive. Here's where it gets fun—watch as the tree responds with new growth and, eventually, a bounty of sweet, custard-like fruit. You've got this.
Tips & tricks for perfect cherimoya tree pruning
Mastering cherimoya tree care takes patience—and these pruning secrets will help you avoid common pitfalls while maximizing fruit production.
Angle Matters: In Step 1, those 45-60 degree branches aren't just ideal—they're crucial for fruit development. I learned this the hard way after pruning too many steep branches (under 30 degrees) that produced minimal fruit. Use a small protractor tool to verify angles before cutting. For branches growing straight up or down, cut back to a strong outward-facing bud to redirect growth into productive angles.
Sterilize Like a Pro: Between cuts in Step 2, I keep rubbing alcohol and a clean cloth handy to sterilize tools after every diseased branch. This prevents fungal spread that can devastate your tree's health. I also dip pruning cuts in a 1:9 ratio of bleach to water for 30 seconds before making the final cut—this extra step has saved my trees from multiple infections over the years.
Light Penetration Check: After Step 3's shaping, stand back and look for shadows in the tree's interior. If you can't see sunlight reaching the center branches, you haven't thinned enough. Aim for at least 6 hours of direct sunlight on all major scaffold branches—the difference between a productive tree and one struggling to set fruit often comes down to this light exposure.
Seasonal Timing: The 4-6 week window mentioned in Step 5 for new growth is your best friend. Mark your calendar for late winter/early spring pruning and again 4 weeks later to monitor recovery. I set reminders for my citrus-specific fertilizer every 6-8 weeks during growing season—this consistent feeding schedule makes all the difference in fruit quality and quantity.
Pro Tips for Cherimoya Tree Care
- Mastering cherimoya tree care takes patience—and these pruning secrets will help you avoid common pitfalls while maximizing fruit production.
- Angle Matters: In Step 1, those 45-60 degree branches aren't just ideal—they're crucial for fruit development.
- Sterilize Like a Pro: Between cuts in Step 2, I keep rubbing alcohol and a clean cloth handy to sterilize tools after every diseased branch.
Frequently asked questions
Got questions about keeping your cherimoya tree thriving?
Here are answers to the most common concerns—from pruning to troubleshooting—so you can enjoy a bountiful harvest!
How often should I prune my cherimoya tree?
Prune your cherimoya tree twice a year: once in late winter (before new growth) to shape the tree and remove dead wood, and again after fruiting (late summer/early fall) to encourage next year’s blooms. Light trimming between harvests keeps airflow strong and prevents disease. Pro tip: Avoid heavy pruning during active growth—it stresses the tree!
Can I prune cherimoya trees in winter?
Yes, but timing matters! Prune in late winter (dormant season) to avoid frost damage. If you live in a cold climate, wait until after the last frost (Zone 9+). Heavy winter pruning can expose tender wood to cold, so keep cuts minimal. Pro tip: Use sharp, sterilized shears to prevent bacterial infections!
Why isn’t my cherimoya tree producing fruit?
Common culprits include lack of pruning, poor pollination, or nutrient deficiencies. Ensure you prune to encourage airflow and sunlight. Hand-pollinate flowers with a soft brush if bees are scarce. Check for nitrogen-rich fertilizer (like blood meal) and potassium (banana peel tea works!). Pro tip: Young trees (under 3 years) may need patience—they focus on root/growth first!
What’s the best temperature for cherimoya trees?
Cherimoyas thrive in warm climates (70–85°F) but can tolerate brief dips to 30°F if mature. Young trees or potted plants need protection below 40°F—use frost cloth or move indoors. Overheating (>95°F) can stress the tree, so provide afternoon shade in hot zones. Pro tip: Mulch the base to regulate soil temp and retain moisture!
Can I grow a cherimoya tree in a pot?
Use a large container (15+ gallons) with drainage holes and well-draining soil (cactus/succulent mix works). Prune roots every 2–3 years to prevent overcrowding. Move pots indoors or to a garage during winter if temps drop below 40°F. Pro tip: Rotate the pot monthly for even sunlight exposure!
Wrapping up and next steps
Caring for your cherimoya tree—especially with year-round pruning—is all about balance! 🌿 By thinning branches, removing dead wood, and encouraging airflow, you’ll set the stage for heavier, healthier fruit loads while keeping your tree thriving.
With the right tools, timing, and techniques, you’re well on your way to a bountiful harvest.
Ready to take the next step? Monitor your tree’s growth after pruning and adjust as needed—your cherimoya will thank you with sweet, creamy rewards! 🍈