
Pruning
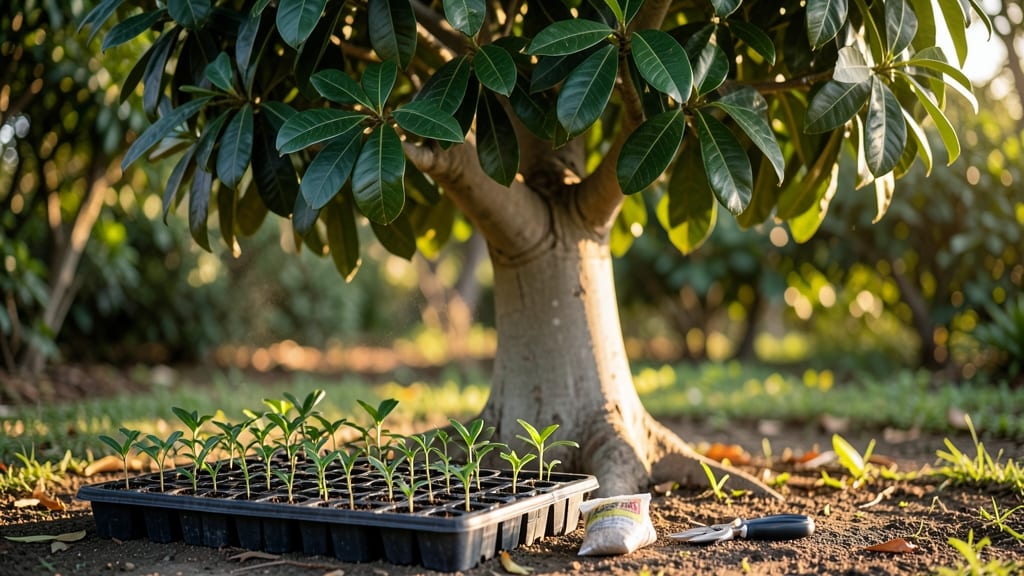
Growing camphor trees from seeds starts with the layered chill method—the secret weapon for breaking dormancy and ensuring those stubborn seeds finally sprout. 🌱 I’ve struggled with camphor germination myself, watching seeds sit for months without a sign of life until I learned this technique.
The key lies in mimicking the natural winter-spring cycle these seeds need to wake up.
You’ll need just a few simple supplies: fresh camphor seeds (sourced from a trusted supplier), a damp paper towel or peat moss, a sealed plastic bag, and patience—this isn’t a quick process. The method involves layering the seeds between moist materials and refrigerating them for weeks to simulate cold stratification.
Once you’ve got everything ready, the process becomes straightforward, with clear steps to follow for reliable results.
What you’ll end up with is a tray of tiny green shoots breaking through the soil, signaling success after what can feel like an eternity. These seedlings will grow into sturdy young trees with that signature camphor scent, though it’ll take years before they mature.
The payoff? A tree that thrives in your climate once established, with minimal fuss after the initial germination hurdle.
This method works best for camphor seeds in temperate climates, but even in warmer regions, the chill period is critical. If you’re dealing with older seeds or low viability, consider grafting as a backup—though starting from seed gives you the satisfaction of nurturing the entire life cycle.
Let’s get those seeds sprouting!
📚 In This Guide
- What you need
- Instructions
- Tips and common mistakes
- Wrapping up and next steps
What you need
- ● Camphor tree seeds: 10–20 fresh, plump seeds (harvested within the last 6 months for best viability). Pro tip: Store seeds in a cool, dry place until use!
- ● Paper towels or coffee filters: 2–3 sheets (unbleached, seed-safe). Avoid tissues with added chemicals.
- ● Plastic zip-top bags: 2–3 medium-sized (quart-sized or larger, with a resealable closure).
- ● Water: Distilled or room-temperature tap water (avoid chlorinated water if possible).
- ○ Small spray bottle: 1 (optional but handy for misting).
- ● Refrigerator: A standard fridge with a temperature range of 35–45°F (2–7°C) for the cold stratification phase.
- ● Growing medium: 1 small pot (4–6 inches in diameter) filled with a mix of: 50% peat moss or coconut coir (for moisture retention).
- ● 30% perlite or vermiculite (for aeration).
- ● 20% sand or compost (for drainage).
- ● Humidity dome or plastic wrap: 1 (to create a mini greenhouse effect post-chilling).
- ● Scissors or pruning shears: For trimming seeds if needed (sterilize with rubbing alcohol first!).
- ● Labeling tags: 2–3 (to track seed batches and dates).
- ○ Heating mat (optional): 1 (for warm stratification, if experimenting with alternate methods).
- ● Grow lights or sunny windowsill: A spot with 6–8 hours of indirect light daily for post-germination care.
- ○ Fungicide (optional): A mild, seed-safe solution (e.g., hydrogen peroxide at 3%) to prevent mold during stratification.
- ● Patience: Camphor seeds can take 4–12 weeks to germinate—stay consistent!
- ● Safety first: Camphor seeds contain camphor oil, which can be irritating. Wear gloves if handling large quantities.
- ○ Seed testing (optional): Soak 2–3 seeds in water overnight to check for sinkers (viable seeds sink; floaters are likely dormant or dead).
How to germinate camphor tree seeds using the layered chill method
Here's the foolproof approach I've used to break through camphor seeds' tough outer shells.
🌱 Step 1: Soak Seeds to Break Dormancy
Fill a bowl with lukewarm water and add your camphor tree seeds. Let them soak for 24-48 hours, changing the water halfway through. You'll notice some seeds begin floating—these are the ones that need extra time. The soaking softens the hard seed coat and kickstarts germination.
After soaking, drain the water completely and place the seeds between two damp paper towels. Roll them up gently and secure with a rubber band. This keeps them moist while allowing air circulation. Store the wrapped seeds in a sealed plastic bag for 7-10 days—check daily for signs of sprouting.
💧 Step 2: Apply Layered Chilling for Consistent Germination
Place the bagged seeds in your refrigerator's crisping drawer, where temperatures stay 35-40°F. This cold treatment mimics winter conditions and helps break dormancy. Keep them in the dark—you won't see progress yet, but trust the process.
After 30 days, transfer the seeds to a warm spot (70-75°F) for another 7-14 days. This temperature swing is key—some seeds need the cold to soften their coats, while others respond better to warmth. Watch for the first signs of root growth through the paper towels.
⏰ Step 3: Plant Sprouted Seeds in Moist Growing Medium
Once you see ¼-inch roots, it's time to plant. Fill your 4-inch pots with moistened seed-starting mix, pressing down gently to create a firm surface. Make a small hole with your finger—about ½ inch deep—and place one seed in each pot, roots facing downward.
Cover the seed with a thin layer of soil and mist lightly with water. Place the pots in a clear plastic bag to maintain humidity, then set them in a warm, bright spot (65-75°F) with indirect light. Germination should occur within 14-30 days—patience is key here.
☀️ Step 4: Provide Gradual Light Exposure
When seedlings emerge, remove the plastic bag immediately to prevent fungal growth. Move them to a location with bright, indirect light for the first week. Direct sunlight can scorch young camphor seedlings—watch for leaves turning pale or crispy at the edges.
After 7 days, gradually introduce them to morning sun for 2-3 hours daily. Increase sun exposure by 1 hour each week until they tolerate 4-6 hours of direct sun. You'll know they're acclimating when new leaves appear dark green and firm, not yellow or wilted.
Tips & tricks for perfect camphor seed germination
This layered chill method might seem slow, but these small adjustments make all the difference between waiting months or seeing sprouts in weeks.
Soak Smart: In Step 1, don't skip changing that water halfway through the 24-48 hour soak. The fresh water prevents bacterial growth and ensures consistent moisture penetration. I've found that seeds floating after 24 hours often need the extra 24 hours—don't rush them, or you'll waste good seeds. The goal is softening that tough outer shell, not drowning them.
Paper Towel Technique: When wrapping seeds in damp paper towels after soaking, press them gently but firmly between the towels. You want just enough pressure to maintain contact with the seed coat, but not so much that you crush the seed inside. The 7-10 day period in the sealed bag is critical—check daily by carefully unrolling just one corner to peek for sprouts without disturbing the moisture balance.
Temperature Precision: The 35-40°F chilling phase in Step 2 is non-negotiable—this mimics natural winter conditions that trigger germination. If your fridge runs cooler (like 30°F), move the seeds to a slightly warmer spot like the main fridge shelf. Too cold can actually inhibit the process, while too warm (above 45°F) won't break dormancy. Use your fridge's thermometer if you have one, or test with an ice cube—it should melt in about 15 minutes at the right temperature.
Light Transition Strategy: In Step 4, when you're ready to introduce morning sun after the first week, start with just 2-3 hours on cloudy days. Cloud cover acts as a natural filter, preventing the intensity that could scorch young seedlings. Gradually increase by 1 hour each week—this slow acclimation prevents shock and gives the seedlings time to develop protective pigments in their leaves.
Pro Tips for Camphor Tree Seeds
- This layered chill method might seem slow, but these small adjustments make all the difference between waiting months or seeing sprouts in weeks.
- Soak Smart: In Step 1, don't skip changing that water halfway through the 24-48 hour soak.
- Paper Towel Technique: When wrapping seeds in damp paper towels after soaking, press them gently but firmly between the towels.
Frequently asked questions
Got questions about growing camphor tree seeds? You’re not alone! Here are some of the most common queries—and their answers—to help you navigate the layered chill method like a pro.
How long should I chill camphor tree seeds before planting?
Camphor tree seeds thrive with a 3-4 month cold stratification period (mimicking winter). Place them in a sealed bag with moist peat moss or sand, then refrigerate at 34–40°F (1–4°C). Consistency is key—don’t rush it! After stratification, sow seeds ½ inch deep in well-draining soil.
When will camphor tree seeds actually sprout?
Patience is vital! Germination can take 4–12 weeks after planting, depending on soil warmth and moisture. Keep soil consistently moist (not soggy) and place pots in a warm, bright spot (70–75°F / 21–24°C). A heat mat can speed things up if your home runs cool.
What if my camphor seeds don’t germinate after stratification?
Don’t panic! Try these fixes:
- Check viability: Soak seeds in water overnight—if they sink, they’re likely viable. Floaters may be dead.
- Adjust moisture: Overly dry or waterlogged soil can stall germination. Aim for dampness (like a wrung-out sponge).
- Test temperature: If your soil is too cold (<60°F/15°C), move pots to a warmer area or use a seedling heat mat.
Can I grow camphor trees from seeds indoors?
Camphor trees adapt well to container life if given the right care. Use a 5–7 gallon pot with drainage holes and a fast-draining cactus/succulent mix. Place near a south-facing window or under grow lights (12+ hours/day). Once seedlings hit 6–12 inches, transplant outdoors after the last frost.
Are there faster alternatives to cold stratification for camphor seeds?
While cold stratification is the gold standard for camphor seeds, some gardeners experiment with:
- Nick the seed: Lightly scratch the outer shell with sandpaper to weaken dormancy (use sparingly—don’t overdo it!).
- Soak in warm water: Soak seeds for 24–48 hours before planting to soften the coat (but skip this if using stratification).
- Use a seed starter: Electric seed starters with built-in heat/moisture can mimic natural conditions faster, but results vary.
Wrapping up and next steps
Growing camphor tree seeds with the layered chill method is a rewarding journey that combines patience with nature’s magic! 🌱 By following the right steps—from seed selection to proper stratification—you’re setting the stage for lush, aromatic trees that thrive for decades.
Whether you’re a seasoned gardener or just starting, this method makes germination feel like a triumph rather than a gamble.
Ready to take the next step? Start small—try a few seeds in pots before planting outdoors, and share your progress with fellow plant enthusiasts. Who knows? You might just inspire someone else to grow their own fragrant forest! 🌿