
Pruning
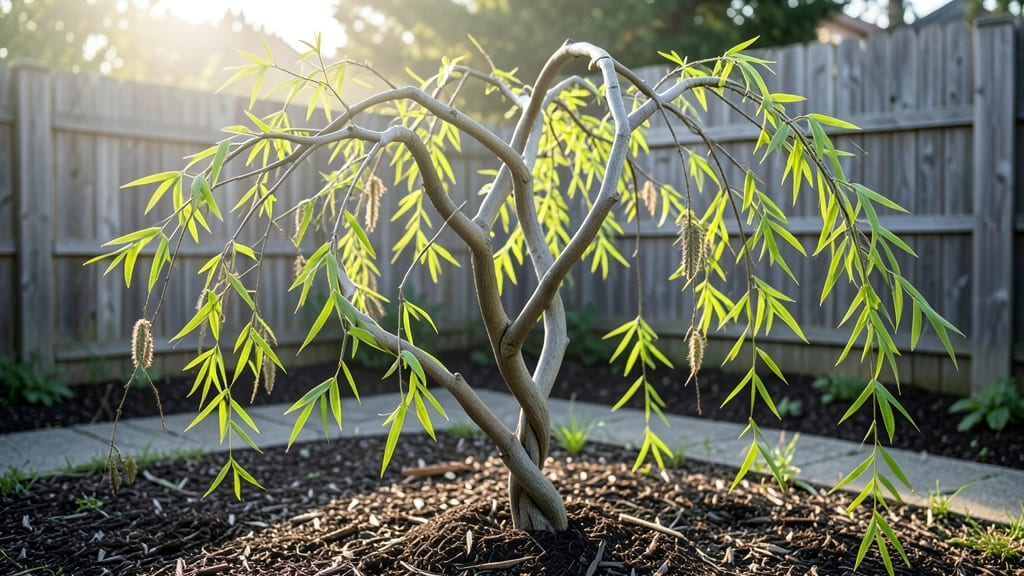
Transforming your garden into a living art gallery starts with a braided willow tree—those graceful, woven trunks create instant drama that no fence or statue ever could. 🌿 I’ve seen them turn ordinary backyards into storybook settings, their flowing branches casting dappled shade that feels like a secret hideaway.
The key isn’t just planting one; it’s placing it where it becomes the centerpiece, not just another shrub.
These trees thrive in moist soil and full sun, making them perfect for pond edges, patio corners, or as a statement piece near a seating area. A mature braided willow can reach 15-20 feet tall, so choose its spot carefully—think of it as a natural pergola with texture.
Pair it with low-growing perennials like hostas or ferns to highlight its height, or let it stand alone as a conversation starter.
What makes them truly magical is how they change with the seasons: golden foliage in autumn, bare branches with intricate weave patterns in winter, and lush green canopies in summer.
Maintenance is minimal—just an annual pruning to keep the shape intact and watering during dry spells. The payoff? A garden feature that grows more stunning every year.
Whether you’re designing a cottage garden, a modern minimalist space, or a whimsical fairy-tale retreat, braided willows add a touch of organic elegance. Start small with a single tree, or go bold with a cluster for a dramatic grove effect.
The possibilities are endless—and your neighbors will ask how you did it.
📚 In This Guide
- What you need
- Instructions
- Tips and common mistakes
- Wrapping up and next steps
What you need
- ● Young, flexible willow branches: 3–5 healthy, pussy willow or crack willow saplings (1–2 inches in diameter, ~6–8 feet tall). Look for branches with smooth bark and no signs of disease.
- ● Sturdy support structure: 1 wooden stake (4–6 feet tall, 2x4 inches) or a metal rebar (½-inch diameter).
- ● 3–5 zip ties or soft garden twine (for securing branches).
- ● Pruning tools: 1 pair bypass pruners (sharp and clean).
- ● 1 hand saw (for thicker branches, if needed).
- ● Soil & nutrients: 1 bag well-draining potting mix or garden soil.
- ● 1 slow-release fertilizer (balanced 10-10-10 or organic option).
- ○ Optional but helpful: 1 measuring tape (to ensure even spacing).
- ● 1 spray bottle (for misting branches during braiding).
- ● 1 decorative ribbon or twine (for a polished finish).
- ● 1 watering can (with a fine rose attachment).
- ● Safety gear: 1 pair gardening gloves (to protect your hands).
- ● 1 safety goggles (if using a saw).
Step-by-Step instructions for crafting a braided willow tree
Here's how to weave a living sculpture that grows with your garden.
🌱 Step 1: Select and Prepare Your Willow Whips
Choose 4-6 flexible willow whips (young, green shoots) that are about ¼ inch thick and 3-4 feet long. I prefer Salix babylonica or Salix viminalis—they're the most pliable. Trim the ends at an angle to prevent water from pooling, then strip off any leaves within 12 inches of the tip to keep the braid clean and reduce moisture loss.
Soak the whips in lukewarm water for 12-24 hours before braiding. This softens the wood fibers and makes them more flexible. Here's the thing—if your whips are still stiff after soaking, trim the ends again and soak for another 6 hours. You want them bendy, not brittle.
🪴 Step 2: Create the Foundation and Begin Braiding
Plant the 4 whips in a square pattern about 6 inches apart in a 12-inch deep pot filled with moistened potting mix. The soil should be damp but not soggy—you'll know it's right when a handful squeezes together but doesn't drip water. Push each whip 3 inches deep into the soil, leaving the rest exposed for braiding.
Start braiding by crossing the top whip over the middle two, then bring the second whip diagonally to create an X pattern. Repeat this over-under motion, pulling each whip gently but firmly to secure the knot. Don't yank too hard—you want the braid to stay tight but not snap. After 6-8 inches, trim any loose ends and tuck them under the braid for a clean finish.
☀️ Step 3: Secure and Maintain the Braid
Wrap the braid with twine or floral wire every 12 inches to hold the structure in place while the whips root. This is the moment that matters: if the braid loosens now, the whips will grow independently, and your tree will lose its shape. Water the pot deeply every 2-3 days, keeping the soil evenly moist but never waterlogged.
Place your braided willow in bright, indirect light—think morning sun or filtered afternoon shade. Direct sunlight can scorch the new growth, while too little light weakens the stems. You'll see new leaves emerge within 3-4 weeks, signaling the whips are rooting. Once the braid feels sturdy (usually after 6-8 weeks), you can remove the twine and let the willow grow freely.
✂️ Step 4: Prune and Encourage Full Growth
After the first growing season, trim the outer branches back by ⅓ to encourage bushier growth. Use clean, sharp pruners to make 45-degree cuts just above a leaf node. This prevents unsightly stubs and promotes new shoots. Real talk: if you skip pruning, your willow will grow tall and leggy instead of full and dramatic.
Fertilize lightly in early spring with a balanced 10-10-10 fertilizer to support new growth. Over-fertilizing can burn the roots, so stick to half-strength applications every 4-6 weeks. By year two, your braided willow should have a dense, tree-like canopy with a striking, woven base. Keep watering consistently, and you'll have a living centerpiece that evolves with your garden.
Tips & tricks for perfect braided willow trees
Here's what nobody tells you about keeping your living sculpture thriving from day one.
Soaking Secret: The 12-24 hour soak is non-negotiable for pliable willow whips, but don't rush it! If your water gets cloudy after 12 hours, that's normal—just change it. For extra flexibility, add a splash of hydrogen peroxide (1 part to 10 parts water) to prevent bacterial growth during soaking. This keeps your whips fresh even after the full 24 hours.
Braiding Technique: In Step 2, when creating your X pattern, work from the bottom up—not top down. This prevents the braid from loosening at the base where all the tension accumulates. If you notice a whip slipping, gently wet it with water and re-tighten. The first 6-8 inches are critical—they set the foundation for your entire tree structure.
Lighting Strategy: That bright, indirect light requirement is serious business. East-facing windows are ideal for morning sun exposure. If you're using grow lights, position them 12-18 inches above the pot and run them for 12-14 hours daily. Too little light means weak growth; too much causes leaf scorch. Watch for these signs to adjust your setup.
Pruning Precision: When trimming back by ⅓ in Step 4, focus on the outer branches first. These are the ones growing away from the center and will create that lush canopy. Use sharp pruners to make clean cuts—ragged edges invite disease. The 45-degree angle isn't just for looks; it directs water away from the cut area, preventing rot.
Pro Tips for Braided Willow Tree
- Here's what nobody tells you about keeping your living sculpture thriving from day one.
- Soaking Secret: The 12-24 hour soak is non-negotiable for pliable willow whips, but don't rush it!
- Braiding Technique: In Step 2, when creating your X pattern, work from the bottom up—not top down.
Frequently asked questions
Got questions about creating your own braided willow tree? Here are some of the most common ones—plus answers to help you craft this stunning garden feature with confidence!
How long does it take for a braided willow tree to fully mature?
A braided willow tree typically reaches its full "braided" glory in 3–5 years, depending on the willow variety and growing conditions. The first year focuses on establishing roots, while the second and third years are when the branches thicken and the braids become more defined. Patience pays off—your living sculpture will keep evolving with time!
Can I braid any willow tree, or are some better suited?
Not all willows work for braiding! The best candidates are fast-growing, flexible varieties like Salix matsudana (Chinese willow) or Salix babylonica (weeping willow). Avoid brittle or slow-growing types—they won’t hold the braids well. Look for young, supple branches (about pencil-thick) for the best results.
How do I protect my braided willow in harsh weather?
Willows are tough, but extreme winds or heavy snow can stress the braids. Secure the structure with soft ties (like garden twine or old T-shirts) during storms, and prune any damaged branches in early spring. Mulching the base also helps retain moisture and protect roots. A light layer of burlap wrapped around the trunk can shield it from frost too!
What if my braids start to loosen or fall apart?
Loose braids usually mean the branches are too mature or dry. Trim back any overgrown sections and re-braid them while the wood is still flexible. If the willow is established, you can also weave in fresh, young shoots to reinforce the design. Regular pruning (every 1–2 years) keeps the structure tight and healthy.
Are there alternatives to a willow tree for braiding?
Yes! If willows aren’t available, try young hazel, dogwood, or even grapevine for smaller-scale braids. For a tropical vibe, Pandanus (screw pine) or Musella lasiocarpa (cloud pine) can create stunning, long-lasting braids. Just ensure the branches are flexible and fast-growing—the key to any successful braided art!
Wrapping up and next steps
Transforming your garden with a braided willow tree isn’t just about creativity—it’s about crafting a living masterpiece that evolves with time. Whether you’re a seasoned gardener or a curious beginner, this project blends artistry with nature, offering endless visual drama and a rewarding hands-on experience. 🌿✨
Ready to bring your vision to life? Start small—practice with a few branches before committing to the full tree, and don’t hesitate to experiment with colors or textures. Grab your tools, embrace the process, and let your garden become the canvas for something truly extraordinary!