
Pruning
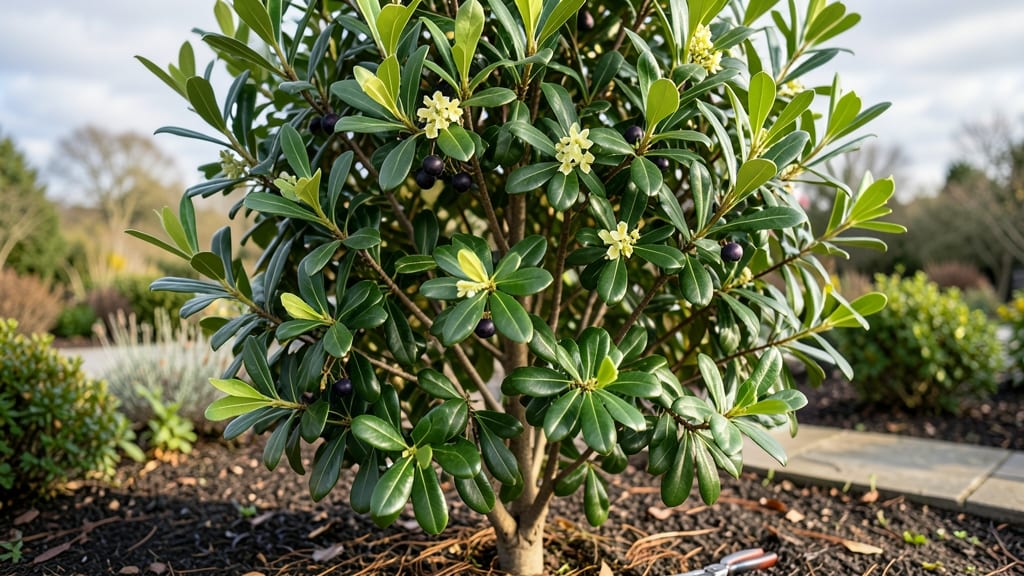
Pruning your bay laurel tree (Laurus nobilis) isn’t just about shaping its glossy leaves—it’s the secret to unlocking that year-round fragrance that makes this plant so special. 🌿 I’ve learned that strategic trimming layers the plant’s energy into more leaves, more branches, and more of that piney-citrus scent that lingers in the air when you brush past it.
The key is timing and technique. Prune lightly in spring to encourage new growth, then do a mid-summer trim to maintain shape and remove any leggy branches. Avoid heavy cuts in fall or winter, as the plant needs its energy reserves for survival.
Most gardeners overlook the top layer, but that’s where you’ll see the biggest fragrance boost—just a few inches off the tip encourages bushier, more aromatic growth.
By following this rhythm, you’ll end up with a bay tree that stays compact, fragrant, and productive for decades. The leaves will be thicker, the branches will fill in, and you’ll have a steady supply of fresh bay for cooking—or just to crush and inhale when you walk by.
It’s the kind of plant that rewards patience with luxurious, sensory-rich results.
Works equally well for potted plants on patios or as a foundation shrub in the garden. The same principles apply whether you’re keeping it indoors near the kitchen or outdoors where it can grow into a small tree. Let’s get those shears out and make it happen!
📚 In This Guide
- What you need
- Instructions
- Tips and common mistakes
- Wrapping up and next steps
What you need
- ○ Pruning shears: Bypass pruners (sharp, clean, and sterilized with rubbing alcohol to prevent disease). Optional: Loppers for thicker branches (1.5"–2" capacity).
- ● Hand pruners: Small, precise shears for delicate trimming (great for shaping).
- ● Gloves: Heavy-duty gardening gloves (thick leather or nitrile-coated for protection against thorns).
- ● Disposable pruning saw: For stubborn, woody stems (if your laurel has thick branches).
- ○ Pruning sealant: (Optional) Wound dressing for large cuts to prevent bacterial entry.
- ● Ladder or step stool: For tall laurels (ensure it’s stable and 6+ feet high if needed).
- ● Buckets or bags: 2–3 gallon-sized containers for clippings (compost or discard based on health).
- ● Rubbing alcohol (70%+) or bleach solution: For sterilizing tools between cuts.
- ● Weather check: Prune on a dry, overcast day or early morning to reduce stress on the plant.
- ● Safety gear: Safety glasses (if sawing) and closed-toe shoes.
- ● Plant health assessment: Inspect the laurel for pests/diseases (e.g., aphids, powdery mildew) before pruning.
- ● Compost bin or trash bin: Designate a spot for debris to avoid clutter.
- ● Sharpener: A file or honing tool to keep blades razor-sharp mid-pruning.
How to prune bay laurel trees for lush year-round growth
Here's the method I've used for years to keep my bay trees thriving indoors and out.
✂️ Step 1: Assess Growth and Identify Pruning Layers
Start by examining your bay tree from all sides. Look for areas where branches are crossing or growing inward—these compete for sunlight and air circulation. I also check for leggy growth (long, bare stems) and branches that are thinner than a pencil. These are your first targets for shaping.
Run your fingers along the stems to feel for the natural growth layers. Each layer represents a node where leaves grow. Prune just above these nodes at a slight angle to encourage new growth from that exact spot. Never cut flush against the trunk—you'll leave a wound that won't heal properly.
🌿 Step 2: Shape the Tree in Three Stages
First, remove any dead, diseased, or crossing branches using clean, sharp pruners. I make my cuts at a 45-degree angle about ¼ inch above a leaf node. This prevents water from pooling on the cut and causing rot. For larger branches, I use loppers and seal the wound with pruning paste immediately.
Next, focus on creating an open center. Bay laurels naturally grow bushy, but they need airflow to prevent fungal issues. Step back frequently and visualize the tree's shape—aim for a balanced, rounded form. For indoor trees, I keep the top slightly flatter than outdoor specimens since they get less natural light.
The final stage is fine-tuning. Trim back any branches that are growing toward the center or rubbing against others. You'll see the tree's natural structure emerge as you work. Remember, bay laurels respond well to pruning, so don't be afraid to be bold—just follow the natural growth patterns.
⏰ Step 3: Time Pruning for Optimal Regrowth
For indoor bay trees, you can prune anytime, but I find the best results come in early spring when new growth begins. Outdoor trees should be pruned after flowering but before summer heat sets in. This gives the plant time to recover before dormancy. I avoid heavy pruning in late summer—it stresses the tree before winter.
After pruning, place your tree in bright, indirect light (about 4-6 feet from a south-facing window). You'll notice new growth within 4-6 weeks—look for small, dark green leaves emerging from the nodes you cut above. Water the tree deeply but infrequently (when the top 2 inches of soil feel dry) to encourage strong root development.
💧 Step 4: Maintain Health Through Water and Light
Bay laurels are drought-tolerant once established, but they need consistent moisture after pruning. Water every 7-10 days, letting excess drain completely from the pot. I check moisture by sticking my finger 1-2 inches into the soil—if it's dry, it's time to water. Overwatering is the #1 killer of pruned bay trees, so always use pots with drainage holes.
If your tree is indoors, supplement with a grow light for 12-14 hours daily during winter months. You'll see leaves turn pale or stems stretch toward the light if it's not getting enough. Outdoor trees need full sun to partial shade—morning sun is ideal to prevent leaf scorch. Fertilize lightly with balanced liquid fertilizer every 6-8 weeks in growing season.
Tips & tricks for perfect bay tree laurel pruning
Real talk: Your bay tree's fragrance and lushness come down to these pruning secrets that'll transform your plant's health.
Node Location Matters: When pruning in Step 1, focus on cutting just above the leaf nodes—those tiny bumps where new leaves emerge. I always run my thumb along the stem to feel for these nodes before making any cuts. This ensures new growth will sprout exactly where you want it, creating a fuller, more aromatic tree. The angle matters too: a slight upward slope helps water run off the cut instead of pooling.
Tool Sharpness is Non-Negotiable: Dull pruners crush stems instead of making clean cuts, which invites disease. Before you start, test your pruners on a scrap piece of wood—they should slice through cleanly. For larger branches in Step 2, I use my loppers and always sterilize them with rubbing alcohol between cuts. This prevents spreading any potential fungal spores hiding in your tools.
Pruning Timing for Indoor vs Outdoor: While the instructions mention early spring for outdoor trees, indoor bay laurels are more forgiving. You can prune anytime, but I find late winter (just before new growth starts) works best for both. The key is watching your tree: prune when you see at least 2-3 new leaves emerging from the nodes. This timing ensures your tree has energy to recover and grow back lushly.
Light Aftercare Makes All the Difference: After pruning, the 12-14 hours of grow light mentioned for winter becomes even more critical. Place your tree within 3 feet of a south-facing window if possible—this gives it the bright indirect light it craves. I've seen dramatic differences when trees get proper light after pruning: leaves stay dark green instead of turning yellow, and new growth appears within those 4-6 weeks the instructions mention.
Pro Tips for Bay Tree Laurel
- Real talk: Your bay tree's fragrance and lushness come down to these pruning secrets that'll transform your plant's health.
- Node Location Matters: When pruning in Step 1, focus on cutting just above the leaf nodes—those tiny bumps where new leaves emerge.
- Tool Sharpness is Non-Negotiable: Dull pruners crush stems instead of making clean cuts, which invites disease.
Frequently asked questions
Got questions about keeping your bay tree laurel lush, fragrant, and thriving? You’re not alone! Here are answers to the most common pruning and care queries—so you can enjoy that signature aroma year-round without the guesswork.
When is the best time to prune a bay tree laurel?
The ideal time to prune is late winter or early spring (just before new growth starts). This encourages fuller, bushier foliage and prevents overgrowth. For light shaping, you can trim throughout the year, but avoid heavy pruning in fall—it may stress the plant before winter.
How do I prune a bay tree laurel without killing it?
Never remove more than one-third of the plant at once. Use clean, sharp pruners to make cuts at a 45-degree angle just above a leaf node. Avoid cutting into old wood—focus on green, flexible stems for best results. Pro tip: If you see yellowing leaves, prune those branches first to improve airflow!
Can I propagate bay tree laurel from cuttings?
Take 4–6 inch cuttings from healthy stems in spring or summer. Remove lower leaves, dip the cut end in rooting hormone, and plant in well-draining soil. Keep the soil moist and place in bright, indirect light until roots form (usually 4–8 weeks).
Why are my bay tree laurel leaves turning brown or yellow?
Brown edges often mean underwatering or low humidity, while yellow leaves could signal overwatering, nutrient deficiency, or pests (like spider mites). Check soil moisture—it should stay slightly damp but not soggy. If pests are the issue, wipe leaves with soapy water or use neem oil.
Is bay tree laurel toxic to pets or humans?
While bay tree laurel is non-toxic to humans, it can be mildly toxic to pets (especially cats and dogs) if ingested in large amounts. Symptoms may include vomiting or diarrhea. Keep pruned leaves out of reach, and avoid using them as mulch near pet areas.
Wrapping up and next steps
Mastering the art of bay tree laurel pruning isn’t just about shaping your plant—it’s about unlocking its full potential for year-round fragrance and lush growth. 🌿 Whether you’re a seasoned gardener or just starting, the key lies in timing, technique, and consistency.
With the right tools, a little patience, and the steps outlined here, your bay laurel will thrive, rewarding you with vibrant foliage and that signature aromatic charm.
Ready to take the next step? Start small—pick one season to focus on, then gradually build your confidence. Before you know it, your bay tree will be the star of your garden, and you’ll be the proud pruning pro behind it! 🌟