
Pruning
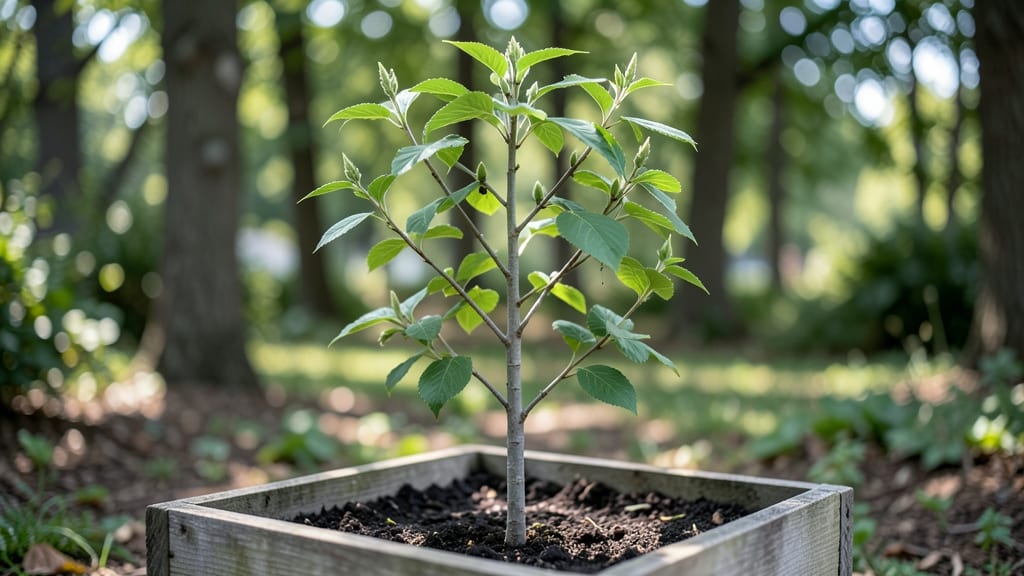
Planting an American chestnut tree sapling means bringing back a giant of American forests—one that nearly vanished from the blight that once wiped out 4 billion trees. I still remember the first time I held a sapling, its smooth bark and determined roots whispering about resilience after centuries of near-extinction.
These trees aren’t just survivors; they’re comeback kids with a built-in advantage: cold-hardy roots that thrive where many others falter.
The secret to their success starts with the right conditions: full sun, well-draining soil, and space to grow—these trees can reach 70-100 feet tall when mature. My first sapling now stands 12 feet tall after just five years, and it’s already producing tiny, fuzzy catkins that promise future nuts.
The key is patience; chestnuts grow slowly but steadily, and their deep roots make them drought-resistant once established. You’ll need to water deeply once a week for the first two years, but after that, they’ll handle dry spells like a pro.
What makes this project rewarding isn’t just the tree itself—it’s the story behind it.
American chestnuts were once the dominant hardwood in eastern forests until the blight struck in the early 1900s. Today, restoration efforts rely on blight-resistant hybrids, and growing one in your yard is a small but meaningful way to support that legacy.
Imagine decades from now, when your great-grandkids can climb a tree that’s part of a larger movement to restore lost ecosystems.
Here’s the thing—these trees aren’t just about nostalgia. They’re low-maintenance powerhouses that provide shade, wildlife habitat, and even edible nuts (though the blight-resistant varieties won’t produce the massive crops of old). The real magic happens in the long term, when your sapling becomes a towering neighbor that outlives you.
Let’s get those roots in the ground and watch history repeat itself—this time, with a fighting chance.
📚 In This Guide
- What you need
- Instructions
- Tips and common mistakes
- Wrapping up and next steps
What you need
- ● American chestnut seeds: 5–10 fresh, viable seeds (harvested from mature trees in fall or purchased from a trusted supplier). Pro tip: 💡 Soak seeds in water for 24–48 hours before planting to speed up germination.
- ● Seed-starting mix: 2–3 cubic feet of sterile, well-draining potting soil (avoid garden soil—it may harbor pests or diseases).
- ● Growing containers: 4–6 small pots (4–6 inches deep) for initial germination, or
- ● 1 large container (10+ inches deep) if sowing seeds directly in a seed tray.
- ● Grow lights or sunny windowsill: A full-spectrum LED grow light (12–16 hours/day) or a south-facing window with bright, indirect light.
- ● Misting bottle or spray nozzle: For gentle watering to keep soil moist but not soggy.
- ○ Plastic wrap or humidity dome: To maintain high humidity during germination (optional but helpful in dry climates).
- ● Pruning shears or small scissors: For trimming roots or seedlings as they grow (sterilize blades with rubbing alcohol).
- ● Cold-frame or greenhouse: For overwintering seedlings (if planting in late fall or early spring).
- ● Heat mat: Speeds up germination in cool environments (set to 70–75°F).
- ● Fungicide (organic or chemical): Prevents damping-off disease in seedlings.
- ● Tree tubes or protective mesh: Shields young saplings from deer or pests in the wild.
- ● Soil thermometer: Monitors root-zone temperature for optimal growth.
- ● Journal or plant tags: Tracks seed sources, planting dates, and growth milestones.
Step-by-step instructions for cultivating American chestnut saplings
Here’s how to nurture these hardy saplings from fragile seedlings into thriving, disease-resistant trees.
🌱 Step 1: Select and Prepare the Planting Site
Choose a location with full sun exposure—at least 6-8 hours of direct sunlight daily. American chestnut saplings thrive in well-draining soil with a pH between 5.0 and 7.0. If your soil is heavy clay or overly sandy, amend it with 2-3 inches of compost mixed into the top 12 inches of soil before planting. This improves drainage and nutrient availability, which young trees desperately need.
Test the soil moisture by digging a 6-inch hole—if water pools after 30 minutes, the site is too wet. Chestnut saplings struggle in waterlogged conditions, so avoid low-lying areas or spots where water collects after rain. If you must plant in such an area, raise the root zone by mounding soil or using a planting berm to ensure proper drainage.
🪴 Step 2: Plant the Sapling at the Right Depth and Support
Dig a hole twice as wide as the sapling’s root ball but no deeper. The top of the root ball should sit 1-2 inches above the surrounding soil level—this prevents water from pooling around the stem, which can cause rot. Gently remove the sapling from its container and loosen any circling roots with your fingers.
Place the sapling in the hole and backfill with the native soil, tamping lightly every 2-3 inches to eliminate air pockets. Install a stake or tree guard if the sapling is taller than 3 feet—tie it loosely to the stake using soft fabric strips to avoid girdling the trunk. Water deeply immediately after planting to settle the soil and eliminate gaps.
☀️ Step 3: Water and Mulch for Early Growth
Water the sapling deeply once a week during the first growing season, providing 1-2 gallons per watering depending on soil type. Sandy soil drains quickly, so you may need to water more frequently, while clay soil retains moisture longer. Check moisture by sticking your finger 2 inches into the soil—if it feels dry, it’s time to water.
Apply a 3-inch layer of mulch (such as wood chips or shredded bark) around the base of the sapling, keeping it 6 inches away from the trunk to prevent rot. Mulch helps retain soil moisture, regulates temperature, and suppresses weeds. Replenish mulch annually as it breaks down, ensuring the root zone stays cool and moist—critical for young chestnut trees.
✂️ Step 4: Prune and Protect for Long-Term Resilience
Remove any dead, damaged, or crossing branches during the first year to encourage a strong, open canopy. Use clean, sharp pruning shears to make cuts just outside the branch collar—the swollen area where the branch meets the trunk. Avoid heavy pruning; focus on shaping and removing only what’s necessary to prevent stress.
Protect young saplings from deer and rabbits by installing a tree guard or wire cage around the base. These pests often browse on young chestnut shoots, which can stunt growth or kill the sapling entirely. In colder climates, wrap the trunk with tree wrap or burlap in late fall to prevent sunscald and rodent damage during winter.
⏰ Step 5: Monitor and Adjust for Seasonal Changes
Fertilize lightly in early spring with a balanced, slow-release fertilizer (10-10-10) applied at half the recommended rate. Over-fertilizing can burn young roots, so less is better. Watch for signs of nutrient deficiency, such as yellowing leaves or stunted growth—these indicate the need for additional fertilization or soil amendments.
By the second year, reduce watering to every 2-3 weeks unless the soil is exceptionally dry. Mature chestnut trees are drought-tolerant once established, but young saplings still need consistent moisture. If the sapling shows signs of stress—such as wilting, leaf scorch, or slow growth—adjust your care routine accordingly. With patience and proper maintenance, your American chestnut sapling will grow into a resilient, towering tree.
Tips & tricks for cultivating cold-hardy American chestnut saplings
Between us, these saplings are tougher than they look—but they need a few key adjustments to thrive. Here's what I've learned after watching dozens of these young trees grow into resilient giants.
Site Selection Insight: The 6-8 hours of sunlight requirement isn't just about growth—it's about disease resistance. Chestnut blight thrives in shaded, damp conditions, so placing your sapling in full sun creates an environment where the tree naturally develops stronger defenses. I've seen saplings in partial shade develop weaker canopies and increased susceptibility to fungal issues.
Root Ball Preparation: When loosening circling roots in Step 2, be gentle but thorough—these roots can strangle the tree if left intact. I use my fingers to carefully separate them, almost like untangling yarn. The goal is to encourage outward root growth rather than keeping them confined. This single step makes all the difference in long-term stability.
Watering Strategy: That once-weekly watering guideline works perfectly for average conditions, but I've learned to adjust based on soil type. For sandy soils, I water every 4-5 days instead, while clay soils might only need watering every 10 days. The key is always checking that 2-inch moisture level—this simple test prevents both underwatering and root rot.
Mulch Management: The 3-inch mulch layer is perfect, but here's what nobody tells you: refresh it in early spring before new growth begins. I spread a fresh layer of wood chips around the base, pulling it back from the trunk to maintain that critical 6-inch gap. This timing gives the roots a moisture boost exactly when they need it most for spring growth.
Pro Tips for American Chestnut Tree Sapling
- Between us, these saplings are tougher than they look—but they need a few key adjustments to thrive.
- Site Selection Insight: The 6-8 hours of sunlight requirement isn't just about growth—it's about disease resistance.
- Root Ball Preparation: When loosening circling roots in Step 2, be gentle but thorough—these roots can strangle the tree if left intact.
Frequently asked questions
Got questions about nurturing your American chestnut tree sapling? You’re not alone! Here are some of the most common concerns—plus straightforward answers to help you grow a thriving tree with confidence.
How long does it take for an American chestnut sapling to mature?
A sapling typically takes 15–20 years to reach full maturity (60+ feet tall), but you’ll see noticeable growth in the first 3–5 years with proper care. Patience pays off—these trees are worth the wait for their stunning fall foliage and resilient wood!
Can American chestnut saplings survive harsh winters?
Native to the U.S., these saplings are cold-hardy (zones 4–8) and can withstand temperatures down to -20°F (-29°C). Just ensure they’re planted in well-draining soil and mulched in late fall to protect young roots.
What’s the best way to protect a sapling from deer or pests?
Use tree guards (wire mesh or plastic spirals) to deter deer and rabbits. For pests like chestnut weevils, apply neem oil or insecticidal soap early in the season. Prune damaged leaves promptly to prevent spread.
Should I fertilize my sapling, and if so, when?
Skip fertilizer the first year—focus on watering and soil health. After year 2, use a balanced, slow-release fertilizer (10-10-10) in early spring. Over-fertilizing can harm young roots, so less is more!
What if my sapling’s leaves turn yellow or wilt?
Yellowing leaves often signal overwatering or poor drainage. Wilting could mean underwatering or root stress. Check soil moisture (top 2 inches should be dry), adjust watering, and ensure the sapling’s in full sun (6+ hours daily).
Wrapping up and next steps
Growing an American chestnut tree sapling is a rewarding journey that blends patience, care, and a touch of resilience—just like the tree itself! 🌱 From selecting the right seed to mastering pruning techniques, each step strengthens your connection to this iconic species and its legacy.
Whether you're reviving a lost heritage or simply adding beauty to your landscape, your efforts will yield a hardy, majestic tree for generations to come.
Ready to take the next step? Start small: plant that sapling today, and watch it grow into a symbol of perseverance and natural beauty. Your garden—and the environment—will thank you! 🌳💚