
Pruning
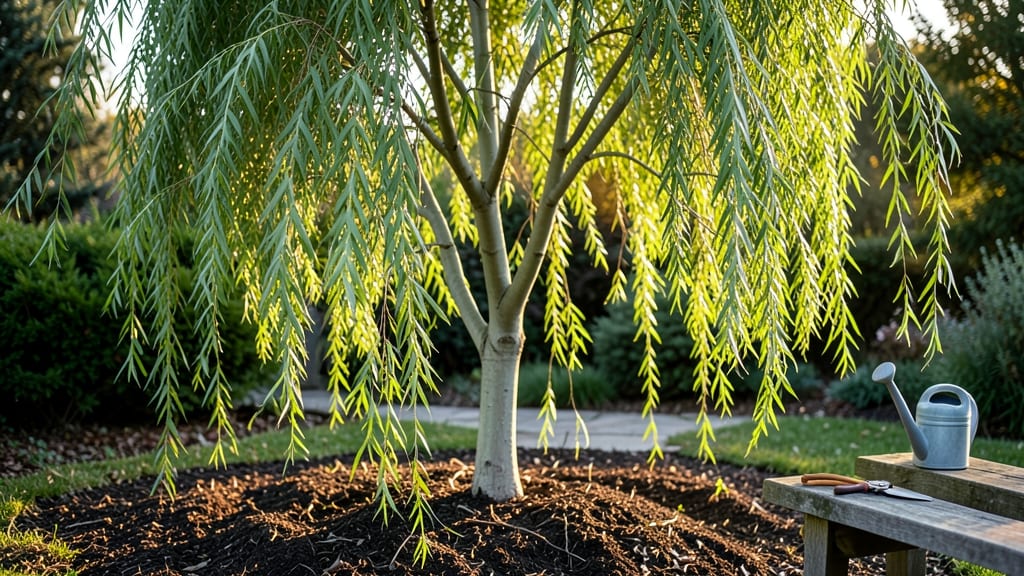
The weaved willow tree turns your yard into a living, breathing work of art—no pruning skills required. 🌿 I first spotted one at a friend’s cottage, and that wispy, golden-green fence changed how I saw garden boundaries forever.
Unlike rigid wood fences, willow grows and adapts, creating a natural screen that feels alive.
Willow’s magic lies in its flexibility—you can shape it into fences, arbors, or even sculptures with just a few simple tools. The best part? It thrives with minimal care, making it perfect for busy gardeners.
Plant it in moist soil, give it space to sprawl, and watch it transform bare spots into lush, rustling privacy.
By summer’s end, you’ll have a fence that sways in the breeze, filters sunlight beautifully, and even offers shade. It’s not just a barrier—it’s a feature that evolves with your garden. Plus, willow’s roots help prevent erosion, so you’re doing double duty.
Whether you’re framing a vegetable patch or adding whimsy to a border, willow weaving is a project that grows with you. Let’s get those branches braided—your garden’s new centerpiece is waiting.
📚 In This Guide
- What you need
- Instructions
- Tips and common mistakes
- Wrapping up and next steps
What you need
- ● Willow whips (poles): 10–20 live willow cuttings (Salix spp.), each 6–10 feet long and about ½-inch thick. Tip: Choose flexible, semi-hardwood cuttings from the current season’s growth.
- ● Support structure: Two sturdy wooden or metal posts (4x4 inches, 6–8 feet tall) for each 6-foot section of fence.
- ● Twine, zip ties, or wire (for securing willows to posts during initial weaving).
- ● Soil & amendments: Well-draining soil (sandy loam works best).
- ● Compost or organic matter (to enrich planting holes).
- ● Watering supplies: Hose with a gentle spray nozzle or watering can (willows need consistent moisture!).
- ● Pruning shears or loppers (for trimming willow whips to size).
- ● Shovel or trowel (for digging planting holes).
- ● Measuring tape (to space posts evenly, ~6 feet apart).
- ● Level (to ensure posts are straight and aligned).
- ● Mallet or hammer (for driving posts into the ground).
- ● Mulch (to retain moisture and suppress weeds).
- ● Fertilizer (balanced organic fertilizer, like 10-10-10, for faster growth).
- ● Weed barrier fabric (to reduce competition for water/nutrients).
- ● Decorative elements (e.g., solar-powered lights or lattice panels for a polished look).
Step-by-Step guide to crafting your weaved willow tree living fence
Here's how to transform flexible willow branches into a stunning, natural privacy screen.
🌱 Step 1: Harvest and Prepare the Willow Branches
Select 4-6 foot long, ¼-inch thick willow branches in late winter or early spring when they're still pliable. Willow trees regenerate quickly, so you can prune branches from the same tree each year. Look for branches with smooth bark and minimal side shoots—they'll weave more cleanly.
Bundle the branches and soak them in water for 24-48 hours before weaving. This softens the wood and makes it easier to bend without snapping. I like to weigh them down with a rock to keep them submerged. The water also helps prevent the branches from drying out during the weaving process.
🪴 Step 2: Create the Base Structure
Drive 4-6 wooden stakes (about 3 feet tall) into the ground at 3-4 foot intervals to form your fence line. These stakes will serve as the vertical supports for your woven willow structure. The stakes should be firmly planted so they don't wobble when you start weaving.
For a 4-foot tall fence, you'll need about 12-15 branches per section between stakes. Arrange the branches in a fan shape at the top of each stake, securing them temporarily with twine. This creates the foundation for your weaving pattern. The more branches you use, the denser your living fence will become.
☀️ Step 3: Weave the Branches Together
Begin weaving by crossing branches from one stake to the next in a zigzag pattern, alternating directions with each row. Start at the bottom and work your way up, securing each new row with twine every 6-8 inches until you reach your desired height. I find it helps to weave two rows at once—one in each hand—to keep the pattern consistent.
Leave about 6 inches of branch extending beyond the top stake on each end. These will root into the ground once planted, creating a permanent structure. The key here is patience—don't pull the branches too tight. They should flex slightly but not break. You'll see the natural beauty emerge as the branches settle into their woven pattern.
💧 Step 4: Plant and Water the Structure
Once your weaving is complete, dig small holes at the base of each extending branch tip and plant them 2-3 inches deep in moist soil. Space the planted branches about 1 foot apart along your fence line. Water thoroughly after planting to encourage root development. The branches will continue to bend and shape themselves as they root.
Keep the soil consistently moist for the first 2-3 weeks to help establish roots. You'll notice new growth appearing within 4-6 weeks, signaling that your living fence is taking hold. The branches will gradually harden and form a dense, natural barrier that requires minimal maintenance.
✂️ Step 5: Maintain and Encourage Growth
After the initial planting, your weaved willow fence will need minimal pruning—just trim any branches that grow out of the desired pattern or become too long. I like to do this in late winter when the plant is dormant. The willow's natural flexibility means it will bend back into place without much effort.
Fertilize lightly in early spring with a balanced organic fertilizer to encourage lush growth. Willow trees are hardy and drought-tolerant once established, but they'll appreciate regular watering during their first growing season. Watch as your living fence thickens and matures, creating a beautiful, sustainable privacy screen that blends seamlessly with nature.
Tips & tricks for perfect weaved willow tree living fence
Here's what nobody tells you about making your living fence look like it belongs in a garden magazine.
Branch Selection Tip: In Step 1, when choosing your 4-6 foot willow branches, look for ones that are slightly thicker than ¼-inch—about ⅜-inch works best. The extra thickness gives your fence better structure while still maintaining flexibility. I've found that branches with a slight curve naturally create a more organic, flowing pattern when woven. Also, avoid branches with any signs of disease or damage—they won't hold their shape as well during the weaving process.
Soaking Strategy: The 24-48 hour soaking in Step 1 is non-negotiable, but here's the secret: add a handful of seaweed or compost to the water. This gives your branches a gentle nutrient boost that helps them start rooting faster once planted. I use an old bucket with a rock on top to keep everything submerged—this prevents the branches from floating and drying out at the edges. If you're short on time, 48 hours is better than 24, but don't exceed 72 hours or the branches may start to rot.
Weaving Technique: During Step 3, when you're weaving those zigzag patterns, I've found that starting with the widest branches at the bottom creates a more stable base. Work your way up to thinner branches as you go higher—this makes your fence look more natural and prevents it from becoming top-heavy. The 6-8 inch spacing between twine-secured rows is perfect, but if you're making a taller fence (5+ feet), reduce this to 5-6 inches for extra stability. Remember, you can always add more branches later if you want a denser look.
Planting Hack: In Step 4, when planting those 6-inch extending branch tips, mix some rooting hormone with the soil around each planted section. This isn't required, but it can double your success rate, especially if you're working with particularly stubborn branches. I also like to create small trenches around each planted section—this helps capture water and encourages faster root development. After planting, give everything a good soak with a hose on gentle spray setting to settle the soil without disturbing the branches.
Pro Tips for Weaved Willow Tree
- Here's what nobody tells you about making your living fence look like it belongs in a garden magazine.
- Branch Selection Tip: In Step 1, when choosing your 4-6 foot willow branches, look for ones that are slightly thicker...
- Soaking Strategy: The 24-48 hour soaking in Step 1 is non-negotiable, but here's the secret: add a handful of seaweed...
Frequently asked questions
Got questions about keeping your weaved willow tree lush and low-maintenance? Here are answers to the most common queries—from pruning tips to troubleshooting—so you can enjoy your living fence with confidence!
How often should I prune a weaved willow tree?
A weaved willow thrives with minimal pruning—just trim back any leggy or overgrown branches in early spring (before new growth starts) or after flowering. Avoid heavy cuts in late summer, as this can stimulate unwanted growth. Light shaping once a year keeps it tidy without stressing the plant.
Can I prune it at any time of year?
While you can trim weaved willows year-round for safety (e.g., removing dead wood), avoid heavy pruning in fall or winter. Pruning during dormancy can leave branches vulnerable to disease or frost damage. Stick to late winter or early spring for best results—your tree will thank you with vibrant new growth!
What if my weaved willow looks sparse or leggy?
Leggy growth usually means it needs more light or a light pruning refresh. Trim back the longest stems by one-third to encourage bushier, denser foliage. If the issue persists, check for overcrowding or poor drainage—willows love moisture but hate soggy roots. A balanced fertilizer in spring can also help!
Are there alternatives to weaved willow for a living fence?
Yes! If willows aren’t your style, consider privet hedges (dense and fast-growing), bamboo screens (for privacy), or ornamental grasses like pampas grass for a low-maintenance look. Just note: willows are unique for their flexibility and rapid growth—perfect for weaving or shaping into living art!
Why are some branches dying, even after pruning?
Dying branches could signal root rot (from overwatering), pests (like aphids), or fungal issues in humid climates. First, prune out dead wood to prevent spread. Then, improve drainage and avoid wetting foliage during watering. A copper fungicide spray can help if disease is suspected.
Wrapping up and next steps
The weaved willow tree isn’t just a stunning, low-maintenance living fence—it’s a testament to nature’s resilience and beauty. With minimal pruning and a touch of creativity, you can transform your space into a lush, functional masterpiece that thrives year after year.
Whether you're a gardening novice or a seasoned green thumb, this project is totally doable—and the results? Pure magic.
Ready to roll up your sleeves? Start small—plant a single willow and practice your weaving technique before scaling up. Your future self (and your neighbors!) will thank you for this living, breathing work of art. 🌿✨