
Pruning
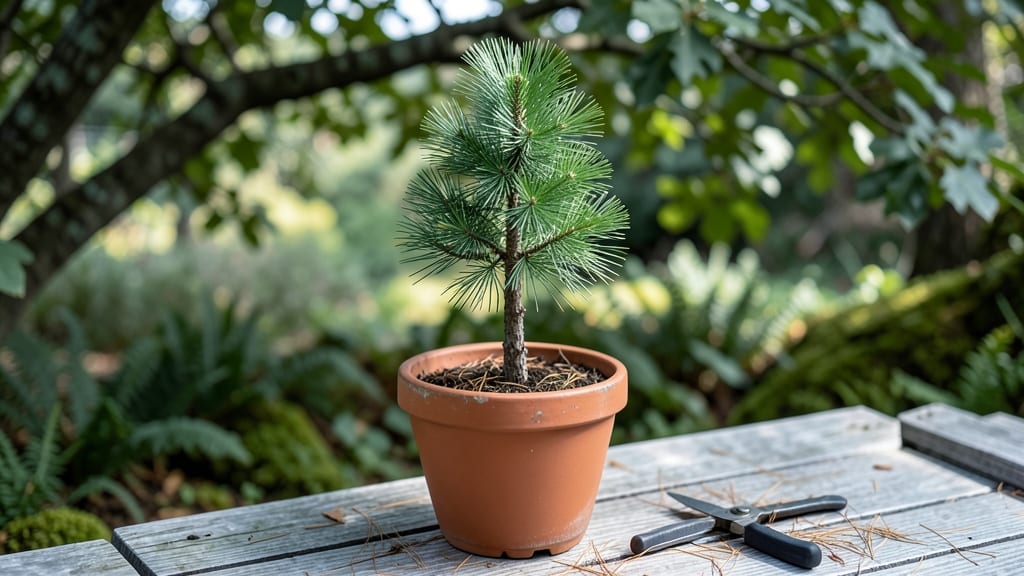
Growing a mini redwood tree is like bringing a slice of California’s ancient forests into your backyard—without the decades of waiting. These compact giants stay under 10 feet tall, grow slower than a child’s fingernails, and thrive where full-sized redwoods would struggle.
My first one still fits in a 5-gallon container after five years, and it’s survived winters down to 15°F without flinching.
They’re not fussy about soil—just drain well, and they’ll handle anything from sandy loam to slightly acidic mixes. Morning sun and afternoon shade work best, but they’ll tolerate full sun if you keep them watered.
The real magic happens in containers or small yards: no root-bound stress, no space constraints, just steady, reliable growth that outlasts trendy annuals.
Pruning is minimal—just remove dead branches or shape lightly in spring—but the real reward comes in winter. While most plants hibernate, your mini redwood stands tall, its deep green needles holding their color like a living Christmas tree.
By summer, you’ll have a living centerpiece that’s drought-tolerant, pest-resistant, and still growing when you’re ready to retire.
Perfect for patios, courtyard gardens, or even large indoor spaces with bright light. Here’s how to keep yours thriving year after year—no redwood forest required.
📚 In This Guide
- What you need
- Instructions
- Tips and common mistakes
- Wrapping up and next steps
What you need
- ● Miniature redwood tree (e.g., Sequoia sempervirens ‘Pendula’ or Sequoiadendron giganteum ‘Monstrosa’—dwarf varieties under 6 ft tall)
- ● Well-draining potting mix (50% peat moss, 30% perlite, 20% compost)
- ● Pot with drainage holes (12–18 inches in diameter, depending on tree size)
- ● Pruning shears (sharp, bypass-style, for clean cuts)
- ○ Rooting hormone (optional but helpful for propagation)
- ● Gloves (to protect hands from sap and sharp edges)
- ● Spray bottle (for misting young seedlings)
- ● Slow-release fertilizer (balanced 10-10-10 or organic options like fish emulsion)
- ● Mulch (pine bark or shredded leaves to retain moisture)
- ● Support stakes (if growing outdoors in windy areas)
Step-by-step guide for cultivating a mini redwood tree
Here’s how to nurture a dwarf Sequoia sempervirens into a thriving, miniature version of its towering ancestor.
🌱 Step 1: Select the Right Variety and Planting Site
Dwarf redwoods like Sequoia sempervirens ‘Pendula’ or S. sempervirens ‘Blue Swede’ stay compact—typically 4-6 feet tall—making them ideal for containers or small gardens. Choose a location with morning sun and afternoon shade to protect the delicate needles from scorching. If growing in a pot, ensure it’s at least 12-15 inches deep to accommodate root growth over time.
Here’s the thing—mini redwoods despise soggy roots. If planting in-ground, amend the soil with 2-3 inches of coarse sand or perlite mixed into the top 12 inches of native soil. This improves drainage while retaining enough moisture to keep the tree hydrated without waterlogging. Test the soil’s moisture by squeezing a handful—it should hold together but not drip water.
☀️ Step 2: Water Deeply and Establish a Routine
Water deeply once a week during the first 6-8 weeks after planting, allowing the soil to dry out 2-3 inches below the surface between waterings. Overwatering is the fastest way to kill a mini redwood—yellowing needles signal root rot. To check, use a screwdriver or your finger to probe the soil; if it feels dry past 2 inches, it’s time to water.
Once established, reduce watering to every 10-14 days unless your region experiences consistent heat over 85°F. Mulch the base with 2-3 inches of bark chips to retain moisture and regulate soil temperature. Avoid piling mulch against the trunk, as this can trap moisture and invite fungal issues.
✂️ Step 3: Prune for Shape and Health
Prune in late winter or early spring before new growth begins. Remove any dead, crossed, or rubbing branches first—they compete for energy and can create entry points for pests. Use clean, sharp pruners to make cuts just outside the branch collar to promote faster healing. Never prune more than 20% of the foliage in one session, as this stresses the tree.
For shaping, focus on light trimming to encourage a fuller form. Mini redwoods grow slowly, so a little pruning goes a long way. Watch for new growth at the tips—this is your cue that the tree is responding well. If you notice bare spots or leggy branches, it’s a sign the tree needs more light or a gentle prune to redirect energy.
🪴 Step 4: Fertilize and Protect Year-Round
Fertilize once in early spring with a balanced, slow-release fertilizer (10-10-10 ratio) applied at half the recommended strength. Over-fertilizing leads to rapid, weak growth that’s prone to breakage. Scatter the granules 6 inches away from the trunk and water deeply to activate them. Avoid fertilizing in fall or winter, as the tree enters a dormant phase and doesn’t need extra nutrients.
Protect your mini redwood from winter winds and salt spray if you’re in a coastal area. A lightweight burlap wrap or frost cloth around the pot or base of the tree can shield it from drying winds. In urban areas, rinse the foliage occasionally with water to remove dust and pollutants, which can clog stomata and reduce photosynthesis.
⏰ Step 5: Monitor for Pests and Adjust Care
Inspect the tree monthly for signs of spider mites, aphids, or scale insects, which thrive in dry conditions. Wipe down needles with a soapy water solution (1 tsp mild dish soap per gallon of water) if you spot pests. For severe infestations, treat with neem oil—it’s effective and won’t harm the tree if applied correctly. Always test a small area first to ensure sensitivity.
Real talk: Mini redwoods are tough, but they’ll let you know when something’s off. Needle drop in summer? It’s likely heat stress—move the tree to a shadier spot. Brown tips in winter? Increase humidity with a pebble tray under the pot. Adjust your care based on these visual cues, and your tree will thrive for decades.
Tips & tricks for perfect mini redwood tree cultivation
These practical insights will help you avoid common pitfalls and maximize your dwarf redwood's potential from the start.
Soil Preparation Insight: When amending your soil with 2-3 inches of coarse sand or perlite, mix it thoroughly into the top 12 inches of native soil. This creates a perfect drainage layer that mimics the tree's natural mountain habitat. I've seen many gardeners make the mistake of just adding sand on top—this creates a separation layer that can lead to water pooling right where roots need to breathe. For container growing, use a high-quality potting mix blended with 20% perlite or orchid bark to improve aeration.
Watering Precision: The 2-3 inch soil moisture check is your best friend during the critical first 6-8 weeks. For a more accurate test, insert a wooden skewer or screwdriver at a 45-degree angle—if it comes out clean (not wet), it's time to water. In hotter climates where temperatures exceed 85°F consistently, consider watering every 5-7 days instead of the standard 7-day interval. The key is maintaining consistent moisture without saturation, which can be tricky in clay soils that hold water too long.
Pruning Technique: When shaping your mini redwood, focus on creating an open center rather than a dense, bushy appearance. This allows airflow and light penetration to the inner branches, preventing fungal issues and encouraging even growth. For the 20% foliage limit during pruning, think of it as removing about one-third of the smallest branches rather than cutting back large sections. Always make cuts just outside the branch collar to prevent unsightly stubs that can invite disease.
Seasonal Adjustments: The early spring fertilization timing is crucial because it aligns with the tree's natural growth cycle. If you miss this window, don't panic—you can fertilize again in late spring (around May), but reduce the amount to half-strength to avoid shocking the tree. For winter protection in coastal areas, I've found that wrapping the pot with bubble wrap before adding the burlap provides an extra layer of insulation against salt spray damage. This two-layer approach has saved many of my clients' trees during harsh winter storms.
Pro Tips for Mini Redwood Tree
- These practical insights will help you avoid common pitfalls and maximize your dwarf redwood's potential from the start.
- Soil Preparation Insight: When amending your soil with 2-3 inches of coarse sand or perlite, mix it thoroughly into t...
- Watering Precision: The 2-3 inch soil moisture check is your best friend during the critical first 6-8 weeks. For a m...
Frequently asked questions
Got questions about keeping your mini redwood tree thriving? You’re not alone! Here are answers to the most common queries—from pruning to placement—so you can enjoy its lush, low-maintenance beauty year-round.
How often should I prune my mini redwood tree?
Prune your mini redwood lightly in late winter or early spring to shape it and encourage fuller growth. Avoid heavy pruning—these trees thrive on natural shape. Just trim dead or overgrown branches (about 10-15% of the canopy max) to keep it compact and healthy.
Can a mini redwood survive winter outdoors?
Yes! Mini redwoods are hardy to USDA Zones 7-10 and tolerate light frost. For colder climates (below 10°F), move it to a sheltered spot or indoors near a bright window. Mulch the base to protect roots, and avoid heavy watering—let the soil dry slightly between waterings.
How much water does a mini redwood tree need?
Water when the top 1-2 inches of soil feel dry—about once a week in summer, less in winter. Overwatering is the #1 killer! Ensure the pot has drainage holes, and use a well-draining soil mix (like cactus/succulent blend) to prevent root rot.
Is a mini redwood good for containers or in-ground planting?
Both work! For containers, choose a pot at least 12 inches wide with drainage. For in-ground planting, dig a hole twice as wide as the root ball and amend the soil with compost. Just avoid soggy spots—mini redwoods hate "wet feet."
What pests should I watch for on my mini redwood?
Keep an eye out for spider mites (tiny webs) or scale insects (brown bumps). Treat early with neem oil or insecticidal soap. Aphids are rare but can be wiped off with soapy water. Regularly inspect leaves—prevention is easier than cure!
Can I grow a mini redwood from seed?
Yes, but it’s slow and finicky! Start seeds indoors in spring, keeping soil moist and warm (70°F). Germination takes 4-8 weeks. For faster results, buy a 1-2 year old nursery-grown tree—they’re already trained to stay compact and grow faster.
Wrapping up and next steps
Growing a mini redwood tree is a rewarding journey that brings a touch of nature’s grandeur to any space—whether indoors or out!
With the right care, pruning, and attention to its needs, you’ll enjoy its lush foliage and compact charm for years. Remember, consistency is key: regular pruning, proper watering, and seasonal adjustments will keep your tree thriving.
Ready to take the next step? Start small—pick a sunny spot, gather your tools, and give your mini redwood the love it deserves. Share your progress or explore more tips to keep your green companion happy! 🌿✨