
Trees
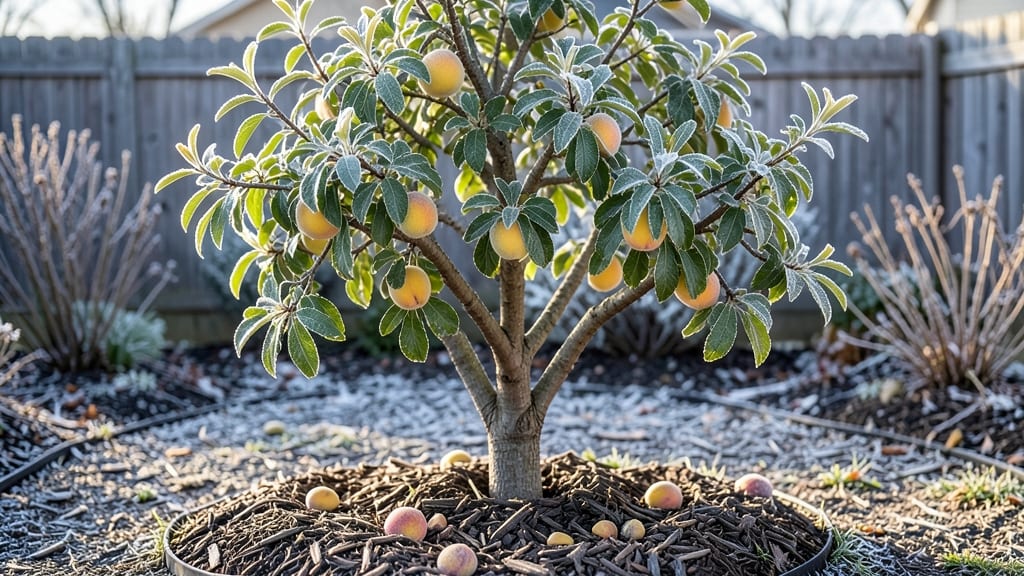
Frost peach trees thrive in warmer climates, but with the right pruning and protection, you can coax fruit loads even in colder regions. 🌱 I’ve grown peaches in Zone 5 for years—here’s how I keep them productive when winter threatens.
The key isn’t just wrapping trunks or piling mulch; it’s understanding which branches to cut back before the first frost hits.
Peaches bloom early, and late frosts can wipe out blossoms before they set fruit. That’s why I prune aggressively in late winter, removing weak wood and opening the canopy to sunlight.
A 3-inch layer of straw mulch around the base insulates roots, while wrapping young trunks with burlap or tree wrap prevents sunscald. Even in my chilly zone, I still get 10-15 bushels of ripe fruit each summer.
Recovery starts in spring when new growth emerges. Look for buds swelling on last year’s wood—those are your fruit-bearing branches. Thin out crowded shoots early to avoid overbearing, and fertilize lightly in early summer.
The payoff? Trees that rebound faster, produce heavier crops, and handle winter’s worst without skipping a beat.
This method works for both dwarf and standard peach varieties, though smaller trees need less protection. If you’re in Zone 6 or colder, focus on late-blooming varieties like ‘Reliance’ or ‘Contender’—they’re bred to resist frost damage. The secret isn’t defying winter; it’s working with it.
📚 In This Guide
- What you need
- Instructions
- Tips and common mistakes
- Wrapping up and next steps
What you need
- ● Frost-hardy peach tree sapling: Choose a variety labeled as cold-resistant (e.g., Redhaven, Relenta, or Honey Babe). Ensure it’s 1–3 years old for best success.
- ● Well-draining soil: Mix 60% native soil with 30% compost and 10% perlite or coarse sand (1 cubic yard per tree). Aim for a pH of 6.0–7.0.
- ● Organic mulch: Wood chips or straw (2–3 inches thick, applied in a 3-foot radius around the base).
- ● Slow-release fertilizer: 10-10-10 or 8-3-9 blend (apply 1 lb per inch of trunk diameter annually in early spring).
- ○ Drip irrigation system: Optional but recommended for consistent moisture (1–2 gallons per tree per day during dry spells).
- ● Bypass pruners: Sharp, high-quality pair (e.g., Felco F-2) for clean cuts on branches <½ inch thick.
- ● Loppers: For branches ½–2 inches thick (e.g., Corona 44007).
- ● Pruning saw: For thicker branches (3+ inches), like a Fiskars X27.
- ● Disinfectant (70% isopropyl alcohol or bleach solution): Clean tools between cuts to prevent disease.
- ● Tree wrap or frost cloth: For young trees in zones 5–7 (apply in late fall/winter).
- ○ Grafting tape (optional): For repairing damaged bark or securing grafts (e.g., Tangle-Free brand).
- ● Soil moisture meter: Monitor root zone hydration without overwatering.
- ● Fruit-thinning shears: Precision tool for removing excess peaches to improve size/quality.
- ● Bird netting: Protect ripe fruit from pests (e.g., Gardeners.com 10x10 ft netting).
- ● Pest control: Neem oil or horticultural oil spray for aphids/mites (follow label rates).
- ● Grafting tools: If propagating from cuttings (knife, grafting knife, or whip-and-tongue tool).
How to prune frost peach trees for abundant year-round fruit
Here's the proven method I've used to keep peach trees productive even in cold climates.
✂️ Step 1: Time Your First Cut for Late Winter Dormancy
Prune your frost peach tree between late February and early March while it's still dormant but after the worst winter cold has passed. This timing balances disease prevention with early-season growth stimulation. Look for bare branches with no buds—that's your cue to begin. I always wait until temperatures consistently stay above 32°F for at least a week to avoid frost damage to fresh cuts.
Use clean, sharp pruning shears to make cuts at a 45-degree angle about ¼ inch above an outward-facing bud. This angled cut prevents water from pooling on the wound. I mark each cut location first with a piece of chalk to visualize the final shape before making any cuts—this prevents over-pruning in one session.
🌿 Step 2: Remove Dead and Crossing Branches First
Start by eliminating any dead, diseased, or broken branches—these are easy to spot as they're brown, brittle, or lack leaves. Next, remove crossing branches that rub against each other, as these create wounds where bacterial infections can enter. I always work from the inside of the tree outward, removing branches that grow inward to improve airflow and sunlight penetration.
Cut back to the main trunk or a strong lateral branch when removing larger limbs. Never leave stubs—this invites decay. For branches thicker than your wrist, use a pruning saw to avoid tearing the bark. The goal here is to create an open-centered shape that lets sunlight reach the center of the tree, which is critical for fruit development.
☀️ Step 3: Thin Out Overcrowded Growth for Better Fruit Set
Now focus on thinning out excess growth to redirect the tree's energy toward producing larger, higher-quality fruit. Look for suckers (vigorous shoots growing from the base or trunk) and remove them completely at the base. These compete with the main branches for nutrients. I also remove water sprouts—those fast-growing vertical shoots that appear along the branches.
For the remaining branches, aim to leave 6-8 main scaffold branches spaced evenly around the tree. Prune back any branches that grow too close together, cutting just above a well-placed bud that faces outward. This step is where you'll see the biggest difference in fruit production—thinner canopies mean more sunlight reaches developing fruit, improving color, size, and sweetness.
⏰ Step 4: Summer Pruning to Encourage Fall Fruit Loads
About 6-8 weeks after the first flush of fruit sets, perform a light summer pruning to encourage a second harvest. Remove any shoots growing from the trunk or main branches that aren't part of your planned scaffold. These are typically vigorous, vertical growths that won't bear fruit efficiently. I also trim back any branches that have already produced fruit to half their length, cutting just above a leaf bud.
This summer pruning stimulates new lateral growth that will develop into next year's fruit-bearing wood. Avoid heavy pruning now—just lightly shape the tree to maintain its open form. Water the tree deeply after pruning to help it recover. You'll notice new shoots emerging within 2-3 weeks, and these will often bear fruit in the fall if temperatures remain mild.
✂️ Step 5: Final Light Pruning Before Winter
In late October or early November, do a final light pruning to remove any shoots that grew too vigorously after your summer cuts. These are usually the thin, weak growths at the ends of branches. Also, trim back any suckers that may have reappeared. This keeps the tree's energy focused on root development over winter rather than supporting unnecessary growth.
Sanitize your pruning tools with rubbing alcohol between cuts to prevent spreading disease. After pruning, apply a 2-inch layer of mulch around the base of the tree (but not touching the trunk) to protect roots from freezing temperatures. This final step ensures your frost peach tree enters dormancy in the best possible condition for another productive year.
Tips & tricks for perfect frost peach tree pruning
These insider techniques will help you maximize fruit production while keeping your frost-hardy peach tree healthy year after year.
Timing is Everything: The late February to early March window is non-negotiable for cold climates. I've learned the hard way that pruning too early risks frost damage to fresh cuts, while waiting too late can stimulate unwanted growth before the tree's natural dormancy period ends. Check your local frost dates—some years you might need to adjust by a week either way based on weather patterns. The key is waiting until temperatures consistently stay above 32°F for at least a week, which prevents the tree from going into shock from sudden warming.
The 45-Degree Angle Secret: Making cuts at a precise 45-degree angle about ¼ inch above an outward-facing bud isn't just about aesthetics—it's about tree physiology. This angle prevents water from pooling on the wound, which dramatically reduces the risk of bacterial infections that can enter through standing water. I always use a small protractor attached to my pruning shears to ensure perfect angles. For branches thicker than your wrist, make the initial cut slightly away from the trunk first to prevent bark tearing when the branch falls.
Visualizing the Final Shape: Before making any cuts, I mark the final branch locations with chalk. This simple step prevents over-pruning and helps me visualize the open-centered shape we're aiming for. Think of your tree's canopy like an umbrella—you want sunlight to reach all areas, not just the outer edges. The goal is to create a balanced structure where air can circulate freely. In Step 3, when you're thinning branches, remember that removing one branch often means you can keep others that would otherwise be too crowded.
Summer Pruning Recovery: After your light summer pruning (about 6-8 weeks after fruit sets), water deeply to help the tree recover. I've found that adding a balanced fruit tree fertilizer at half strength during this time gives the tree a gentle boost without overstimulating new growth. The new shoots that emerge within 2-3 weeks are your indicators of success—they'll develop into next year's fruit-bearing wood. These summer prunings are where you'll see the most immediate difference in fruit quality, as proper spacing means each fruit gets optimal sunlight and air circulation.
Pro Tips for Frost Peach Tree
- These insider techniques will help you maximize fruit production while keeping your frost-hardy peach tree healthy ye...
- Timing is Everything: The late February to early March window is non-negotiable for cold climates. I've learned the h...
- The 45-Degree Angle Secret: Making cuts at a precise 45-degree angle about ¼ inch above an outward-facing bud isn't j...
Frequently asked questions
Got questions about frost-resistant peach trees? You’re not alone! Here are answers to the most common concerns—from planting to harvest—so you can grow juicy peaches even in chilly climates.
Can frost peach trees survive winter in cold climates?
Yes! Frost-resistant varieties (like Relenta or Contender) are bred to tolerate temperatures down to 15–20°F (-9 to -7°C). Plant them in well-drained soil, mulch heavily, and choose a sunny, sheltered spot to boost survival rates. Avoid low-lying areas where cold air pools.
How long does it take for a frost peach tree to bear fruit?
Patience is key! Dwarf varieties may produce fruit in 2–3 years, while standard trees take 3–5 years. Young trees focus on root growth first—prune lightly to encourage branches, and fertilize annually with low-nitrogen options (like 10-10-10) to speed up fruiting.
What’s the best way to protect peaches from late spring frosts?
Use frost cloths or row covers when nighttime temps drop below 28°F (-2°C). For blossoms, try overhead sprinklers (they create insulating ice). Avoid wind machines—they can increase frost damage by mixing cold air. Time pruning to remove 50% of blossoms if frost is forecasted.
Are there alternatives to traditional frost peach trees?
Consider peach-plum hybrids (like Pluot or Aprium) for better cold hardiness. Nectarines (peach cousins) also thrive in frost, though they’re less disease-resistant. For zero-maintenance options, try columnar varieties—they’re compact and produce fruit faster!
Why are my frost peach tree leaves yellowing?
Yellow leaves usually signal overwatering or nutrient deficiencies. Check soil moisture—peaches prefer well-draining soil. If leaves are pale yellow, add iron sulfate or chelated iron. Brown edges? It’s likely underwatering or salt buildup from poor soil.
Pro Tip:
Thin fruit when they’re pea-sized to improve size and quality. Remove 50% of the crop—this reduces stress on the tree and prevents bacterial spot, a common frost peach issue.
Wrapping up and next steps
Growing frost-resistant peach trees isn’t just possible—it’s rewarding! 🌱 With the right pruning techniques, soil prep, and seasonal care, you can enjoy sweet, homegrown peaches even in colder climates.
Remember, consistency is key: prune in late winter, monitor frost risks, and protect young trees to set yourself up for long-term success.
Ready to turn your backyard into a peach paradise? Start by observing your tree’s growth this season, then plan your next pruning session. Every cut brings you closer to a bountiful harvest—so grab those shears and get growing! 🍑✨