
How To
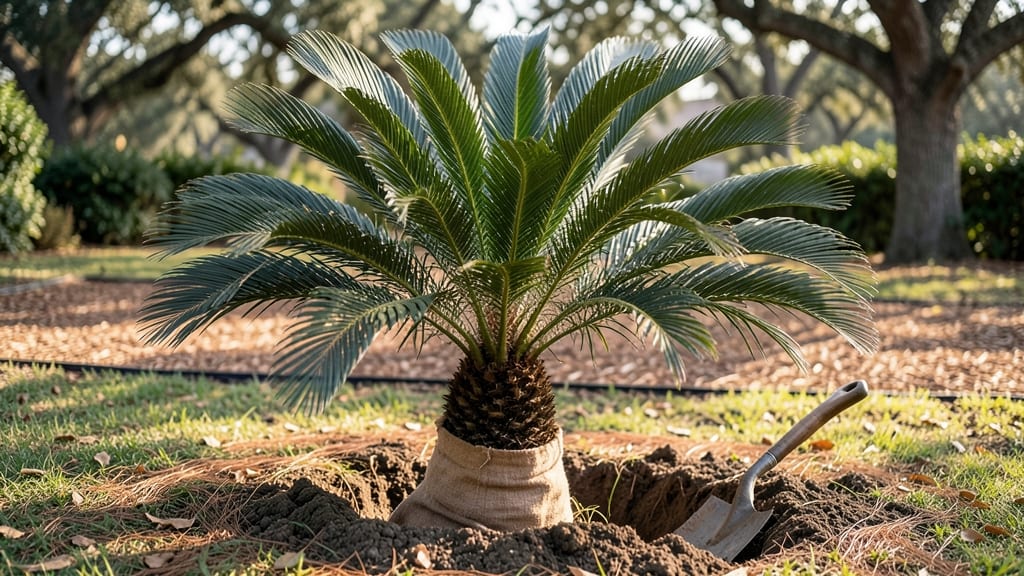
Transplanting a palm tree feels like moving a skyscraper—one wrong step and everything collapses. 🌴 The key is timing, technique, and treating those roots like they’re fragile glass.
I’ve nursed back more struggling palms than I’d like to admit, and the difference between success and failure often comes down to how you handle the first 48 hours after digging.
Start by choosing a day when temperatures stay mild—spring or fall are ideal—and water the tree deeply the week before moving it. You’ll need a sharp shovel, burlap for wrapping roots, a wheelbarrow, and a helper (palm trees are heavy).
The goal is to minimize root damage while keeping the plant hydrated; even a small palm’s roots can stretch wider than you think.
📚 In This Guide
- What you need
- Instructions
- Tips and common mistakes
- Wrapping up and next steps
What you need
- ● Shovel or spade – A sharp, sturdy digging tool (24–36 inches wide for mature palms).
- ● Pruning shears or handsaw – For trimming fronds or roots if needed.
- ● Wheelbarrow or tarp – To transport soil and the palm tree.
- ○ Burlap or landscape fabric – 3–4 feet wide to wrap the root ball (optional but helpful for stability).
- ● Garden hose or watering can – For keeping the root ball moist during transplanting.
- ● Stakes and twine – 2–3 stakes (2–3 feet tall) to secure the palm temporarily.
- ● Compost or well-draining potting mix – 2–3 cubic yards (for large palms) or bags (for smaller ones).
- ○ Mulch (optional but recommended) – 2–3 inches of organic mulch (e.g., wood chips) to retain moisture.
- ● Root stimulator or mycorrhizal fungi – Boosts root growth post-transplant.
- ● Glove – Protects hands from sharp fronds or roots.
- ● Measuring tape – Ensures proper spacing for the new hole.
- ● Post-hole digger – For breaking up compacted soil in the new location.
- ● Fertilizer (slow-release) – Apply 2–3 months after transplanting for recovery.
Step-by-Step instructions for moving palm trees safely
Here's my foolproof method for relocating palms without shocking their delicate roots.
🪴 Step 1: Prepare the New Planting Site
Choose a location with similar sun exposure to where your palm currently grows. Dig a hole twice as wide and just as deep as the root ball. This gives roots room to spread without circling tightly, which strangles growth.
Amend the native soil with 4-6 inches of compost mixed into the bottom of the hole. Palms hate soggy roots but thrive in well-draining, nutrient-rich soil. Tap the sides of the hole gently after filling to remove air pockets—solid contact helps roots establish faster.
Real talk: If your soil drains poorly, add a 2-inch layer of coarse sand or gravel at the bottom before backfilling. You'll see yellowing fronds if roots suffocate from poor drainage, and that's a slow recovery.
🌿 Step 2: Prune and Prepare the Palm for Moving
Trim any dead or yellow fronds completely off before digging. Use clean, sharp pruners to cut at the base where the frond meets the trunk. Healthy fronds should stay attached—they're the plant's food factories during recovery.
Water the palm 2-3 days before transplanting to encourage roots to grow outward rather than staying compacted. You'll know it's ready when the soil feels uniformly moist down to 12 inches deep. Dig only when the ground isn't frozen or waterlogged.
💧 Step 3: Dig and Transport the Root Ball
Mark a circle around the trunk 6-12 inches beyond the drip line (where fronds naturally extend). Use a sharp spade to cut vertically around this circle, then work your way inward to lift the root ball intact. If roots tear, trim them cleanly—don't leave jagged edges.
Wrap the root ball in burlap or a tarp secured with twine before moving. Keep it shaded and moist during transport. I've seen palms wilt dramatically from exposure to sun or wind during this critical phase. Move slowly—jerking the plant stresses roots and delays recovery.
☀️ Step 4: Plant and Stabilize the Palm
Lower the palm into the prepared hole so the top of the root ball sits 1-2 inches above ground level. This prevents water from pooling around the trunk. Backfill with native soil mixed with compost, tamping down gently in layers to eliminate air pockets.
Create a 4-inch deep water basin around the base and water deeply until it drains from the bottom. Add 2-3 inches of mulch (keeping it clear of the trunk) to retain moisture and regulate soil temperature. Stake the palm only if it leans—use soft ties to avoid girdling the trunk.
⏰ Step 5: Care for Recovery Over First Month
Water 2-3 times weekly for the first month, keeping soil consistently moist but never soggy. You'll see new fronds emerging in 4-8 weeks if roots are happy. Reduce watering gradually after that as the plant establishes.
Keep the palm shaded with a 30-50% shade cloth for 2-4 weeks to reduce stress. Gradually increase sun exposure over 2 weeks. Avoid fertilizing for 3 months—roots need all their energy for regrowth, not leaf production.
Tips & tricks for transplanting palm trees safely
Moving palms without stressing their roots takes more than just digging and replanting—here's what I've learned from watching palms thrive (and sometimes struggle) after transplanting.
Soil Prep Secret: The 4-6 inches of compost in Step 1 isn't just about nutrients—it's about creating the perfect air-to-water ratio in the soil. I've seen palms recover faster when the compost is thoroughly mixed with the native soil, not just dumped in. For heavy clay soils, add perlite to the compost mix to improve drainage even more. The key is getting that soil to feel like a well-draining sponge, not concrete.
Root Ball Rescue: When lifting the root ball in Step 3, think of it like moving a fragile vase—support the bottom while cutting around the edges. I've ruined three root balls by lifting from the top, which caused roots to tear. If roots do tear, trim them cleanly with sterilized pruners and dip the cuts in rooting hormone powder. This might seem like overkill, but torn roots are the #1 reason palms struggle to recover.
Planting Height Matters: That 1-2 inch elevation above ground level in Step 4 isn't just a suggestion—it's critical for preventing trunk rot. I've seen palms develop fungal issues when planted too deeply. After backfilling, gently press down the soil with your hands to eliminate air pockets, but don't compact it like you would for vegetables. Palms need loose, aerated soil around their roots.
Shade Strategy: The 2-4 week shade recommendation in Step 5 is your palm's recovery period. I use shade cloth that blocks 30-50% of sunlight during this time, gradually reducing it over 2 weeks. Too much shade too soon causes weak growth, while too little can scorch new fronds. Think of it like helping a patient recover from surgery—you don't rush them back to full activity immediately.
Pro Tips for Transplant A Palm Tree
- Moving palms without stressing their roots takes more than just digging and replanting—here's what I've learned from ...
- Soil Prep Secret: The 4-6 inches of compost in Step 1 isn't just about nutrients—it's about creating the perfect air-...
- Root Ball Rescue: When lifting the root ball in Step 3, think of it like moving a fragile vase—support the bottom whi...
Frequently asked questions
Got questions about transplanting your palm tree?
You’re not alone! Here are some of the most common concerns—and straightforward answers—to help you tackle the job with confidence.
When is the best time of year to transplant a palm tree?
The ideal window is late fall to early spring (avoid extreme heat or frost). For tropical palms, aim for cool, overcast days to reduce stress. If you’re in a warm climate, spring or fall (just before summer’s peak) works best. Never transplant during drought or extreme weather!
How do I know if my palm tree is healthy enough to transplant?
Look for green fronds, firm trunks, and no signs of pests/disease. Avoid transplanting if you see yellowing leaves, soft spots, or wilting—these could signal root rot or nutrient deficiencies. A healthy palm should have roots extending beyond the root ball and minimal leaf drop.
Can I transplant a palm tree myself, or should I hire a pro?
Small palms (under 10 feet tall) are DIY-friendly with the right tools. For mature or large species (like royal or coconut palms), hire a pro—especially if the tree weighs 500+ lbs or has deep roots. Pros have cranes, root pruners, and expertise to minimize damage.
How often should I water my palm tree after transplanting?
Water deeply every 2–3 days for the first 2 weeks, then taper to once a week (adjust for your climate). Avoid overwatering—palms hate soggy roots! Mulch the base to retain moisture. Signs of underwatering: drooping fronds; overwatering: yellow leaves or mushy trunk.
What if my palm tree looks sad after transplanting?
Don’t panic! Wilting or leaf drop are normal for 4–6 weeks. To help recovery:
- Trim any dead fronds (never more than 1/3 of the crown).
- Apply a balanced fertilizer (low nitrogen) after 3 months.
- Shade the tree for 2–4 weeks if in full sun.
- Watch for pests (like palm weevils)—treat early!
Wrapping up and next steps
Transplanting a palm tree may seem daunting, but with the right prep, patience, and care, you’ve got this! 🌴✨ Remember, the key is timing, soil health, and gentle handling—your palm will reward you with lush growth for years to come.
Now that you’re armed with the know-how, take that next step: mark your calendar for the ideal transplant season and start gathering your tools. Your future shady oasis awaits!
Pro tip: Document each step with photos—it’ll help track progress and troubleshoot if needed. Happy planting! 🌱