
How To
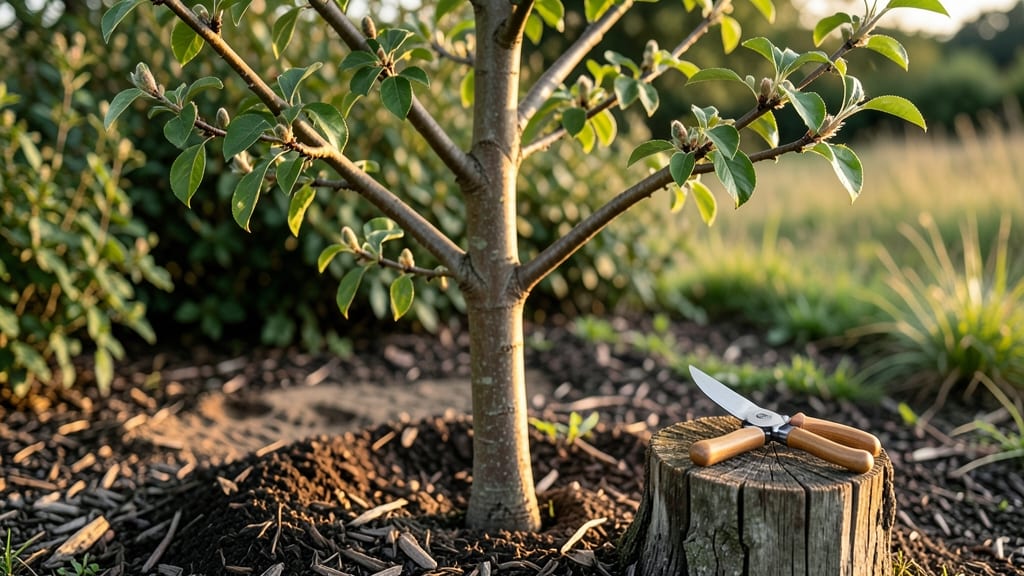
Pruning a peach tree for the first time isn’t as scary as it seems—it’s the key to a stronger, more productive tree. I remember my first attempt, where I over-cut and nearly stressed the tree, but now I prune with confidence.
The right cuts open up the canopy to sunlight, prevent disease, and encourage bigger, sweeter fruit next season.
Timing matters most: prune in late winter or early spring while the tree is still dormant but before buds swell. You’ll need sharp pruners, rubbing alcohol to sterilize cuts, and a ladder if branches are high.
Focus on removing dead wood, crossing branches, and thinning out crowded areas to let air and light reach the center. Every cut you make today sets the stage for years of better harvests.
📚 In This Guide
- What you need
- Instructions
- Tips and common mistakes
- Wrapping up and next steps
What you need
- ● Bypass pruning shears: Sharp, clean shears (4- to 6-inch blades) for cutting small branches (up to ½ inch in diameter). Pro tip: 💡 Sanitize them with rubbing alcohol before and after use to prevent disease spread!
- ● Pruning saw: A curved-tooth saw for thicker branches (½ to 2 inches in diameter). Look for a folding design for portability.
- ○ Ladder (optional but helpful): A sturdy, extendable ladder (6- to 8-foot height) if your tree is tall. Safety first! 🎯 Use stabilizers and never overreach.
- ● Gloves: Heavy-duty, cut-resistant gloves to protect your hands from thorns and rough bark.
- ○ Disposable pruning sealant (optional): A wax-based sealant to coat larger cuts (over ½ inch) and prevent disease entry.
- ● Rag or paper towels: For cleaning tools and wiping sap off cuts.
- ● Trash bags: To collect pruned branches and debris.
- ● Permanent marker: For marking branches to remove (if planning ahead).
- ● Rubbing alcohol (70% isopropyl): For sterilizing tools between cuts.
- ● First-aid kit: Just in case—peach tree thorns are no joke! 🌡️
- ● Best time to prune: Late winter or early spring (just before buds swell) for dormant-season pruning. Avoid pruning in fall.
- ● Weather conditions: Choose a dry, calm day to prevent sap bleeding and ensure clean cuts.
- ● Tree age: Ideal for first-time pruning if your peach tree is 2–5 years old (younger trees need minimal pruning).
- ● Safety gear: Long sleeves/pants and closed-toe shoes to protect against thorns and falling branches.
Step-by-Step guide for pruning a young peach tree
Here's how I approach first-time pruning to set your peach tree up for strong, healthy growth.
Assess the Tree Structure and Identify Key Branches
Start by examining the tree's central leader—the main vertical trunk. Look for branches growing at sharp angles (less than 45 degrees) or rubbing against each other. These are your first targets. I also check for any branches growing inward toward the center of the tree, as these will compete for sunlight and air circulation.
Identify the strongest scaffold branches—these are the main limbs that will form the tree's framework. They should be spaced evenly around the trunk and grow at a wide angle (60-70 degrees). Mark these branches with a piece of twine or tape so you don't accidentally prune them later. Remember, you're shaping the tree's future, so take your time with this step.
Remove Dead, Diseased, or Damaged Branches First
Using sharp, clean pruning shears, cut out any branches that are dead (no green tissue inside when snapped), diseased (mushrooms at the base, odd growths, or discolored areas), or damaged (broken, split, or storm-damaged). Make your cuts just outside the branch collar—the swollen area where the branch meets the trunk. This ensures the tree can heal properly.
Don't worry if you don't find any of these—many first-time trees are healthy. But if you do, removing them now prevents problems from spreading. I always sterilize my shears with rubbing alcohol between cuts to avoid transferring any potential diseases between branches.
Thin Out Crowded Branches for Better Airflow
Now focus on thinning the tree's interior. Remove branches that cross over others, grow inward, or create narrow V-shaped crotches (these are weak points that can split under fruit weight). Aim to create an open center that allows sunlight to reach the inner branches. This isn't about removing every branch—just the ones that will compete with stronger growth.
When pruning, cut back to a lateral branch or bud that grows in the direction you want the remaining branch to grow. For example, if you're removing a vertical branch, cut it back to an outward-facing lateral. This encourages the tree to grow in a more open, balanced shape. Never leave stubs—always cut just outside the branch collar.
Shape the Tree's Framework with Strategic Cuts
Now it's time to shape the tree's main structure. Start by selecting 4-6 well-spaced scaffold branches that form a balanced framework. These should be evenly distributed around the trunk and spaced about 8-12 inches apart vertically. Remove any competing branches that grow too close to these scaffold branches.
For branches that are too long, cut them back to a lateral branch or bud that grows in the desired direction. I like to leave the last cut just above an outward-facing bud to encourage outward growth. Avoid cutting back to a stub or a place where the branch was previously pruned—this can lead to weak regrowth. Remember, you're guiding the tree's growth pattern, not just making random cuts.
Clean Up and Monitor for New Growth
After pruning, clean up the area by removing all pruned branches and debris from the base of the tree. This helps prevent disease and pests from taking hold. Seal larger cuts (over 1/2 inch in diameter) with pruning sealant to protect them from infection. For smaller cuts, the tree's natural healing process will take over.
Water the tree deeply after pruning to help it recover. Then, monitor the tree closely over the next few weeks. You should see new growth emerging from the buds you left behind. If you notice any signs of stress (wilting, yellowing leaves, or oozing sap), it's a sign the tree is struggling with the pruning. In that case, reduce watering and keep the tree well-mulched to help it recover.
Tips & tricks for pruning a young peach tree
First-time pruning can feel overwhelming, but these key insights will help you shape your peach tree like a pro.
Angle Awareness: Pay special attention to branch angles during Step 1. Branches growing at less than 45 degrees from the trunk are more likely to break under fruit weight. I've seen too many trees with snapped branches because they ignored this angle rule. Look for those narrow V-shaped crotches—they're weak points that need immediate attention. When you find branches growing inward, mark them clearly with twine before making any cuts.
Branch Collar Technique: In Step 2 and Step 3, always cut just outside the branch collar—the swollen area where the branch meets the trunk. This is crucial for proper healing. I learned this the hard way when I made cuts too close to the trunk, which led to slow recovery and potential infection. Using sharp, sterilized pruning shears makes these clean cuts easier and safer. Remember, the branch collar contains healing tissues that help the tree recover from pruning wounds.
Scaffold Branch Strategy: When selecting your 4-6 scaffold branches in Step 4, prioritize branches that are evenly spaced around the trunk and grow at 60-70 degrees. These branches will form your tree's framework, so choose wisely. I recommend spacing them about 8-12 inches apart vertically. This spacing allows for proper air circulation and sunlight penetration, which are essential for healthy fruit production. If you're unsure which branches to keep, visualize how sunlight will reach the inner branches—this will guide your selection.
Post-Pruning Care: After completing all your cuts in Step 5, don't forget about the cleanup and monitoring process. Remove all pruned branches and debris from the base of the tree to prevent disease and pests. For cuts larger than ½ inch, apply pruning sealant to protect against infection. Water the tree deeply after pruning, but be careful not to overwater—this can stress the tree further. Monitor the tree closely over the next few weeks, looking for new growth emerging from the buds you left behind. This new growth is a good sign that your pruning was successful.
Pro Tips for Prune A Peach Tree For The First Time
- First-time pruning can feel overwhelming, but these key insights will help you shape your peach tree like a pro.
- Angle Awareness: Pay special attention to branch angles during Step 1. Branches growing at less than 45 degrees from ...
- Branch Collar Technique: In Step 2 and Step 3, always cut just outside the branch collar—the swollen area where the b...
Frequently asked questions
Got questions about pruning your peach tree for the first time? You’re not alone! Here are answers to the most common concerns to help you feel confident before grabbing those pruners.
When is the best time to prune a peach tree for the first time?
The ideal time is late winter or early spring (just before buds swell but before leaves emerge). This timing minimizes stress on the tree and prevents disease spread. Avoid pruning in fall—it can encourage fungal growth or attract pests.
Do I need special tools, or will regular pruners work?
While sharp bypass pruners or loppers work for small branches, a pruning saw is handy for thicker limbs. Disinfect tools with rubbing alcohol between cuts to prevent bacterial spread. Gloves and safety goggles are also smart additions!
What if I accidentally cut too much off? Can I fix it?
Don’t panic! Peach trees are resilient. If you over-prune, focus on open-center shaping in future years—prioritize removing dead, crossing, or inward-growing branches. The tree will recover as long as you leave at least 20-30% of the canopy intact.
Should I remove all the suckers around the base?
Yes, but strategically! Suckers (shoots growing from the base or roots) drain energy from the main tree. Cut them off at ground level, but leave a few healthy ones if you’re training a new scaffold branch. Mulch the area to reduce future suckers.
How long does it take for a peach tree to recover after pruning?
Recovery time varies, but you’ll see new growth within 2-4 weeks if pruned correctly. The tree may look sparse at first, but proper pruning boosts airflow, fruit production, and long-term health. Patience pays off—healthy trees reward you with sweeter, larger peaches in 1-2 years!
Wrapping up and next steps
Pruning your peach tree for the first time might feel intimidating, but you’ve got this! 🌱 By following these steps—choosing the right time, using clean tools, and shaping with confidence—you’re setting the stage for a thriving, fruit-bearing tree.
Remember, patience and precision are your best friends, and even small adjustments make a big difference over time.
Now that you’re equipped with the know-how, take the next step: mark your calendar for next year’s pruning season and keep an eye on your tree’s growth. With each passing season, you’ll gain more confidence—and maybe even a bounty of juicy peaches! 🍑✨