
Size
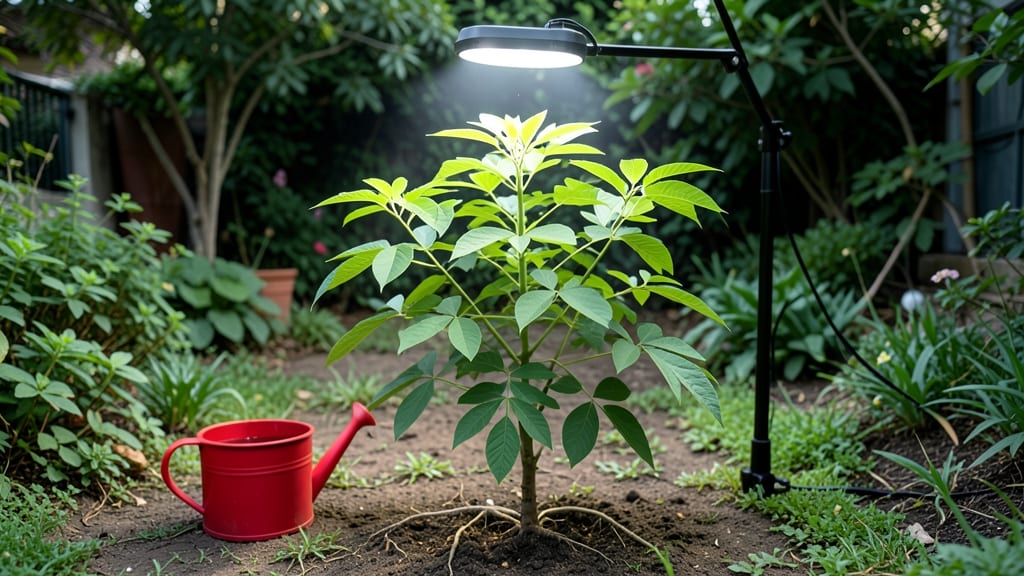
Growing a moringa tree indoors delivers fast harvests of nutrient-packed leaves in just 6-8 weeks from seed—no greenhouse or backyard needed. I’ve grown mine on a sunny windowsill, and the trick isn’t fancy equipment but matching its tropical habits to your space.
The first leaves appear within weeks, and with the right light, you’ll taste the difference between store-bought greens and your own homegrown powerhouse.
You’ll need a 6-inch pot with drainage, well-draining cactus/succulent mix, and a bright spot getting 6+ hours of sunlight daily—south-facing windows work best. Moringa hates soggy roots, so water only when the top inch feels dry, and use a spray bottle for humidity in dry climates.
A small grow light works if natural light falls short, but the plant will stretch and weaken without enough brightness.
By month two, you’ll have a 3-foot-tall bush producing tender leaves you can harvest every 2-3 weeks. The leaves stay crisp and flavorful, packed with 7x the vitamin C of oranges and 4x the calcium of milk.
Best part? No pests, no weeds, and no need to brave the heat—just consistent light and occasional pruning to keep it bushy.
This method works year-round, even in apartments, and scales from one pot to a small indoor garden. The only challenge is keeping light levels steady, but with a little adjustment, you’ll have a thriving moringa that outpaces outdoor growth. Ready to grow your own superfood?
📚 In This Guide
- What you need
- Instructions
- Tips and common mistakes
- Wrapping up and next steps
What you need
- ● Moringa seeds: 3–5 organic, non-GMO seeds (ensure they’re fresh for best germination).
- ● Seed-starting tray or small pots: 4–6 inches in diameter (with drainage holes). Pro tip: Use biodegradable pots if you plan to transplant later!
- ● Well-draining potting mix: A blend of cactus/succulent mix (50%) + perlite/vermiculite (30%) + coconut coir (20%). Avoid heavy garden soil!
- ● Spray bottle: For gentle watering (avoid over-saturating seeds).
- ● Grow lights or sunny windowsill: A full-spectrum LED grow light (12–16 hrs/day) or a south-facing window (6+ hours of sunlight).
- ● Humidity dome or plastic wrap: To retain moisture during germination.
- ● Fertilizer: Balanced liquid fertilizer (10-10-10 or 20-20-20) diluted to half-strength for seedlings.
- ● Heating mat: Keeps soil warm (75–85°F) for faster germination.
- ● Humidifier or pebble tray: Boosts humidity for tropical moringa seedlings.
- ● Pruning shears: For shaping as your tree grows.
- ● pH test kit: Ensures soil pH stays in the ideal range (6.0–7.0).
- ● Larger container (1+ gallon): For transplanting once roots fill the starter pot.
Step-by-step instructions for cultivating moringa trees indoors
Here's my foolproof method for nurturing these nutrient-packed trees from seed to harvest.
🌱 Step 1: Prepare the Seed and Planting Medium
Moringa seeds germinate quickly, but they need the right conditions to start strong. Soak the seeds overnight in warm water to soften the outer shell and speed up germination. This ensures faster sprouting within 24-48 hours—no waiting weeks like with some other tropical plants.
Use a lightweight, well-draining potting mix designed for seedlings. I fill a 6-inch diameter pot with 2-3 inches of the mix, leaving room for root growth. Moringa hates soggy roots, so avoid heavy garden soil. Press the soil down gently to remove air pockets, but don't compact it too tightly—you want roots to push through easily.
☀️ Step 2: Plant and Position for Immediate Light
Plant the soaked seeds ½ inch deep in the prepared soil. I use two seeds per pot to ensure at least one germinates successfully. Cover lightly with additional soil and water gently until the surface is moist but not saturated. The key here is consistency—too much water drowns the seed, while too little prevents germination.
Place the pot in a location with bright, indirect light right away. Moringa thrives on light, but direct midday sun can scorch young seedlings. A south-facing window with sheer curtains works well, or use a grow light positioned 4-6 inches above the pot for 12-14 hours daily. You'll notice the first sprouts within 3-5 days—watch for tiny green leaves pushing through the soil.
💧 Step 3: Maintain Ideal Moisture and Humidity
Keep the soil consistently moist but never soggy. Moringa roots need oxygen, so let the top ½ inch of soil dry out slightly between waterings. I use a spray bottle to mist the leaves occasionally, especially in dry indoor air, as this mimics the tropical humidity moringa loves. Aim for 50-60% humidity—you can achieve this by placing the pot on a tray of pebbles with water or using a small humidifier nearby.
Fertilize lightly with a balanced liquid fertilizer (10-10-10) diluted to half strength once every 4-6 weeks after the first true leaves appear. Over-fertilizing burns tender roots, so less is more. You'll see rapid growth when the leaves are deep green and new ones emerge every 2-3 weeks. If leaves yellow or drop, you're likely overwatering or using too much fertilizer.
🌿 Step 4: Prune and Train for Bushier Growth
Pinch off the top set of leaves when the seedling reaches 6-8 inches tall to encourage branching. This is where moringa trees develop their signature bushy shape. Use clean scissors to make a precise cut just above a leaf node, and avoid tearing the stem. You'll notice new side shoots forming within 2-3 weeks—this is your signal that the pruning worked.
Rotate the pot a quarter turn weekly to prevent the plant from leaning toward the light source. Moringa grows toward light aggressively, so consistent rotation keeps it compact and sturdy. Once the plant reaches 12-18 inches tall, you can transplant it to a larger 10-12 inch pot if needed, using the same well-draining soil mix. Handle the roots gently to avoid shock, and water thoroughly after repotting.
⏰ Step 5: Harvest and Encourage Continuous Growth
You can start harvesting leaves when the plant is 4-6 months old and has at least 12-15 inches of growth. Use clean scissors to cut leaves just above a leaf node, leaving the lower leaves intact to keep the plant producing. Harvest every 2-4 weeks, and you'll see new growth spurt within 1-2 weeks—this is moringa's fast-growing nature in action.
To keep the plant productive, prune back any leggy or overgrown branches in early spring. This stimulates fresh growth and ensures a steady supply of nutrient-rich leaves. With proper care, your indoor moringa tree can grow 3-5 feet tall and produce leaves year-round. The faster you harvest, the more the plant responds by growing back quickly—this is why moringa is called a "miracle tree."
Tips & tricks for perfect moringa tree growth indoors
These insider tricks will help you accelerate your moringa's growth while avoiding common pitfalls that slow down progress.
Germination Hack: For even faster sprouting within the 24-48 hour window, place your soaked seeds between two damp paper towels in a sealed plastic bag overnight. This creates a humid environment that mimics tropical conditions, often resulting in germination within 12-24 hours instead of waiting the full 48 hours. Check daily for tiny cracks in the seed coat—this is your first sign of life!
Light Optimization Strategy: The 12-14 hours of daily light is non-negotiable, but quality matters more than quantity. If using natural light, position your pot near a south-facing window but shield it from direct midday sun with sheer curtains. For grow lights, LED bulbs with a full spectrum (especially red and blue wavelengths) will produce better results than basic white bulbs. I've found that adjusting the light source to follow the sun's arc throughout the day—even just moving it a few inches—helps prevent leggy growth.
Pruning Precision: When pinching back at the 6-8 inch mark, focus on removing the top set of leaves just above a leaf node. This is where new branches will emerge within those critical 2-3 weeks. I like to use sterilized scissors and make clean cuts to prevent tearing—this reduces stress on the plant. After pruning, give your moringa a light misting to help it recover faster from the shock of trimming.
Harvest Timing Insight: The 4-6 month window for first harvests might seem long, but you can actually start harvesting individual leaves as soon as they're large enough to use (usually around 3-4 months). Just leave at least 6-8 leaves per branch to maintain photosynthesis. I've found that harvesting every 3 weeks instead of 4 stimulates even faster regrowth—your plant will respond by producing new leaves within that 1-2 week window mentioned in the instructions.
Pro Tips for Grow Moringa Tree Indoors
- These insider tricks will help you accelerate your moringa's growth while avoiding common pitfalls that slow down pro...
- Germination Hack: For even faster sprouting within the 24-48 hour window, place your soaked seeds between two damp pa...
- Light Optimization Strategy: The 12-14 hours of daily light is non-negotiable, but quality matters more than quantity...
Frequently asked questions
Got questions about growing moringa indoors?
You’re not alone—this superplant can be tricky for beginners! Here are answers to the most common queries to help you grow thriving moringa at home.
How long does it take for an indoor moringa tree to grow?
With proper care, your moringa seeds can sprout in 7–14 days, and you’ll see noticeable growth (3–6 inches) in 4–6 weeks. However, reaching harvestable size (12+ inches) typically takes 3–6 months, depending on light and nutrients. Patience pays off—moringa grows fast but needs consistency!
Why is my indoor moringa tree turning yellow or dropping leaves?
Yellowing leaves or leaf drop usually mean overwatering (moringa hates soggy roots) or nutrient deficiency. Check your soil—it should be lightly moist but never waterlogged. If leaves are crispy, it’s underwatering or low humidity. Boost growth with a balanced fertilizer (like 10-10-10) every 4–6 weeks.
Can I grow moringa indoors without direct sunlight?
Moringa needs 6+ hours of bright light daily, but you can supplement with grow lights (LED or fluorescent) if natural light is limited. Place your tree near a south-facing window or use a full-spectrum bulb 6–12 inches above the plant for 12–14 hours/day. Without enough light, growth will stall, and leaves may turn pale.
What’s the best alternative if moringa is too hard to grow indoors?
If moringa proves too finicky, try these easy indoor superfoods:
- Pea shoots – Fast-growing, nutrient-packed, and thrives in containers.
- Microgreens (broccoli, radish, or sunflower) – Ready in 1–2 weeks with minimal light.
- Basil or mint – Hardy herbs that tolerate lower light and humidity.
How often should I harvest moringa leaves indoors?
You can start harvesting young leaves (1–2 inches long) once your plant is 6+ inches tall. Prune 20–30% of new growth every 4–6 weeks to encourage bushier growth. Avoid over-harvesting—never take more than 1/3 of the plant at once, or it may stress and stop producing. Use clean scissors to snip leaves just above a leaf node!
Wrapping up and next steps
Growing a moringa tree indoors is a rewarding journey—packed with nutritional benefits and sustainability! With the right lighting tricks, soil mix, and care, you’ll watch your little sapling thrive in no time.
Whether you’re a busy plant parent or a health enthusiast, this green companion is just a few weeks away from becoming your edible, sun-soaking superstar.
Now that you’re armed with the know-how, take the next step: plant your seeds today! Start small, stay consistent, and soon you’ll be harvesting fresh moringa leaves for smoothies, teas, or salads—all from the comfort of your home. 🌱✨