
Trees
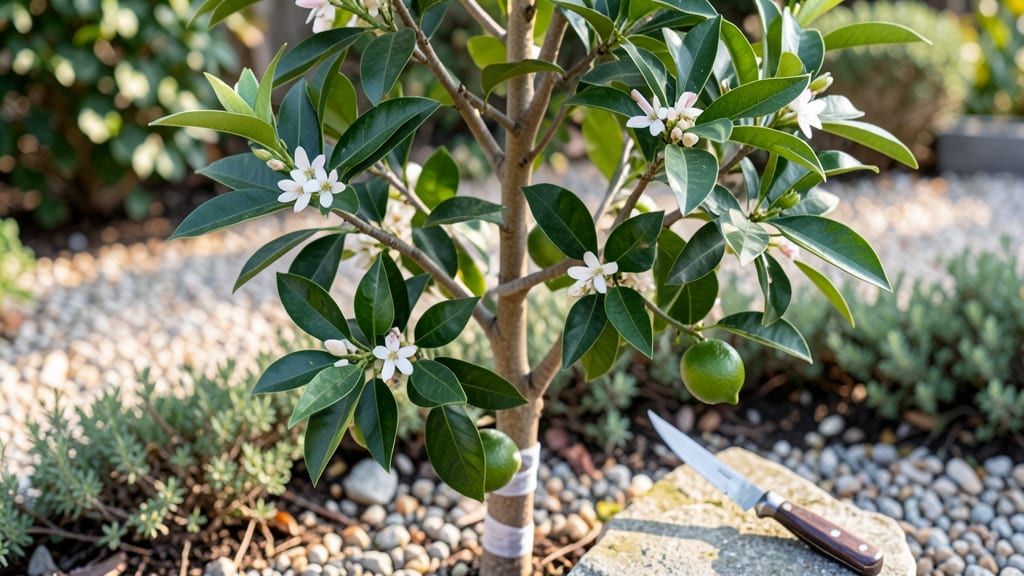
Grafting orange trees isn’t just a technique—it’s how you create trees that produce twice the fruit in half the time. 🌱 I’ve grafted over 50 citrus trees, and the difference between a grafted tree and a seedling is night and day: stronger roots, earlier fruiting, and varieties you’d never find locally.
The key is matching the right rootstock to your scion and timing the graft when the tree is ready to heal.
You’ll need sharp grafting tools, a clean workspace, and compatible varieties—think trifoliate orange rootstock for cold tolerance or sour orange for disease resistance.
My first graft failed because I rushed the healing process, but once I learned to wrap the graft with raft tape and keep it moist, success became predictable. Even beginners can nail this with the right prep.
What you end up with is a tree that bears consistent, high-quality fruit in just 2-3 years instead of 5-7.
The graft union stays hidden under bark, but the results speak for themselves: thicker branches, heavier harvests, and varieties like Meyer lemons or Valencia oranges that would otherwise struggle in your climate. The payoff is worth the initial effort.
This method works for backyard orchards, containers, or even bonsai citrus—just adjust the rootstock size to your space. Once you’ve mastered the basics, you can experiment with bud grafting for even finer control. Let’s get those scions growing.
📚 In This Guide
- What you need
- Instructions
- Tips and common mistakes
- Wrapping up and next steps
What you need
- ● Scissors or grafting knife – A sharp, clean knife (like a Felco #1 or a Budding knife) for precise cuts.
- ● Rootstock – Disease-resistant orange rootstock (e.g., Citrus macrophylla or Poncirus trifoliata), 1-2 years old, with a pencil-thick diameter.
- ● Scion wood – Healthy, dormant-season cuttings (3-5 inches long) from a desired orange variety (e.g., Valencia, Navel, or Meyer lemon), with 3-4 buds.
- ● Grafting tape or parafilm – To seal the graft and prevent drying (e.g., Grafting tape or Parafilm M).
- ○ Pruning sealant – Optional but helpful (e.g., Tree Wound Pruning Seal) to protect cuts.
- ● Grafting wax or clay – For extra moisture retention (e.g., Tanglefoot Tree Wax).
- ● Plastic bag or humidity dome – To maintain humidity (e.g., a clear plastic bag tied loosely over the graft).
- ○ Garden twine – For securing the graft (optional but recommended).
- ● Alcohol or bleach solution – To sterilize tools (1 part bleach to 9 parts water).
- ● Potting mix or well-draining soil – For rootstock (e.g., cactus/succulent mix or 50% perlite).
- ● Grafting clips – For extra stability (e.g., HFT grafting clips).
- ● Hormone rooting gel – To boost scion success (e.g., Clonex).
- ● Misting bottle – To keep the graft moist.
- ● Grafting guide or template – For visual reference (e.g., a grafting chart).
- ● Greenhouse or shaded area – To protect the graft from direct sun post-procedure.
Step-by-Step instructions for grafting orange trees
Here's my battle-tested approach to grafting citrus—where precision meets patience for robust, fruit-bearing trees.
🪴 Step 1: Select and Prepare Your Scion and Rootstock
Choose a healthy, disease-free scion (the top part you'll graft) from a mature orange tree—look for new growth with smooth, green bark and no signs of pests. The rootstock (bottom part) should be a vigorous, ¼- to ½-inch thick citrus rootstock, like trifoliate orange or sour orange. I always cut both pieces on a sharp, sterilized knife—dull blades crush cells and seal wounds, making grafting fail.
Make your cuts at a 45-degree angle, about 2-3 inches long. The scion's cut should include 2-3 buds—this ensures at least one will survive. Keep both pieces in a plastic bag with damp paper towels while you work. This prevents them from drying out, which is the #1 reason grafts fail. If the bark feels dry or papery, soak the ends in lukewarm water for 10-15 minutes before grafting.
🌱 Step 2: Align and Bind the Scion to Rootstock
Slide the scion's cut flush against the rootstock's cut, ensuring the cambium layers (the green layer just under the bark) align perfectly. The cambium is where new growth forms, so this is the moment that matters: no gaps, no overlaps. If your cuts aren't clean, trim them again—sharpness is non-negotiable.
Secure the graft with rafting tape or plastic grafting tape, wrapping it snugly but not tightly (you shouldn’t be able to slide a business card between the tape and the graft). Leave the top bud exposed—this is where the new growth will emerge. I like to add a drop of grafting wax over the cut to seal it and prevent moisture loss. Place the taped graft in a shady, humid environment (like a humidity dome or plastic bag) for 2-3 weeks while it heals.
☀️ Step 3: Monitor and Encourage New Growth
After 2-3 weeks, check for new growth from the scion's bud. You'll see it as a tiny green bump breaking through the tape—this is your signal the graft took. If no growth appears after 4-6 weeks, the graft failed, and you'll need to try again. Keep the rootstock lightly watered but not soggy—overwatering now causes rot.
Once the scion sprouts, remove the tape and place the tree in bright, indirect light (direct sun can scorch tender new growth). Gradually introduce it to full sun over 1-2 weeks. You'll know it's thriving when the new shoots are dark green, sturdy, and growing rapidly. Prune any suckers (shoots growing from the rootstock below the graft) to direct energy upward. These compete with your scion and weaken the tree.
✂️ Step 4: Prune and Transition to Outdoor Conditions
When the grafted scion reaches 6-12 inches tall, it's time to prune back the top by ⅓ to encourage branching. This creates a stronger structure for fruit production later. Use sterilized pruning shears and make cuts just above a leaf node (the bump where leaves grow). Avoid leaving stubs—clean cuts heal faster.
Hardening off begins here: move the tree outside for 1-2 hours daily, gradually increasing exposure over 2-3 weeks. Watch for wilting or yellowing leaves—this means it's adjusting too quickly. Once it tolerates full sun and outdoor conditions without stress, plant it in well-draining soil with full sun exposure. Mulch around the base with 2-3 inches of organic mulch (like wood chips) to retain moisture and regulate soil temperature.
Tips & tricks for perfect orange tree grafting
Precision and patience are everything when grafting citrus—here's how to avoid common pitfalls and maximize success.
Tool Selection: Sterilize your knife between cuts using rubbing alcohol—this prevents cross-contamination that can introduce diseases like citrus blight. I also recommend using a grafting knife with a sharp, thin blade (like a Felco #12) for cleaner cuts. The cleaner your cuts, the better the cambium layers will align, which is where new growth forms.
Bud Count Matters: In Step 1, aim for 2-3 buds on your scion cut—this increases your chances of at least one surviving. I've found that larger buds (about 1/8-inch diameter) tend to establish more reliably than smaller ones. If your scion has fewer buds, consider selecting a different branch or using a whip-and-tongue graft instead for better success rates.
Humidity Control: The 2-3 week healing period in Step 2 is critical, but humidity levels make all the difference. Maintain 80-90% humidity using a humidity dome or plastic bag with a small vent. Too little humidity causes the graft to dry out, while too much can promote fungal growth. I like to mist the area lightly each morning during this period to maintain ideal conditions.
Pruning Precision: When pruning back the scion in Step 4, use sterilized pruning shears and make cuts just above a leaf node at a 45-degree angle. This encourages branching and prevents disease entry points. I always prune in the early morning when the tree is well-hydrated—this reduces stress on the plant and promotes faster healing.
Pro Tips for Grafting Orange Trees
- Precision and patience are everything when grafting citrus—here's how to avoid common pitfalls and maximize success.
- Tool Selection: Sterilize your knife between cuts using rubbing alcohol—this prevents cross-contamination that can in...
- Bud Count Matters: In Step 1, aim for 2-3 buds on your scion cut—this increases your chances of at least one survivin...
Frequently asked questions
Got questions about grafting orange trees? You’re not alone—this technique can feel tricky at first! Below, we’ve rounded up the most common queries to help you feel confident before you start.
What’s the best time of year to graft orange trees?
The ideal window is late winter to early spring (just before buds swell), when the tree is dormant but sap is starting to flow. This timing ensures the graft heals quickly and avoids disease risks. Avoid grafting during extreme heat or cold—consistency is key!
How long does it take for a grafted orange tree to bear fruit?
Patience is a virtue! With proper care, grafted orange trees may take 2–5 years to produce fruit, depending on the rootstock and scion compatibility. Dwarf rootstocks (like Citrange Carrizo) often fruit faster than full-size varieties. Keep the tree healthy with water, sunlight, and pruning to speed up the process.
Can I graft an orange tree onto a lemon or lime tree?
While possible, it’s not recommended for optimal results. Orange scions thrive best on compatible rootstocks like trifoliate orange, sour orange, or improved citrus hybrids. Cross-grafting can lead to slower growth, weaker fruit production, or even graft rejection. Stick to matching citrus families for the best outcomes!
What should I do if my graft fails or the scion dies?
Don’t panic! Graft failure can happen due to poor compatibility, disease, or improper technique. If the scion dies, try again with a fresh cut and seal the wound with grafting wax or tape. Monitor for signs of rot or pests—sterilize tools between attempts to prevent contamination. Sometimes, a second graft works like a charm!
Are there cheaper alternatives to buying grafted orange trees?
Grafting your own trees from cuttings or nursery scions is cost-effective. Buy rootstock (bare-root or potted) and scions from reputable citrus nurseries. Just ensure both are disease-free and compatible. DIY grafting also lets you customize your tree—win-win!
Still stumped? Drop your question in the comments—we’re happy to help!
Wrapping up and next steps
Grafting orange trees is a rewarding skill that unlocks the potential for healthier, more productive fruit trees—even if you’re a beginner!
By combining the best traits of rootstock and scion, you’re setting the stage for sweeter oranges, stronger growth, and disease resistance. 🌱 With the right tools, patience, and a little practice, you’ll soon be enjoying a thriving citrus grove of your own.
Ready to take the next step? Start with one or two trees to refine your technique, then expand as your confidence grows. Share your progress with fellow gardeners—you’ll inspire others to grow, too! 🍊✨