
Pruning
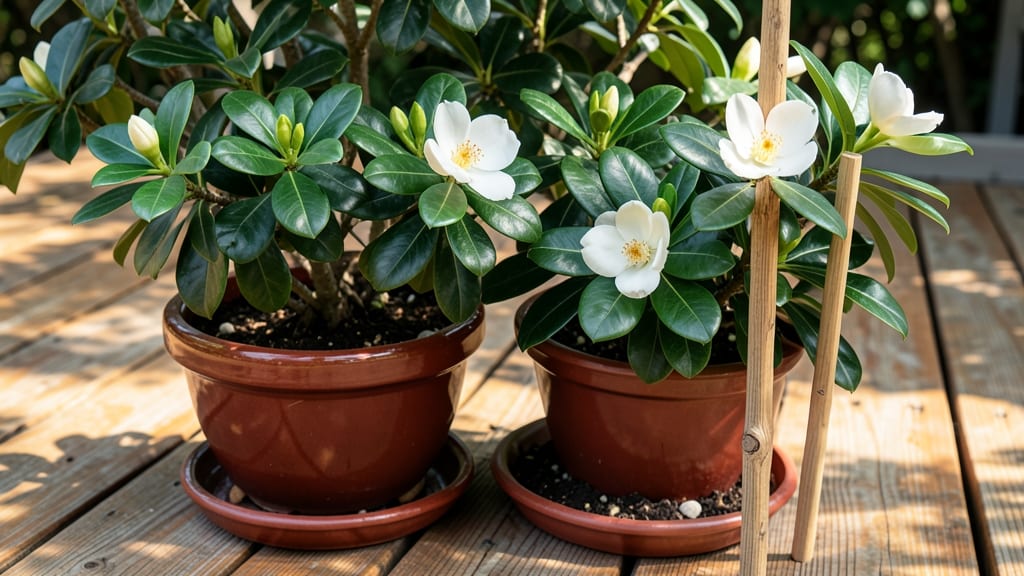
A gardenia tree in a pot transforms any space into a tropical sanctuary with its intoxicating blooms and glossy leaves. 🌿 I've learned that the key to year-round fragrance isn't just good soil—it's mastering the pruning schedule and understanding how these tropical divas behave in containers.
My first gardenia nearly died from overzealous pruning, but now I've cracked the code for keeping them thriving in pots.
The secret starts with the right container: at least 18 inches wide with drainage holes, paired with well-draining soil that mimics their native tropical conditions.
Gardenias hate soggy roots, so I use a mix of 50% peat moss or coco coir, 30% pine bark, and 20% perlite—this keeps moisture balanced while preventing root rot. Most people overwater, but these plants actually prefer to dry out slightly between waterings.
When you nail the pruning rhythm—light trims after each bloom cycle and a harder cut back in late winter—you'll see new growth within weeks.
The fragrance alone makes it worth the effort, but the deep green foliage and creamy white blooms create a showstopping display that lasts all year with proper care. The best part? You can move the pot to chase seasonal sunlight.
This method works for both patio gardenias and dwarf varieties, though larger types need bigger pots and more frequent feeding. Whether you're dealing with yellowing leaves or sparse blooms, the fixes always come back to water, light, and pruning timing. Let's get yours flourishing!
📚 In This Guide
- What you need
- Instructions
- Tips and common mistakes
- Wrapping up and next steps
What you need
- ● Gardenia plant: Choose a healthy Gardenia jasminoides (or similar variety) in a pot—either a young nursery plant or a mature one needing a refresh.
- ● Pot: A container 12–18 inches deep with drainage holes (terracotta or ceramic works best). For mature trees, opt for 20+ inches.
- ● Well-draining potting mix: A blend of 50% peat moss or coco coir, 30% perlite or orchid bark, and 20% sand or pumice (acidic, pH 5.0–6.5).
- ● Pruning tools: Sharp bypass pruners (for clean cuts on small branches).
- ● Sterilized pruning saw (for thicker branches, if needed).
- ● Garden gloves (to protect from thorns and sap).
- ● Mulch: 2–3 inches of pine bark or pine needles (keeps roots moist and mimics natural conditions).
- ● Fertilizer: Acid-loving plant fertilizer (e.g., Miracle-Gro Azalea/Camellia or fish emulsion for organic option).
- ● Watering can or hose with gentle spray nozzle (gardenia roots are sensitive to overwatering!).
- ○ Support stake (optional but helpful): A bamboo or metal stake (4–6 ft tall) to secure the tree as it grows.
- ● Root stimulator (e.g., Mycorrhizal fungi) to boost root health after repotting.
- ● Slow-release fertilizer pellets for steady nutrition.
- ● Humidity tray or pebble tray (gardenia loves humidity—great for indoor pots!).
- ● Pruning sealant (to prevent sap oozing on large cuts).
- ● Lime or aluminum sulfate (if your soil pH drifts above 6.5).
- ● Decorative pot liner (for a polished look if using a decorative outer pot).
Step-by-step guide to cultivating a thriving potted gardenia
Here's how to coax those intoxicating blooms year after year—no green thumb required.
🪴 Step 1: Select the Right Container and Soil Mix
Choose a container with drainage holes at least 12-14 inches deep—gardenia roots need room to breathe. I recommend glazed ceramic or plastic pots because they retain moisture without overheating roots in summer. The soil must be acidic (pH 5.5-6.5) and well-draining, so blend 2 parts peat moss, 1 part perlite, and 1 part sand with 1 part pine bark fines. This mix mimics their native tropical soil while preventing root rot.
Fill the pot 2/3 full with your prepared mix, then tap the container gently to settle the soil. Leave 2-3 inches of space at the top—this prevents water from spilling over when you water deeply. Here's the thing: gardenias hate soggy roots, so if your mix feels dense, add extra perlite until it crumbles easily when squeezed.
🌱 Step 2: Plant and Establish Initial Care Routine
Remove the gardenia from its nursery pot and loosen the root ball gently with your fingers. Place the plant in the center of your container, then fill the remaining space with the prepared mix, pressing lightly to eliminate air pockets. Water thoroughly until water runs freely from the drainage holes—this ensures the roots make full contact with the soil.
Set your potted gardenia in a location with bright, indirect light (think east or north-facing window). Direct sun can scorch leaves, while too little light stunts blooms. After planting, mist the foliage daily for the first week to reduce transplant shock. You'll know it's acclimating when new leaves appear—usually within 2-3 weeks.
☀️ Step 3: Master Light and Temperature for Continuous Blooms
Gardenia trees need 6-8 hours of bright, indirect light daily to produce flowers. If your space lacks natural light, supplement with a full-spectrum LED grow light positioned 12-18 inches away from the plant. Keep the light on for 14 hours daily to mimic long summer days. Watch for leggy growth—this means your plant is stretching toward light. Adjust the light position or rotate the pot quarter-turn weekly to encourage even growth.
Temperature is critical: gardenias thrive in 65-75°F during the day and no lower than 60°F at night. If your home dips below 55°F, move the plant away from drafts or use a small space heater (set to 65°F) near the pot. Cold drafts from windows or AC vents will shock the plant and cause buds to drop. Here's where it gets fun: once buds form, increase humidity around the plant by placing the pot on a tray of pebbles and water—just ensure the pot sits above the waterline.
💧 Step 4: Water and Feed for Peak Fragrance
Water your gardenia when the top 1-2 inches of soil feel dry—this usually means every 2-3 days in summer, but reduce to once weekly in winter. Overwatering is the #1 killer of potted gardenias, so always check moisture before watering. Use room-temperature water (cold water shocks roots) and water until it drains freely from the bottom. Empty the saucer 30 minutes later to prevent root rot.
Feed your plant every 4-6 weeks during spring and summer with an acid-loving plant fertilizer (look for high phosphorus and potassium, like a 20-20-20 formula). Dilute the fertilizer to half-strength to avoid burning roots. Stop fertilizing in fall and winter—this encourages dormancy and prepares the plant for next year's blooms. You'll see the difference: fertilized plants produce larger, more fragrant flowers within 6-8 weeks of consistent feeding.
✂️ Step 5: Prune Strategically for Year-Round Blooms
Prune your gardenia immediately after flowering to encourage new growth and more blooms. Use clean, sharp pruners to cut back 1/3 of the plant's height, focusing on overcrowded or leggy branches. Always cut just above a leaf node (the bump where leaves attach) at a 45-degree angle—this promotes faster healing and new growth. Remove any dead, yellowed, or diseased leaves as you go.
Here's the pruning secret: gardenias bloom on new wood, so pruning in late winter or early spring (just as buds begin to swell) stimulates fresh growth that will flower by summer. After pruning, water deeply and place the plant in bright, indirect light to help it recover. You'll notice new shoots within 2-3 weeks, and with consistent care, your plant will reward you with continuous blooms from spring through fall.
Tips & tricks for perfect potted gardenia care
Real talk: gardenias are finicky divas—but these tricks will turn your potted plant into a blooming superstar. Let's cut to what actually works in my experience.
Soil Mix Secret: That 2:1:1:1 peat moss/perlite/sand/pine bark fines ratio is non-negotiable, but here's the thing: if your mix still feels compact after blending, add an extra 1/4 cup perlite per gallon of mix. Think of it like adding air pockets to a sponge—roots need that oxygen as much as water. I've seen gardenias wither in dense mixes even when watered perfectly, and this tweak makes all the difference. The goal is soil that crumbles like wet coffee grounds when squeezed.
Light Position Strategy: Those 6-8 hours of bright indirect light are crucial, but positioning matters more than you'd think. Place your gardenia 2-3 feet from an east-facing window for morning sun without afternoon heat stress. If using grow lights, elevate them to 15-18 inches—closer than 12 inches can scorch leaves. I learned this the hard way when my first plant developed crispy brown edges from light burn. Rotate the pot quarter-turn weekly to prevent lopsided growth toward the light source.
Humidity Hack for Buds: Once buds form, humidity becomes your best friend. The pebble tray method works, but here's the upgrade: place a humidifier nearby (not directly on the plant) and aim for 50-60% humidity around the gardenia. I use a small digital hygrometer to monitor levels—buds drop like flies when humidity dips below 40%. For extra fragrance, mist the leaves lightly twice daily with room-temperature water, avoiding the blooms themselves.
Pruning Timing Nuance: The instructions say to prune after flowering, but here's what nobody tells you: if your gardenia blooms heavily in spring, do a light first pruning in late June to encourage a second flush of flowers by fall. Cut back only the most leggy stems by about 1/4 of their length—this stimulates bushier growth without shocking the plant. Always sterilize your pruners with rubbing alcohol between cuts to prevent bacterial infections that can cause leaf spots.
Pro Tips for Gardenia Tree In Pot
- Real talk: gardenias are finicky divas—but these tricks will turn your potted plant into a blooming superstar. Let's ...
- Soil Mix Secret: That 2:1:1:1 peat moss/perlite/sand/pine bark fines ratio is non-negotiable, but here's the thing: i...
- Light Position Strategy: Those 6-8 hours of bright indirect light are crucial, but positioning matters more than you'...
Frequently asked questions
Got questions about keeping your gardenia tree in a pot thriving and fragrant? You’re not alone! Here are answers to the most common concerns—from pruning to pests—so you can enjoy lush blooms year-round.
How often should I prune my potted gardenia tree?
Prune your gardenia 2-3 times a year: lightly after flowering (to shape), in late winter (to remove dead wood), and as needed to control size. Avoid heavy pruning in spring—it can reduce blooms. Use clean, sharp shears and sterilize them with rubbing alcohol between cuts to prevent disease. Pro tip: Prune just above a leaf node or bud for healthier regrowth!
Why isn’t my gardenia blooming in a pot?
Potted gardenias often skip blooms due to stress from root-bound conditions, poor light, or over-fertilizing. Ensure it gets 6+ hours of bright, indirect sunlight daily and repot every 2–3 years. Use a well-draining mix (like 60% peat moss, 30% perlite, 10% sand) and fertilize monthly in spring/summer with acid-loving plant food. Watch out: Yellow leaves? It might need more iron or better drainage!
Can I grow a gardenia tree in a pot indoors year-round?
Yes! Gardenias thrive indoors but need ideal conditions: humidity (50%+), warmth (65–75°F), and bright light. Place near a south or west window or use grow lights. Group plants together to boost humidity, and mist leaves daily (or use a pebble tray). In winter, keep it away from drafts or heating vents. Outdoor potted gardenias can stay outside in mild climates but must be brought indoors before temps drop below 50°F.
What’s the best pot size for a gardenia tree?
Start with a 12–15 inch pot for young gardenias and upgrade by 2 inches in diameter every 2–3 years. Too-small pots cause root binding (stress = fewer blooms), while oversized ones lead to soggy soil. Ensure pots have drainage holes and use a cache pot if aesthetics matter. Material matters: Terracotta wicks away moisture (great for humidity control), while plastic retains moisture longer.
How do I fix yellow leaves on my potted gardenia?
Yellow leaves usually signal overwatering, nutrient deficiency, or poor drainage. Check the soil—it should be slightly moist but not soggy. Adjust your watering (let the top 1–2 inches dry out between waterings) and flush the soil with water to remove excess salts. For yellowing with brown edges, it’s likely underwatering or low humidity. Feed with an acid-based fertilizer (like 8-3-9) if leaves are pale green. Quick fix: A foliar spray with chelated iron can revive chlorotic (yellowing) leaves!
Are there fragrant alternatives to gardenias for pots?
If gardenias seem high-maintenance, try these fragrant, pot-friendly alternatives:
- Jasmine (Trachelospermum jasminoides): Hardy, drought-tolerant, and blooms white flowers with a sweet scent.
- Gardenia ‘Kleim’s Hardy’: A cold-hardier hybrid that thrives in pots and blooms prolifically.
- Stephanotis (Madagascar jasmine): Delicate white flowers with a heavy perfume (needs humidity!).
- Plumeria (Frangipani): Tropical, drought-resistant, and fragrant—ideal for warm climates.
Wrapping up and next steps
Growing a gardenia tree in a pot is a rewarding journey that fills your space with intoxicating fragrance year-round—with the right pruning techniques, you’ll keep it lush, healthy, and blooming beautifully. Remember, timing, tools, and technique are your best friends, and a little patience goes a long way.
Now that you’re armed with the know-how, why not grab those shears and get pruning? Your fragrant oasis is just a trim away! 🌿✨
Next step: Mark your calendar for the next pruning session—whether it’s spring’s fresh start or summer’s maintenance—and watch your gardenia thrive! 📅🌸